
What is a Perc Test and When is it Needed?
Have you recently been told that you need a percolation test? You might be buying a plot of land or preparing for a septic system installation, which are common scenarios when a perc test might be required.
If you aren’t familiar with this test, then you might be wondering why it’s necessary. Here, we will cover the basics you need to know about why a perc test is needed and what is involved. Keep in mind that these tests are essential, especially because they might impact your real estate value or affect upcoming building plans.
What is a Perc Test?
A perc test determines if the surrounding soil is able to absorb the amount of water that is being released by drain fields or a septic tank. Ultimately, the goal is to determine the percolation rate of the soil and how it responds to drainage and water management.
Since perc tests are done in connection with leach fields and septic systems, they must be performed based on the guidelines of the local health department or county health officials. The tests are required before development or construction can begin, so perc tests are often part of the site preparation phase.
Why Are Perc Tests Important?
There are several reasons why this step is necessary before beginning construction or land development. The results of the perc test will affect the design of the drain fields and septic tanks that are being placed on the property. It’s necessary to check the soil and implement proactive measures to protect groundwater and avoid contamination in the water table. Additionally, these tests will ensure that your land is stable and ready for construction.
It’s worth noting that you must complete these tests to maintain compliance and avoid fines and legal issues in the future.
When is a Perc Test Required?
Here are a few examples of the most common situations when perc tests are required:
- Before the installation of a new septic system;
- Before/when you buy land;
- During real estate development, and/or
- If you are expanding a property.
The best thing that you can do is consult with your municipality and a local, experienced contractor to determine whether a perc test is needed. Reach out to our team at Mikula, and we can offer personalized recommendations based on your property and upcoming development plans.
How is a Perc Test Conducted?
We at Mikula Contracting do not perform the actual perc test; however, we work with an environmental firm to have the test completed. Our team will dig for the perc test and provide the environmental firm with what they need to run the test. Here’s what you can expect when a perc test is done on your property:
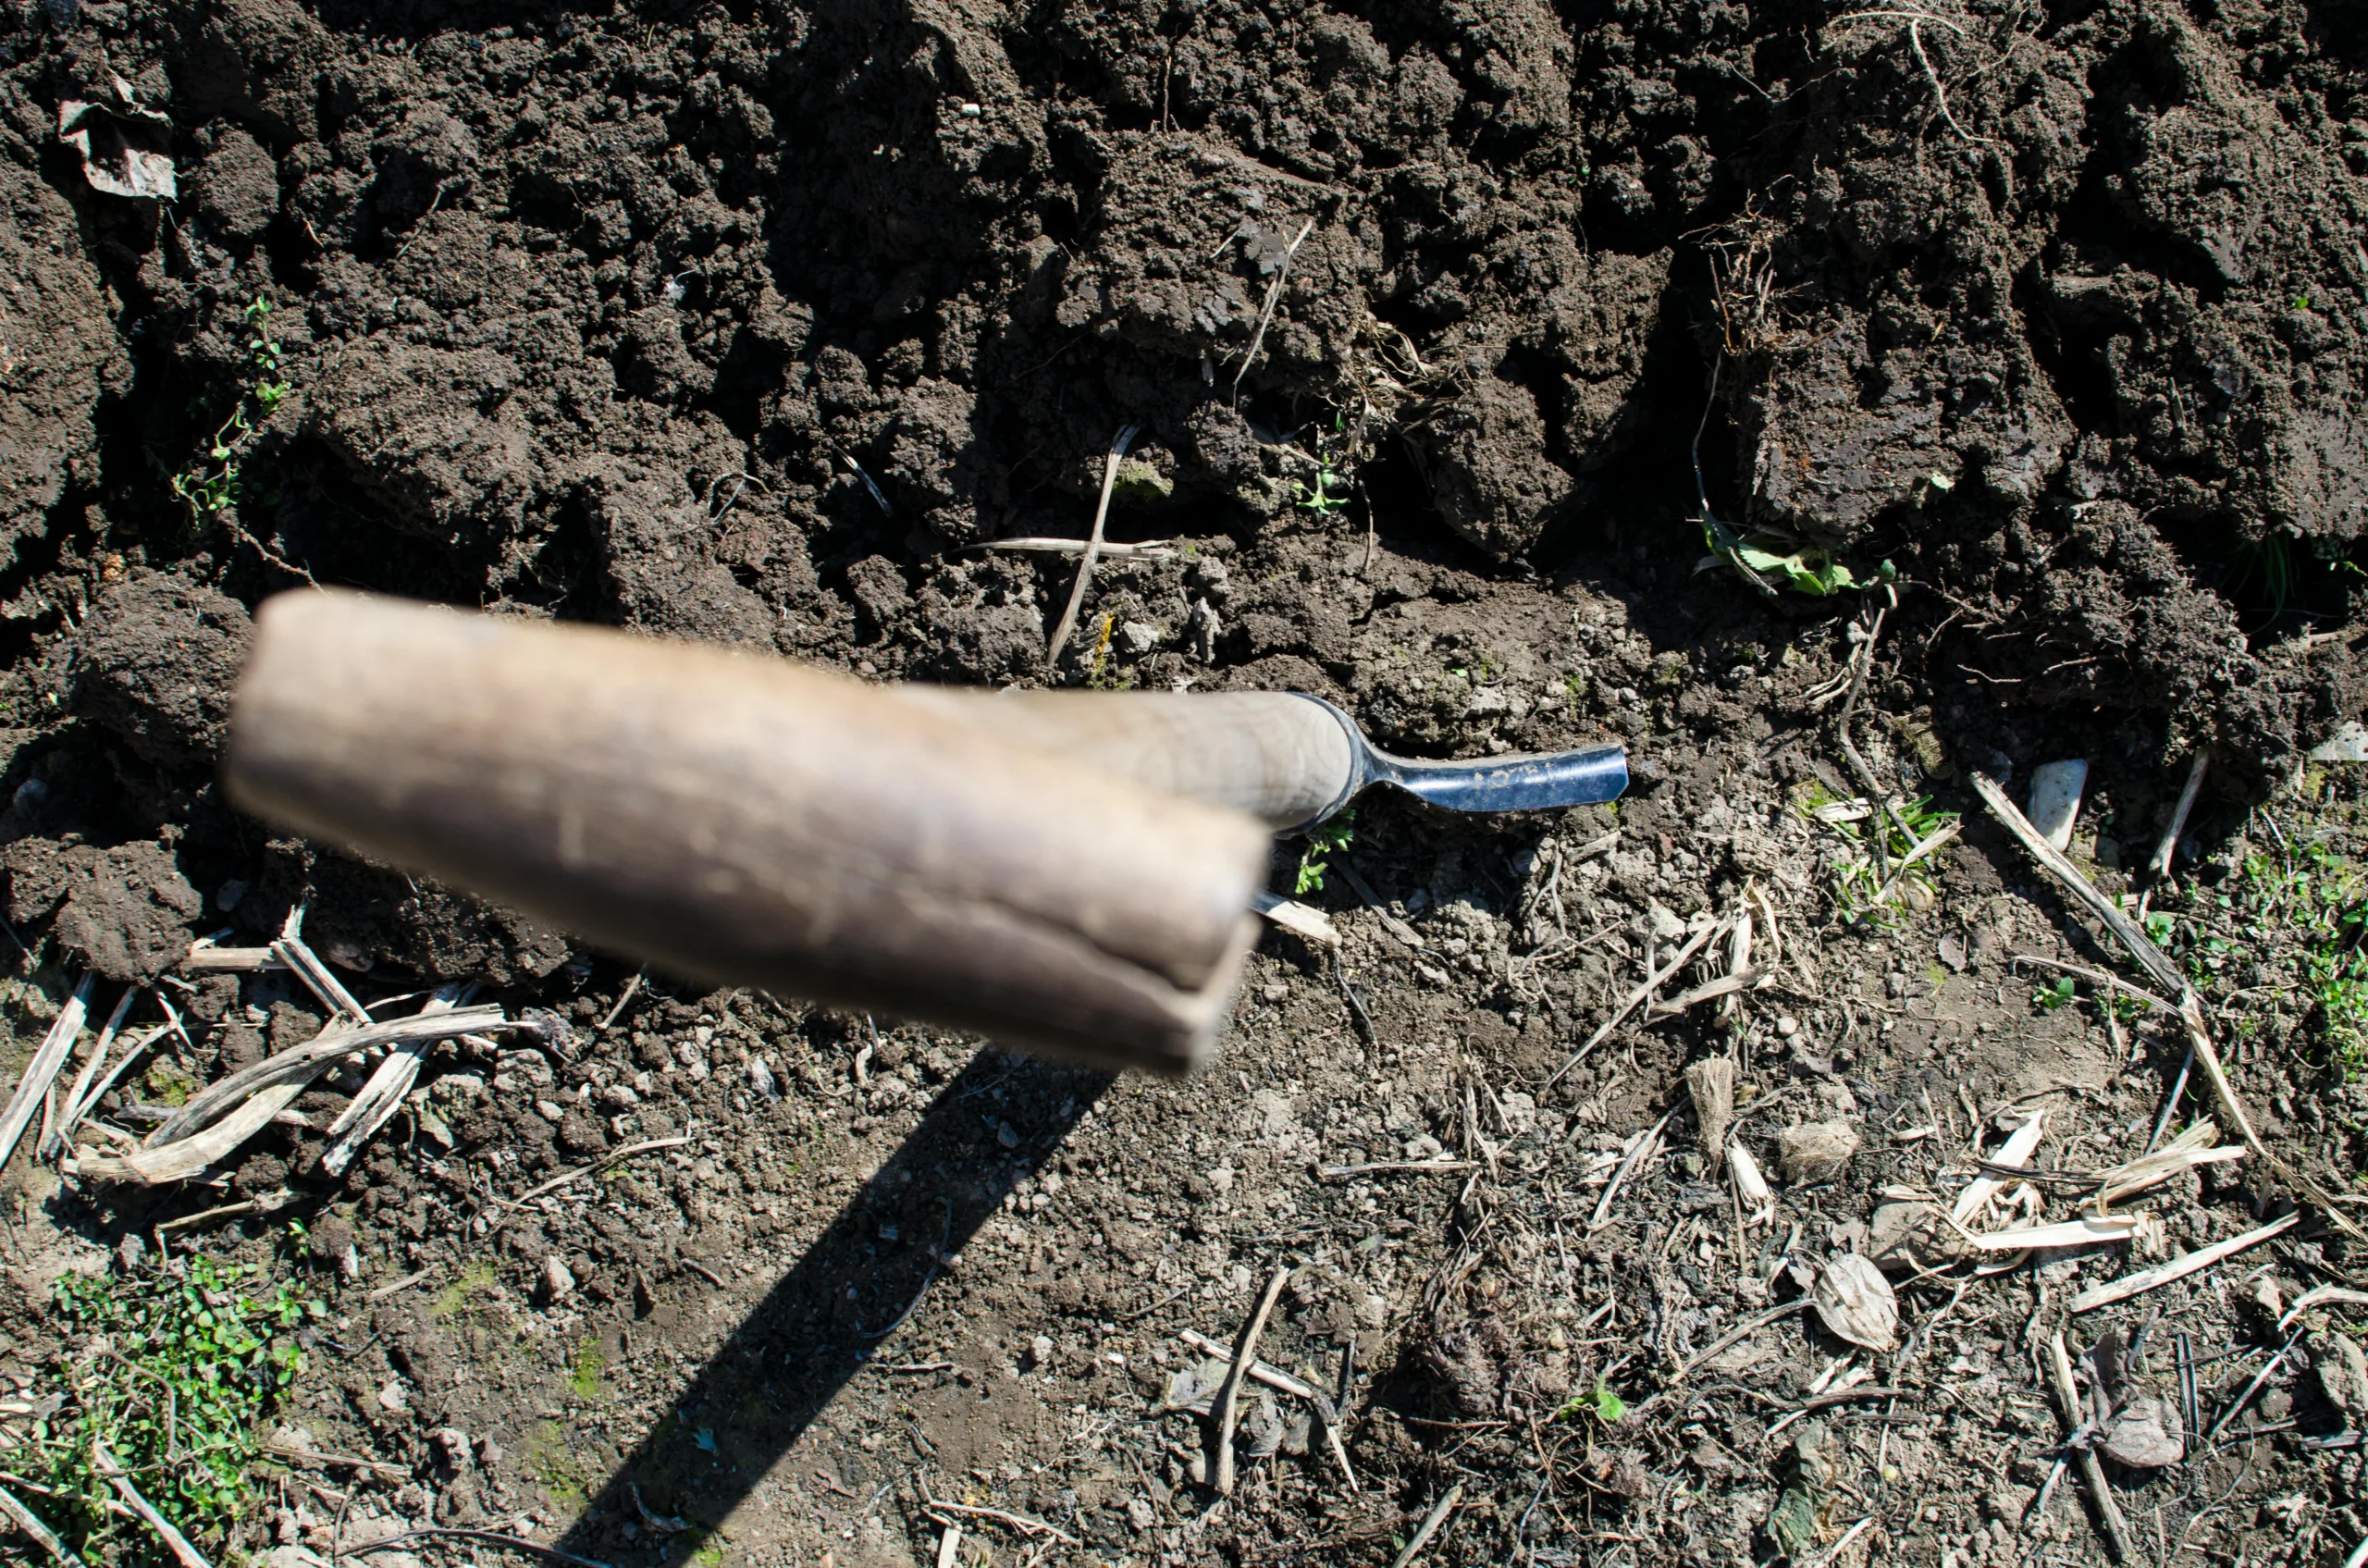
- First, the contractor digs one or more holes in the ground.
- Next, the contractor fills the holes with a specific amount of water.
- Then, it’s time to watch how quickly the surrounding soil absorbs the water.
- The timing of the water absorption is a key factor in determining the percolation rate.
Understanding Perc Test Results
You need a passing perc test in order to get the green light to move forward with a septic system and other land development projects. If your land fails a perc test, then consult with our team right away, and we can help you evaluate various options.
Each property is unique, which is why there isn’t a one-size-fits-all solution for every property. We will evaluate your soil type, property slope, and other factors that can influence your site preparation plans.
Perc Test Costs and Timelines
The perc test cost varies depending on exactly what needs to be done for your property, so we recommend that you contact our team for an estimate. We’ll discuss your needs and provide details about the expected costs for the perc test and other necessary services.
Factors that can influence the cost of your perc test include your soil type, the number of holes that need to be dug, and how big your property is overall. Rest assured knowing that our team at Mikula can work quickly to ensure that your perc test results are finalized so that it doesn’t hold up your development or construction schedule.
What to Do If Your Land Fails a Perc Test
If you end up with a failed test, don’t panic– there are options for long-term property planning. Some alternative solutions that we might discuss with you include the installation of drain fields, mound systems, or even municipal sewage systems.
Additionally, there are times when it might make sense to retest or file an appeal with the health department. We will help you evaluate all of your options so you can choose the best pathway forward for your property.
Local Perc Test Regulations and Requirements
If you need help understanding Perc test regulations and requirements, then reach out to our team at Mikula for guidance in what your next steps should be. We are here to help every step of the way. It’s essential that you are working with an experienced contractor who knows the local codes.
We offer a variety of related services for perc testing, including test pit excavation, drainage services, and other types of excavation. Contact us today to discuss your property and determine the necessary services for your upcoming development plans.

The Role of Test Pit Excavation and Soil Testing in Environmental Remediation
Before getting started with a construction project or any type of environmental cleanup, you need to know if there are any special considerations in the soil that need to be addressed. While the hope is that the site is clean and safe, there could be contamination in the soil requiring specialized services to ensure safety.
The reality is that if soil or groundwater is contaminated, then it poses serious health and safety risks to everyone in the area. Not only are people impacted by these issues, but there are also environmental concerns that need to be addressed.
The good news is that it’s possible to identify these issues early when you are working with the right New Jersey excavation contractor and environmental consultant. Our team is here to help with site investigations, test pit excavation, and soil testing. The goal is to evaluate the quality of the soil, then put proactive measures in place, if necessary, in order to avoid delays or issues when construction starts.
In this article, we are taking a closer look at what environmental remediation is and why test pits and soil testing are necessary at times.
What Is Environmental Remediation?
To put it simply, environmental remediation is the process of cleaning up polluted soil, water, or air. These contaminants impact the overall safety of the area. Not only is environmental remediation the right thing to do to protect the community and environment, but there are also regulations in place that require you to follow these practices.
Some of the most common reasons why you might need remediation before construction projects include industrial activity, underground tanks that are leaking, or chemical spills.
Ultimately, the goal is to protect the health of everyone in the area, including both residents and crew members. At the same time, it’s possible to restore the ecosystem and create the conditions for the land to be developed safely.
Test Pit Excavation Overview
If test pits are necessary, then you’ll need to hire a New Jersey excavation contractor. The process involves small-scale digging so that we can take a closer look at what is happening below the surface level. We’ll bring in excavation equipment, such as backhoes, to make it easy and accessible.
There are various things that can be inspected with test pit excavation. For example, industry experts will be able to see the layers of soil and any contaminants that might be present.
Other inspection points include the condition of the soil overall, water table levels, and more. This process is also important for underground utilities, protecting current lines and preparing for installation if new lines are needed.
In many situations, test pit excavation is the first step that needs to happen before major work starts for construction projects.
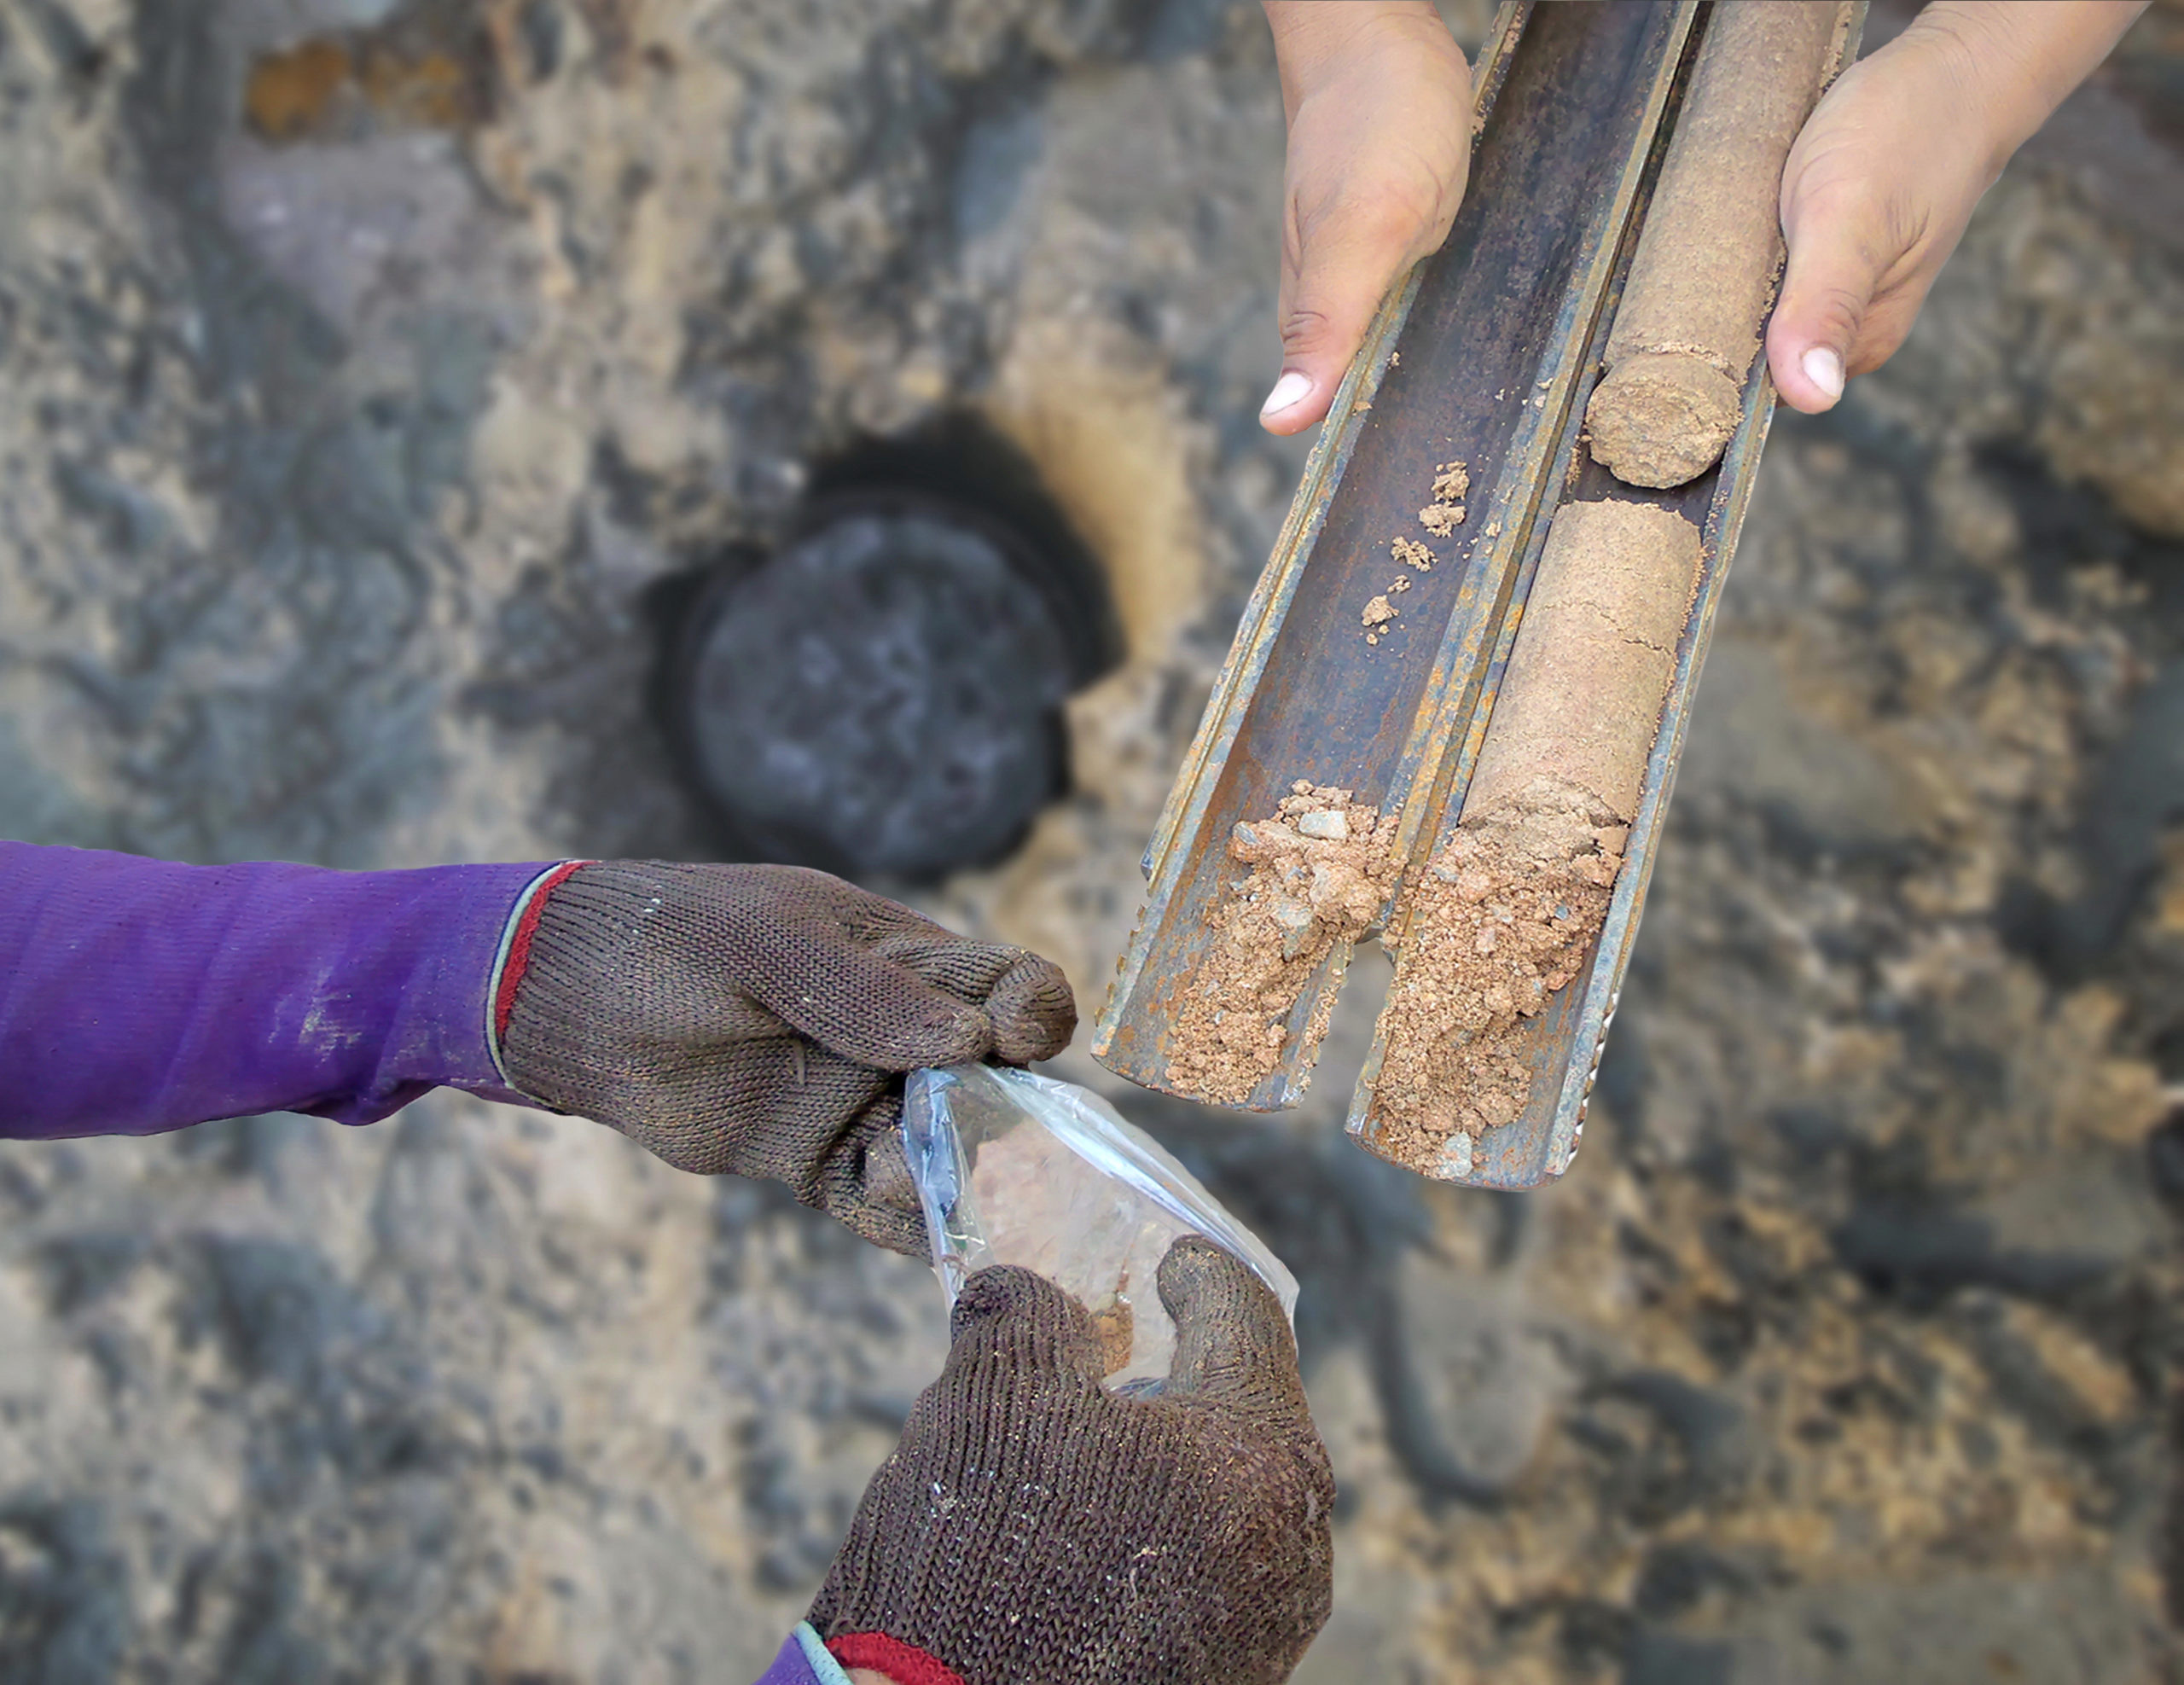
Understanding Soil Testing
When the test pits are excavated, it allows experts to collect soil samples from the different layers within the pit. These samples are tested in a laboratory setting to see if there are any contaminants or issues that need to be addressed. Your testing team will be looking for common contaminants such as chemicals, oil, or metals.
Soil testing also involves processes to check the properties of the soil, including the type, compaction, moisture content, and drainage. All of these factors affect the successful outcome of the construction project.
The results of these soil tests will guide your New Jersey excavation contractor in planning the proper site preparation activities to minimize complications or issues in the future.
How Test Pit Excavation and Soil Testing Work Together
Both test pit excavation and soil testing go hand in hand. If you need to have soil testing done, then the pit excavation is the preparatory step so that you can access the deep layers of soil. This excavation process is helpful because it provides a visual inspection of the soil so that you can find and address any problem areas that need to be taken care of. Finding an excavation contractor that works well with environmental firms can help make the process move along more quickly and seamlessly.
Our goal is to confirm what is in the ground on your work site. We’ll work with environmental experts to find chemical and physical properties that might impact construction, safety, and environmental factors. Test pit excavation and soil testing are the perfect combination to give you a complete picture of the site conditions.
Why Test Pit Excavation and Soil Testing Are Vital for Effective Remediation
There’s no question that you need both test pit excavation and soil testing in order to have a successful outcome with your remediation project. In order to plan an effective remediation, we need to determine both the scope and severity of the contamination. Then, we can create a targeted plan that will achieve the desired outcomes.
Rest assured knowing that we always meet both state and federal regulations. Also, we take a proactive approach to protect workers, nearby communities, and the environment from toxic exposure.
Need the Help of a New Jersey Contractor You Can Trust?
If you are looking for a local New Jersey excavation contractor, then make sure to hire a team that has experience in environmental site work. Mikula is here to help every step of the way. We’ve been working in the local community for many years and understand the unique soil and groundwater conditions. Contact us today to learn more.

Five Common Questions (And Answers) About Seepage Pits
Seepage pits can be an effective way to manage runoff wastewater, and they are often built into the design of older properties.
In this article, we are taking a look at the most common questions people have about seepage pits: what they are, how they work, and whether it’s a good idea to use a seepage pit on your property.
What is a Seepage Pit?
A seepage pit is designed with a chamber underground that can hold liquids. Seepage pits work with septic systems because the liquid wastes move into the pit. The walls of a seepage pit allow for wastewater to gradually seep out, where the water moves into the surrounding soil
Different materials and designs can be used for seepage pits and sewage disposal. The most common materials include cinder blocks, concrete, or precast concrete rings that are designed with no bottom.
What is a Seepage Pit Used For?
The primary role of a seepage pit is to handle partially treated wastewater coming from the septic tanks. It’s important for homeowners to understand that the septic tank and seepage pit are two separate parts of the sewer system.
The septic tank is part of the onsite wastewater treatment system. It stores the waste and partially treats the contents. Then, the wastewater is dispersed through the seepage pit. Since seepage pits have such a simple design, they are not suitable alone for handling raw sewage.
How are Seepage Pits Regulated in New Jersey?
Rules are set by the permitting authority in New Jersey regarding sewage systems, septic tanks, and more. It is important to understand that regulations and codes may vary by municipality and you should always hire a professional to be sure your seepage pit follows necessary guidelines and is installed properly to provide maximum effectiveness.
If you have an existing seepage pit, then it must be properly maintained. In cases where the seepage pit fails or major repairs or replacements are necessary, then the seepage pit may need to be replaced with a modern system. Whether you are updating your current seepage pit design or starting from scratch, during your seepage pit project you may need your land’s soil tested as well as working closely with a soil engineer to make sure that all the regulations required by your municipality are followed.
How Long Does a Seepage Pit Last?
One of the most frequently asked questions we hear is: how long will my seepage pit last? Multiple factors affect how long a seepage system will last:
- Construction Quality: Well-built seepage systems can last for many years. But if there are issues with the construction quality, then there’s a higher likelihood of the system failing prematurely. The most durable seepage pits are constructed with concrete or cinder blocks. Other materials, such as fieldstone or brick, are more prone to deterioration.
- Soil Type: Sandy soils are the ideal solution for seepage pits because they allow the wastewater to drain efficiently. Proper drainage extends the lifespan of the pit and also reduces the risk of backup problems. If you have clay content in the soil, then the ground is less permeable – which hinders drainage and increases the likelihood that the system will fail prematurely. In areas with clay soil, it’s more common to use alternative systems such as a leach field.
- Maintenance: If you want to maximize the lifespan of a seepage pit, then it’s essential to stay consistent with regular maintenance. The septic tank needs to be pumped to prevent the buildup of solids, which in turn reduces the burden on the pit. Also, mark your calendar for routine inspections to check for issues such as tree root infiltration, leaks, or cracks.
- Usage: One significant influence on the lifespan of a seepage pit is the way it is used. These patterns vary depending on the size of the household and the amount of wastewater that is being generated. For example, a large household with high water usage puts more strain on the pit, which can decrease the lifespan. Improper usage also causes issues, such as disposing of harsh chemicals, grease, or non-biodegradable items – because these things disrupt the delicate balance of bacteria in the septic system.
As a general rule of thumb, seepage pits usually last between 20–30 years. But, depending on the above conditions, this timeline can be shorter or longer.
Please note: If you have a seepage system, then it’s important to watch for these signs of failure:
- Slow draining fixtures
- Sewage backups
- Foul odors
- Soggy ground around the pit
How Much Does it Cost to Replace a Seepage Pit?
The replacement costs for a seepage pit vary, depending on the size of the pit, the location, the estimated labor required, and the soil conditions. Typically, if you are replacing a seepage pit, then it means that you are putting in a modern sewer system – not a new seepage pit.
If a new septic system needs to be installed to handle solid waste, scum, and sludge, then it's best to receive a quote from a professional like Mikula Contracting who can provide you with the proper solution and pricing for your drainage and seepage pit needs.
Have Additional Questions About Seepage Pits? Mikula Can Help!
The reality is that seepage pits can be useful, but there are sometimes environmental concerns. The good news is that modern solutions can be used to make them more effective. If you have a seepage pit and need a professional opinion, then reach out to our experienced team for help. At Mikula, we have experience with seepage pits and many other related services.

Why Digging a Test Pit is an Important Step When Building a New Home
There are many important details that need to be addressed to prepare for the construction of your new home. If you are getting ready to build your dream home, then it’s critical to ensure that you are working with experienced and skilled contractors who can assist every step of the way.
Most of the time, there are checklists you can follow to make sure everything is ready to go. But there is one important step that is sometimes overlooked in the planning process: digging a test pit.
The truth is that the condition of the soil plays an important role in the construction process. Not only can soil issues result in problems in the initial stages of construction, but unaddressed soil issues can also impact the durability of the building in the future.
A Test Pit Explained
Test pits are a way for geotechnical engineers to evaluate your ground conditions. The goal is to understand everything about the soil composition to make sure that the ground will be able to support your home’s foundation. Often, soil testing or digging a test pit is even a requirement to get the necessary building permits.
Most of the time, the pit’s measurements are between 3 and 15 feet in depth. It’s important to look at the soil composition and layers to understand what is happening in the ground where the construction will be occurring.
What is the Purpose of a Test Pit
Just because there are problems found with the soil doesn’t necessarily mean that you can’t move forward with construction. Instead, we can identify these issues and put mitigating steps in place to avoid issues in the future.
For example, if digging a test pit uncovers a high water table or loose soil that is easily compressed, then it’s likely that you will need extra foundation support. The construction plans might be changed to make the foundation wider or deeper to ensure the strength of the building.
Without these foundational adjustments, then the soil could expand or contract, causing the foundation to crumble or crack – which can result in expensive repairs for you in the future.
Why a Test Pit is Necessary When Building a New Home
Digging a test pit can identify some of the most common issues that could affect your construction project:
- Buried structures
- Groundwater seepage
- Soil contamination
- Water table location
- Stability of the side walls
- Unsuitable soil conditions
- Other possible challenges
While digging a test pit might seem like an unnecessary step when you are anxious to begin construction, the truth is that this step could save you a lot of money in the future. Identifying these issues in the earliest stages allows you to adapt the construction plan as needed, helping you avoid project delays and extra expenses down the road.
Who Can Help with Digging a Test Pit
Make sure to hire a contractor who has experience with soil testing and excavation specifically. If you are working with a general contractor, then they will already have a soil engineer to recommend for this soil testing. You also have the option to hire a soil engineer privately if you want to research the property before hiring other contractors.
Soil engineers (also known as geotechnical engineers) graduated as civil engineers. Make sure they have all the necessary licensing to ensure you are working with a credentialed engineer.
Our team at Mikula is here to help with digging a test pit. We offer full-service solutions for both residential and commercial projects. We understand the most important factors that ensure the success of soil testing.
For example, choosing the ideal location is important. It might be necessary to dig several pits across the property so that we can look at a full cross-section of the conditions. We’ll make sure that the test pit is at least a few feet deeper than the foundation will be. Before digging, we will identify the location of utility lines to avoid the risk of damaging these services.
Samples of the soil will be taken and sent to a laboratory for testing. It’s important to look for contamination and other elements that could impact the success of your project.
Finally, after the samples have been gathered and the testing is complete, we will backfill the test pit and provide full documentation of the discoveries.
Hire an Experienced Team to Dig Your Test Pit
What questions do you have about excavation and digging a test pit? When you are preparing to start your project, we invite you to reach out to our expert team for more information. At Mikula, we bring years of experience to ensure the highest quality results for every client.
Not only do we offer services for test pit digging, but we also provide new home excavation and more. Call today to see how we can help.
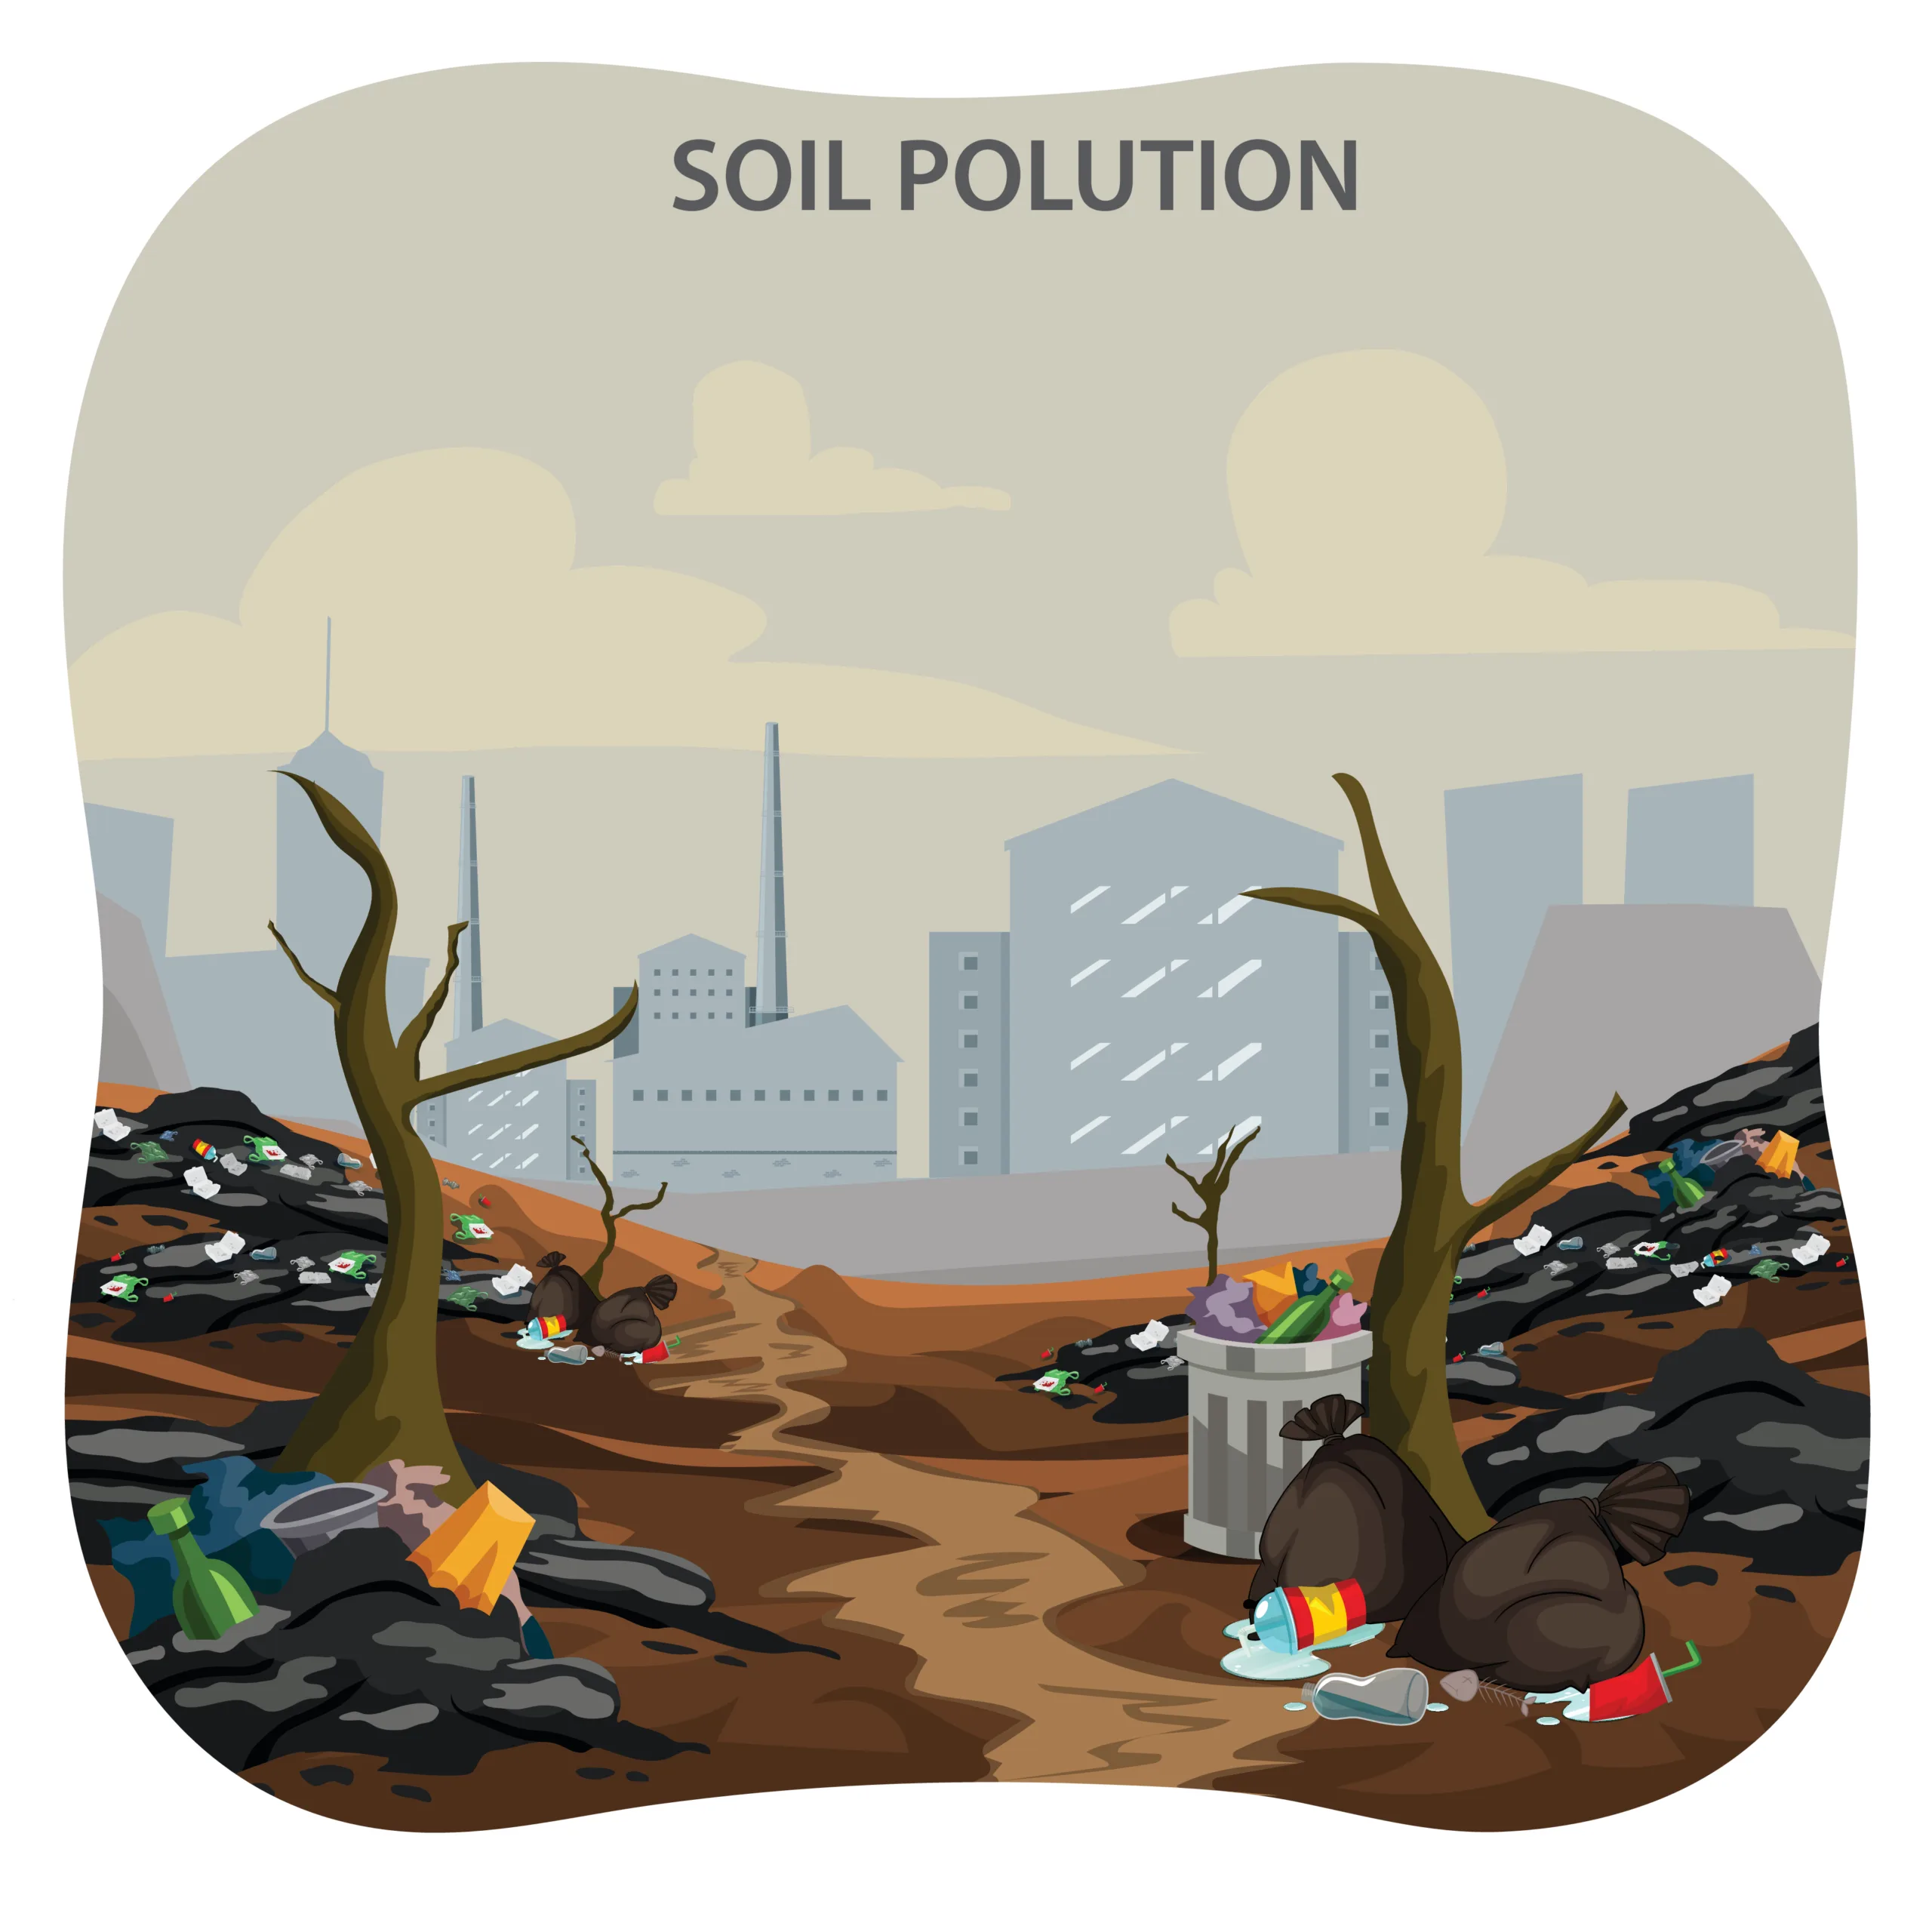
Strategies for Reducing Soil Pollution
The soil is an integral part of the natural ecosystem. If something goes wrong and land pollution occurs, then it can have a domino effect that impacts plants, animals, and humans alike. We offer soil remediation services in New Jersey to help with cleanup projects, as well as preventive solutions to reduce the risk of these problems occurring in the first place. By partnering with environmental firms we can help by digging test pits, providing soil remediation, and much more.
While most pollution prevention strategies focus on air and water, it is just as important to prevent soil pollution. Everything is connected in the ecosystem, which means that it’s essential to take responsibility for managing waste disposal, remediating soils, and more.
What is Soil Pollution?
The term “soil pollution” refers to the presence of hazardous substances that contaminate the soil. When the land is polluted, it causes serious environmental concerns that can lead to a variety of health hazards. There are many ways that soil can be polluted as a result of human activities. Some of the most common causes of soil pollution include:
- The use of pesticides, herbicides, fungicides, and other hazardous farming chemicals and agricultural pollution
- Industrial waste and improper disposal
- Urban activities
- Drainage from homes and commercial buildings
- Improper trash disposal
Soil contamination might seem like a minor inconvenience. However, researchers are finding more and more links between serious health issues and the presence of pollution in the soil. There is a direct connection between human health and the environment, which is why we need to consider the long-term effects of soil quality.
Our New Jersey soil remediation services are here to help reduce the risk of soil pollution, clean up existing issues, and provide strategies to improve soil quality so you don’t have to worry about exposure and contamination in the future.
What to Do If Your Soil Is Polluted?
The worst mistake you can make with polluted soil is attempting a DIY remediation. It’s important to call for New Jersey soil remediation services without delay. You need the experts on the job to protect your property, water resources, and everyone in the area.
Several steps will be followed to ensure successful soil remediation. First, we evaluate the conditions to determine the source and severity of the problem. This process gives us all the information that is needed to ensure optimal results with the treatment plan.
Next, we can move forward with your personalized soil remediation services. Different treatment methods can be used for contaminated soil, including:
- Bioremediation
- Chemical oxidation
- Soil stabilization
- Physical methods (soil washing)
Three Ways to Reduce Soil Pollution
While soil remediation can be used to clean up soil pollution, the ideal solution is to take a proactive approach to preventing the issues in the first place. Instead of the hassle and expense of soil washing and cleanup in the future, you can avoid reduced soil quality through careful steps to keep pollutants out of the soil. Many of these strategies improve soil quality to protect these important resources for future generations.
1. Properly Dispose of Waste
When various types of waste are dumped into the environment, toxins from the disposal can seep into the soil and affect many aspects of the environment. Instead of simply dumping waste, the proper disposal of solid waste includes proper treatment prior to the release of waste into the environment.
This proper waste disposal method is a long-term solution to reduce the risk of soil contamination. For example, if the waste is highly acidic or alkaline, then it must be neutralized before disposal. Any biodegradable waste should be taken to a controlled environment where it can be broken down.
In order to ensure proper waste disposal, our soil remediation services will categorize the type of waste depending on the level of contamination. In situations where the waste is mildly or moderately contaminated, we can use specific steps before releasing the treated waste into the environment. On the other hand, waste and soil that is heavily contaminated need to be strictly managed and controlled to avoid the serious consequences that can happen if something goes wrong.
2. Limiting the Use of Chemical Fertilizers and Pesticides
Every New Jersey soil remediation services provider will agree that it is cheaper to focus on soil pollution prevention than it is to pay for the remediation of polluted soils. Regardless of the way the land is being used, be proactive about minimizing the use of chemical pesticides and fertilizers.
While these commercial products can offer immediate benefits, such as promoting the growth of vegetation cover or minimizing pest damage, the chemicals can have a long-term effect on soil quality. One of the biggest concerns with modern farming is the way the contaminants can add up over time as property owners use chemicals year after year.
While strict standards are controlling the use of certain pesticides and fertilizers, new products are always entering the market. If you have doubts about the safety of the products you are using, then talk to a New Jersey soil remediation services expert for more information and personalized recommendations.
3. Practicing Sustainable Land Management to Control Soil Erosion
It’s important to understand the impact that soil erosion has on water quality. When water runoff is happening on the soil surface, it picks up pollutants and contaminants along the way. Not only can erosion be a factor in water management and pollution concerns, but it’s also challenging to stabilize the site and protect structures when the water is unmanaged.
Land management protects your livelihood, ensures long-term soil quality, and helps you reduce the risk of soil pollution. The more you learn about land and water management, the more you will see that these services are an excellent investment.
Chat With an Experienced Professional About New Jersey Soil Remediation Services
Do you need help with New Jersey soil remediation services? Then Mikula is the team to call! We invite you to reach out at your convenience to learn more about available services. Not only do we offer soil remediation in NJ, but we can also assist with excavation, site preparation, and more.
Schedule an appointment for personalized recommendations from a contracting team you can trust. We are always here to help.
What is the Soil Remediation Process?
Soil pollution is an ongoing concern, especially when there are so many manufacturing and business practices that can threaten our beautiful planet. Not only is cleaning up soil pollution the right thing to do, but there are often regulations and requirements necessary to manage pollution problems.
The truth is that soil remediation is essential for some of the most significant problems that are threatening the environment. If you need assistance, then it’s important to call an experienced and trusted team for help.
What is Soil Remediation?
Any time contaminants need to be removed from the soil of a site, it is known as soil remediation. When a company or organization is found guilty of causing pollution or contamination, then there are laws in place to require these companies to fix the problem. However, many companies don’t have the experience or qualifications to complete the project accurately, which is why it often makes sense to bring in a soil remediation service.
Soil remediation is available for projects both large and small. If you have a large-scale construction site that needs to be cleaned up or a more minor issue with leaking chemicals, then our team is here to assist.
There are many common issues affecting the environment. Some of the most common reasons why soil remediation might be necessary include:
- Oil and Gas Contamination: Even though the oil and gas industries have regulations and safety requirements, this industry is one of the biggest contributors to soil pollution. The contaminants often end up in both the soil and water, requiring soil remediation to clean up the mess.
- Chemical Spills: There are different reasons chemical spills can occur, such as improper storage of hazardous materials or mistakes during the transportation of these chemicals. Not only do these chemicals pose a threat to the environment, but they can also be dangerous to human health. Soil remediation can be essential to mitigate the impact of chemicals on the environment.
- Groundwater Contamination: Serious health consequences can occur if the groundwater and/or surface water is tainted. Luckily, soil remediation can be used to ensure that the water is safe for human consumption.
Remediation is the process of cleaning up these issues to ensure safety in the area.
Types of Soil Remediation
There are many situations that might require soil remediation services. Examples of different types of incidents that can be fixed with soil remediation include:
- Hazardous chemicals
- Particulate matter
- Greenhouse gasses
- Plastic waste
- Various forms of trash
- Radioactive contaminants
- Oil spills
- And more
For example, there are different activities that can result in damage to the environment, such as deforestation, drilling, mining, agriculture, chemical processing, manufacturing, and more.
The Soil Remediation Process
Specific steps must be followed to ensure the contaminated area is cleaned efficiently and effectively. The remediation process should be completed by a certified and experienced team, following these steps to complete the project successfully. For example, at Mikula Contracting we work directly with environmental companies in soil remediation projects to handle digging, removal of soil, and loading onto trucks to be taken away from the site. Additionally, we are able to bring in sand, stone, or soil to replace the soil that was removed.
Assessment of the Site
The first step is to evaluate the contaminated area and determine the extent of the problem. Our specialists will identify the contaminants that need to be cleaned up, as well as the location of the contaminants and the anticipated scope of work necessary to complete the project.
During the site assessment stage, we map the area and take soil and water samples for testing. We need to have a clear picture of the severity of the pollution or contaminants, as well as the strategies and efforts that will be necessary to clean up the site.
Decide on Remediation Methods
Now that we understand the situation, it’s time to plan the specific soil remediation strategies that will be used. We have years of experience in the industry and understand the most appropriate cleanup methods to ensure success when we are finished.
Often, several types of remediation methods are included in the same project. While standalone services can be effective, sometimes it’s necessary to use a combination of services in order to effectively clean up all present pollutants.
Various techniques include dredging, excavation, soil vapor extraction, oxidation, pump and treat, thermal desorption, and nano-remediation.
Part of the planning and strategy is to ensure that proper safety measures are implemented through all stages of the project. Not only is it important to protect the community, but the cleanup crew needs to be as safe as possible. These safety strategies help to reduce the risk of injury and wrongful death.
Begin Remediation
Now that the plan is finalized, it’s time to move forward with soil remediation. Our specialists get started with the actual cleanup. Rest assured knowing that we take care of every detail, including bringing the necessary equipment, tools, and staff members. We handle everything that needs to happen on the site, as well as any off-site requirements, such as removing contaminated soil and/or bringing clean soil onto the property.
The remediation process often happens in stages, including testing, ongoing evaluations, and more. Every step of the way, we work hand-in-hand with officials to ensure that we are complying with regulations on a local and federal level.
Evaluate Post-Remediation of the Site
Once soil remediation is finished, the project isn’t over yet. Now it’s time to evaluate the effectiveness of the cleanup. We re-examine the site, complete additional testing, and determine whether more remediation services are necessary.
Additionally, post-remediation conversations should always involve public officials to ensure everything is in compliance with the regulations.
If You Need Your Soil Remediated, Mikula Can Help
For more information about soil remediation, Mikula Contracting is just a call away. Contact our professional team to learn more about all of our services, including soil remediation, water remediation, and more.
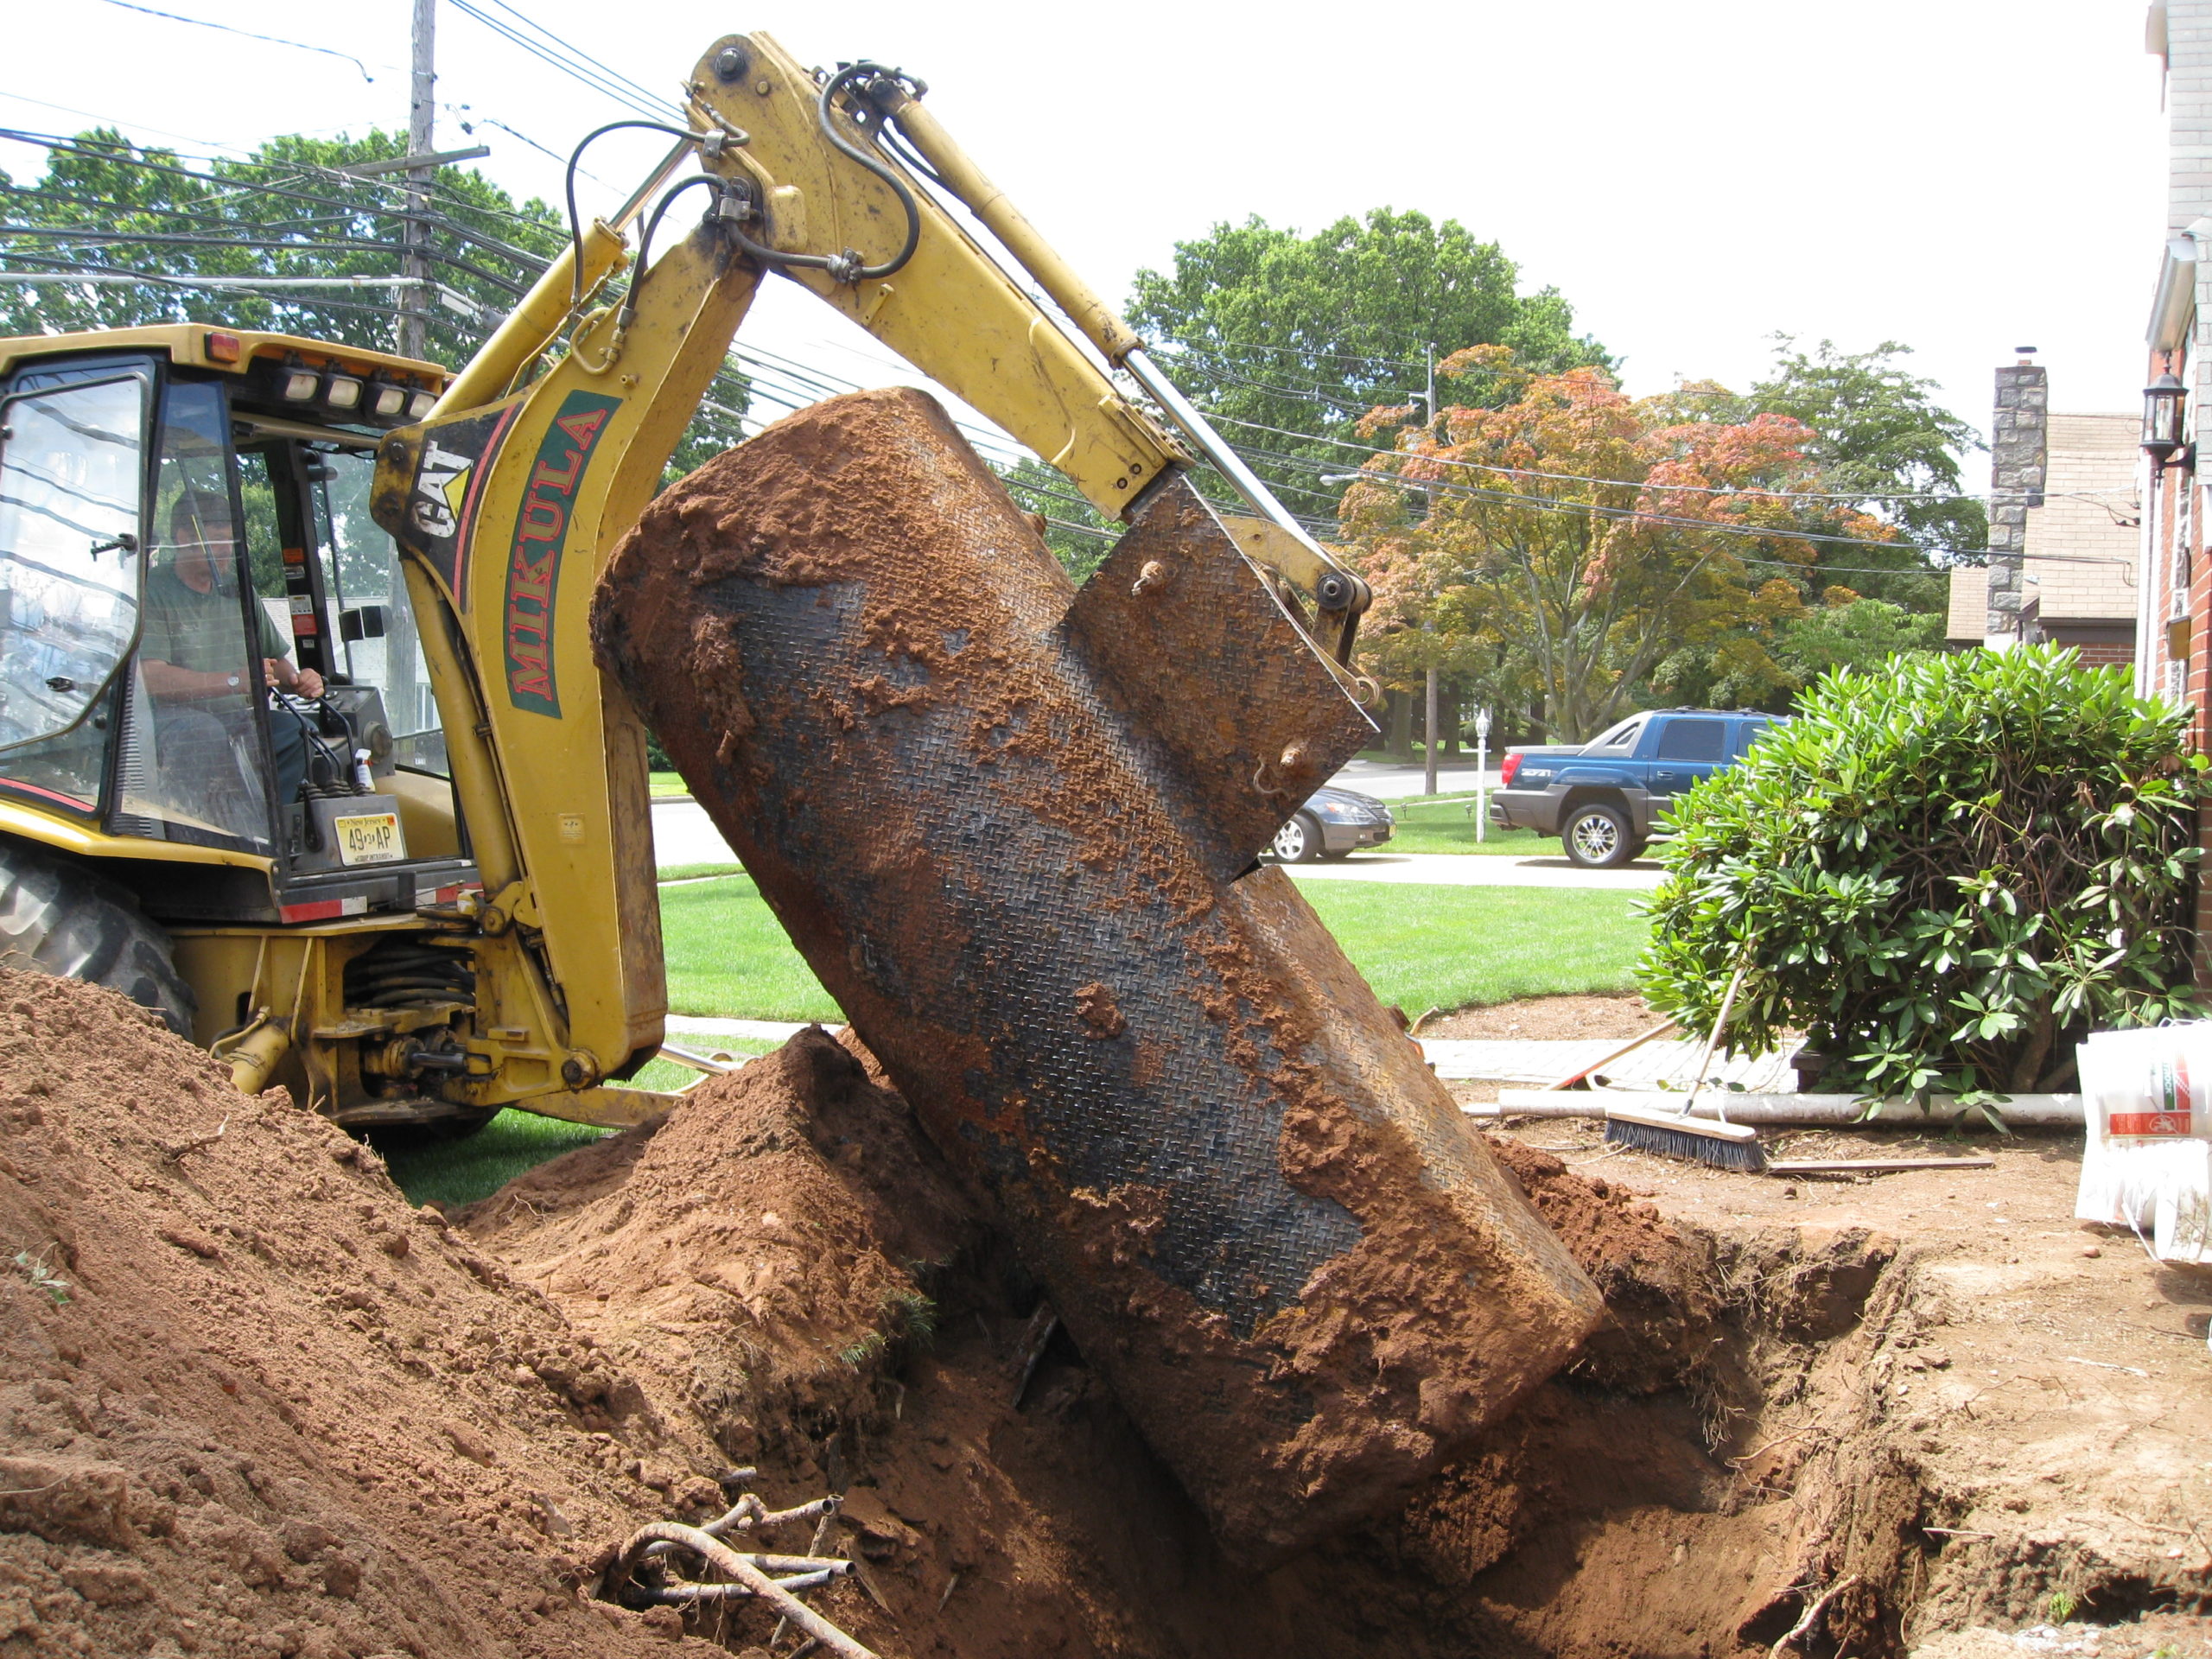
Seven Reasons Why You May Need Your Oil Tank Removed
Oil tank removal is on the minds of all New Jersey homeowners with an old oil tank buried on their property. “Out of sight, out of mind” does not apply when the value of your property and your family’s safety is on the line.
When you find trusted contractors for oil tank removal in New Jersey, you can have the peace of mind that your property will not have an unidentified leak during the removal process. If you are ready to sell your home, understand that any potential buyers will want you to remove the oil tank before the sale goes through. Instead of waiting, sign up for oil tank removal on your terms.
1. Sale of Property
Imagine this. You have your property ready for sale. You are hoping for the maximum profit as you look at your neatly manicured lawn and new paint job. You find potential buyers that love the home and make an offer. You accept the offer! It’s every homeowner’s dream.
And then the inspection comes up, and with it, you realize what you forgot. The property has an oil tank, and the buyers ask for immediate oil tank removal. Not only is the value of your home immediately going to decline, but now you must find a contractor you can trust in a time crunch.
Instead of finding yourself in a desperate situation, take care of your oil tank removal now. You will not have to worry about surprises coming up during the sale of your home. Instead, taking care of the oil tank now means you can invite the inspector in with open arms, handing over the survey of your property with a sigh of relief.
2. Potential for an Oil Leak
Most properties with an oil tank no longer use the tank to produce heat in their homes. Gas furnaces have replaced the need for an oil tank replacement if your oil tank no longer functions. If your outdated oil tank is on your property, do you know if there is oil in it? If it has oil, is there a possibility of an oil leak?
What would an oil leak mean? What about the water that runs through the soil and spreads close to your home? These questions lead to an urgent need for New Jersey homeowners to consider oil tank removal.
The removal process is down to a science when you hire a team like Mikula Contracting. We will remove the tank, emptying it first to eliminate any risk of oil leaks during the removal process. We test the surrounding soil to ensure it is thriving and healthy for producing plant growth. And then, we backfill the hole and repair your yard to look as good as new.
3. Mortgage and Home Insurance Applications
There is no hiding an oil tank on the property. Your home insurance already knows about the oil tank. You must legally disclose this information to insurance companies so they know what potential accidents could occur on the property.
After oil tank removal, New Jersey homeowners will see savings in their home insurance monthly premiums because the property is no longer at risk for oil leaks, contaminated soil, and other hazards. Find a trustworthy company and get the job done quickly and efficiently.
4. Renovation Needs
If you are ready to upgrade your backyard with a patio, pool, or garden area, you may hit an obstacle when digging for a pool near the oil tank site. Prepare your property for renovations by starting with oil tank removal. Then you will not have to block off a whole section of the yard that is unusable due to the buried oil tank.
Maximize the use of your property by ridding it of an outdated oil tank. The investment into your property’s future is worth it.
5. The Age of the Tank
Oil tank usage dates back decades to when homeowners used buried oil tanks to heat their homes. Now that we have modern furnaces, we no longer need them. Underground oil tank removal from an experienced team would clean up your property and take care of any contamination if the tank leaked.
6. Health and Safety Reasons
Soil remediation is a must during oil tank removal. New Jersey residents should always look for removal companies that are thorough about testing the health of the surrounding soil.
Our team at Mikula Contracting is familiar with soil testing and removing soil from your property that will not benefit plant growth. In addition, contaminated soil can spread and negatively affect your family’s health– protect your loved ones with safe oil tank removal.
7. Being Proactive
You will never regret soil testing to see whether your buried oil tank has already caused damage. It could have severe consequences if you find out about an oil leak years later. If you test the soil and everything is fine, you’ve done yourself a favor! Once you’ve removed your underground oil tank, testing will no longer be a concern.
Consult with Mikula Contracting for Your Oil Tank Removal
Mikula Contracting is a local oil tank removal company that you can trust. We are familiar with New Jersey homes with obsolete oil tanks. Take action on the oil tank on your property with oil tank removal. New Jersey homeowners should contact Mikula Contracting today to learn more.
Soil Remediation Project in Newark, NJ
In New Jersey, it is a common practice that a test pit excavation is ordered before construction starts on a commercial and/or residential property. If there is any reason to believe that the soil is contaminated, the soil needs to be remediated and replaced with new soil.
Property openers or those who represent the property owners, like environmental consultants, will order a test pit excavation to be sure the construction is not built on contaminated or unsafe soil. Read on to learn about a local soil remediation project in New Jersey that was recently completed by our team at Mikula Contracting.
The Project
We were hired for a test pit excavation at a site in Essex County, New Jersey. When we conducted the test pit excavation, which was originally scheduled as a 2-day project, contaminated soil was discovered, and it was found to spread even further beneath the surface.
At that point, the test pit excavation became a full soil remediation project. Our 2-day contract turned into an ongoing soil remediation project, which called for the removal of soil from the site. Certified material needed to be hauled onto the site to replace the outgoing contaminated material.
The environmental cleanup will likely take months in order for it to be environmentally compliant for commercial use. Once the remediation is complete, the site work can continue with the clean material now on the property.
Equipment Used
We used a variety of equipment to get the job done right for this New Jersey test pit excavation. In addition to the equipment, we needed more laborers on the site to work on this unexpected project. Some of the equipment included:
- Excavators: The excavators moved out large amounts of soil to be transported away.
- Clean Backfill: Once the contaminated soil that was discovered in the test pit was removed, we had to fill the empty area with certified material. It took soil testing to determine how much soil needed to be removed and replaced.
- Trucking: We used trucking to transport the contaminated soil away from the property and bring in new certified material.
- Stone: The project required stone to be removed from the deep pits that were being built. New stone was also implemented throughout the project.
Once we pivoted and started on the new project, we were able to provide the proper equipment and professionals to get the job done.
How Long Did It Take?
Once we knew that the project would be longer than expected, we took the time to organize a new plan. When soil contamination is discovered at the site of a proposed commercial project, the client must address the problem. In order to have a commercial property approved for site work and construction, the owner must provide their certified material paperwork.
Once a new plan was presented to the client, we started on the project as soon as possible. After months of work, we are still not finished. The soil remediation efforts have continued as soil contamination was discovered deeper and wider through our test pit excavations on the site. We will continue to work for a few more months on this project in order to provide a clean and approved site.
How the Team Handled Surprises
When the unexpected happens, the best you can do is learn the scope of what needs to be done and organize new plans for the labor and equipment needs. We reviewed the new plan with the client and got started.
We also ran into some weather-related delays as we worked on this project. With our company, safety always comes first, so we stayed in constant communication with the client as there was no reason to waste time and take risks on a project in unsafe site conditions.
Contact Mikula Contracting
Learn more about how Mikula Contracting can help you with your New Jersey test pit excavation service. Certified contractors are used to dealing with the unexpected. You never know what you’re going to get when you start excavation.
Our team is skilled at talking with the client and keeping them updated on each step of the project. If we discover something significant in the test pit excavation, we work alongside an environmental team to provide solutions for the site.
Failing to treat contaminated soil conditions could cause poisoning from lead, arsenic, or other hazardous substances. In addition, if you grow vegetation on the soil and eat vegetables, you can ingest the harmful substance through the food. Soil discoloration, strong odors, and the absence of plant or animal life near the property may be signs of contamination. Pouring cement and paving asphalt over the contaminated soil will not make the problem go away. Soil remediation is vital to owning a safe and certified property. Contact Mikula Contracting for a consultation on your property if you suspect any soil contamination.
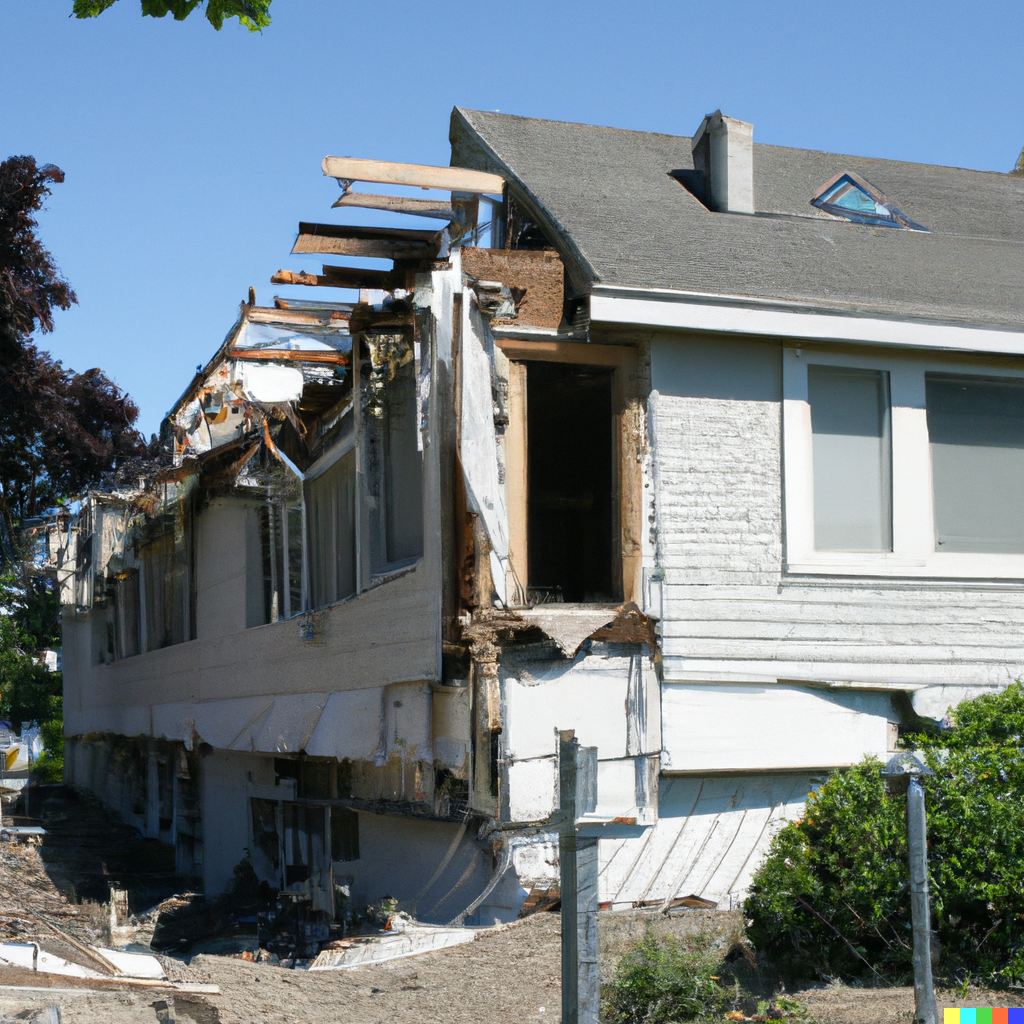
Environmental Considerations When Demolishing a House
Demolishing a house sounds pretty straightforward – grab a sledgehammer or rent a piece of equipment and begin tearing things down. It’s not quite that easy, though. Many environmental and health consequences can come from demolishing a house. We will examine some of the most important things you should pay attention to during the next house demolition you may be involved in.
Pre-Demolition Inspection
While you most likely want to jump on your demolition project as soon as possible, taking a step back and getting a pre-demolition inspection is one of the smartest things you can do. This inspection can pick out things you need to know before demolition; factors like what kind of materials you are dealing with and what needs to be removed before the demo can even begin. Environmental problems that need to be handled and/or monitored can also be examined in an inspection.
Sometimes, a pre-demolition inspection is required and is not a choice. Be sure you know the regulations in the location of demolition so you don’t do harm to the environment and don’t get hit with some hefty fines! Submit any required forms, and get those permits and any other approvals you need before your demolition begins.
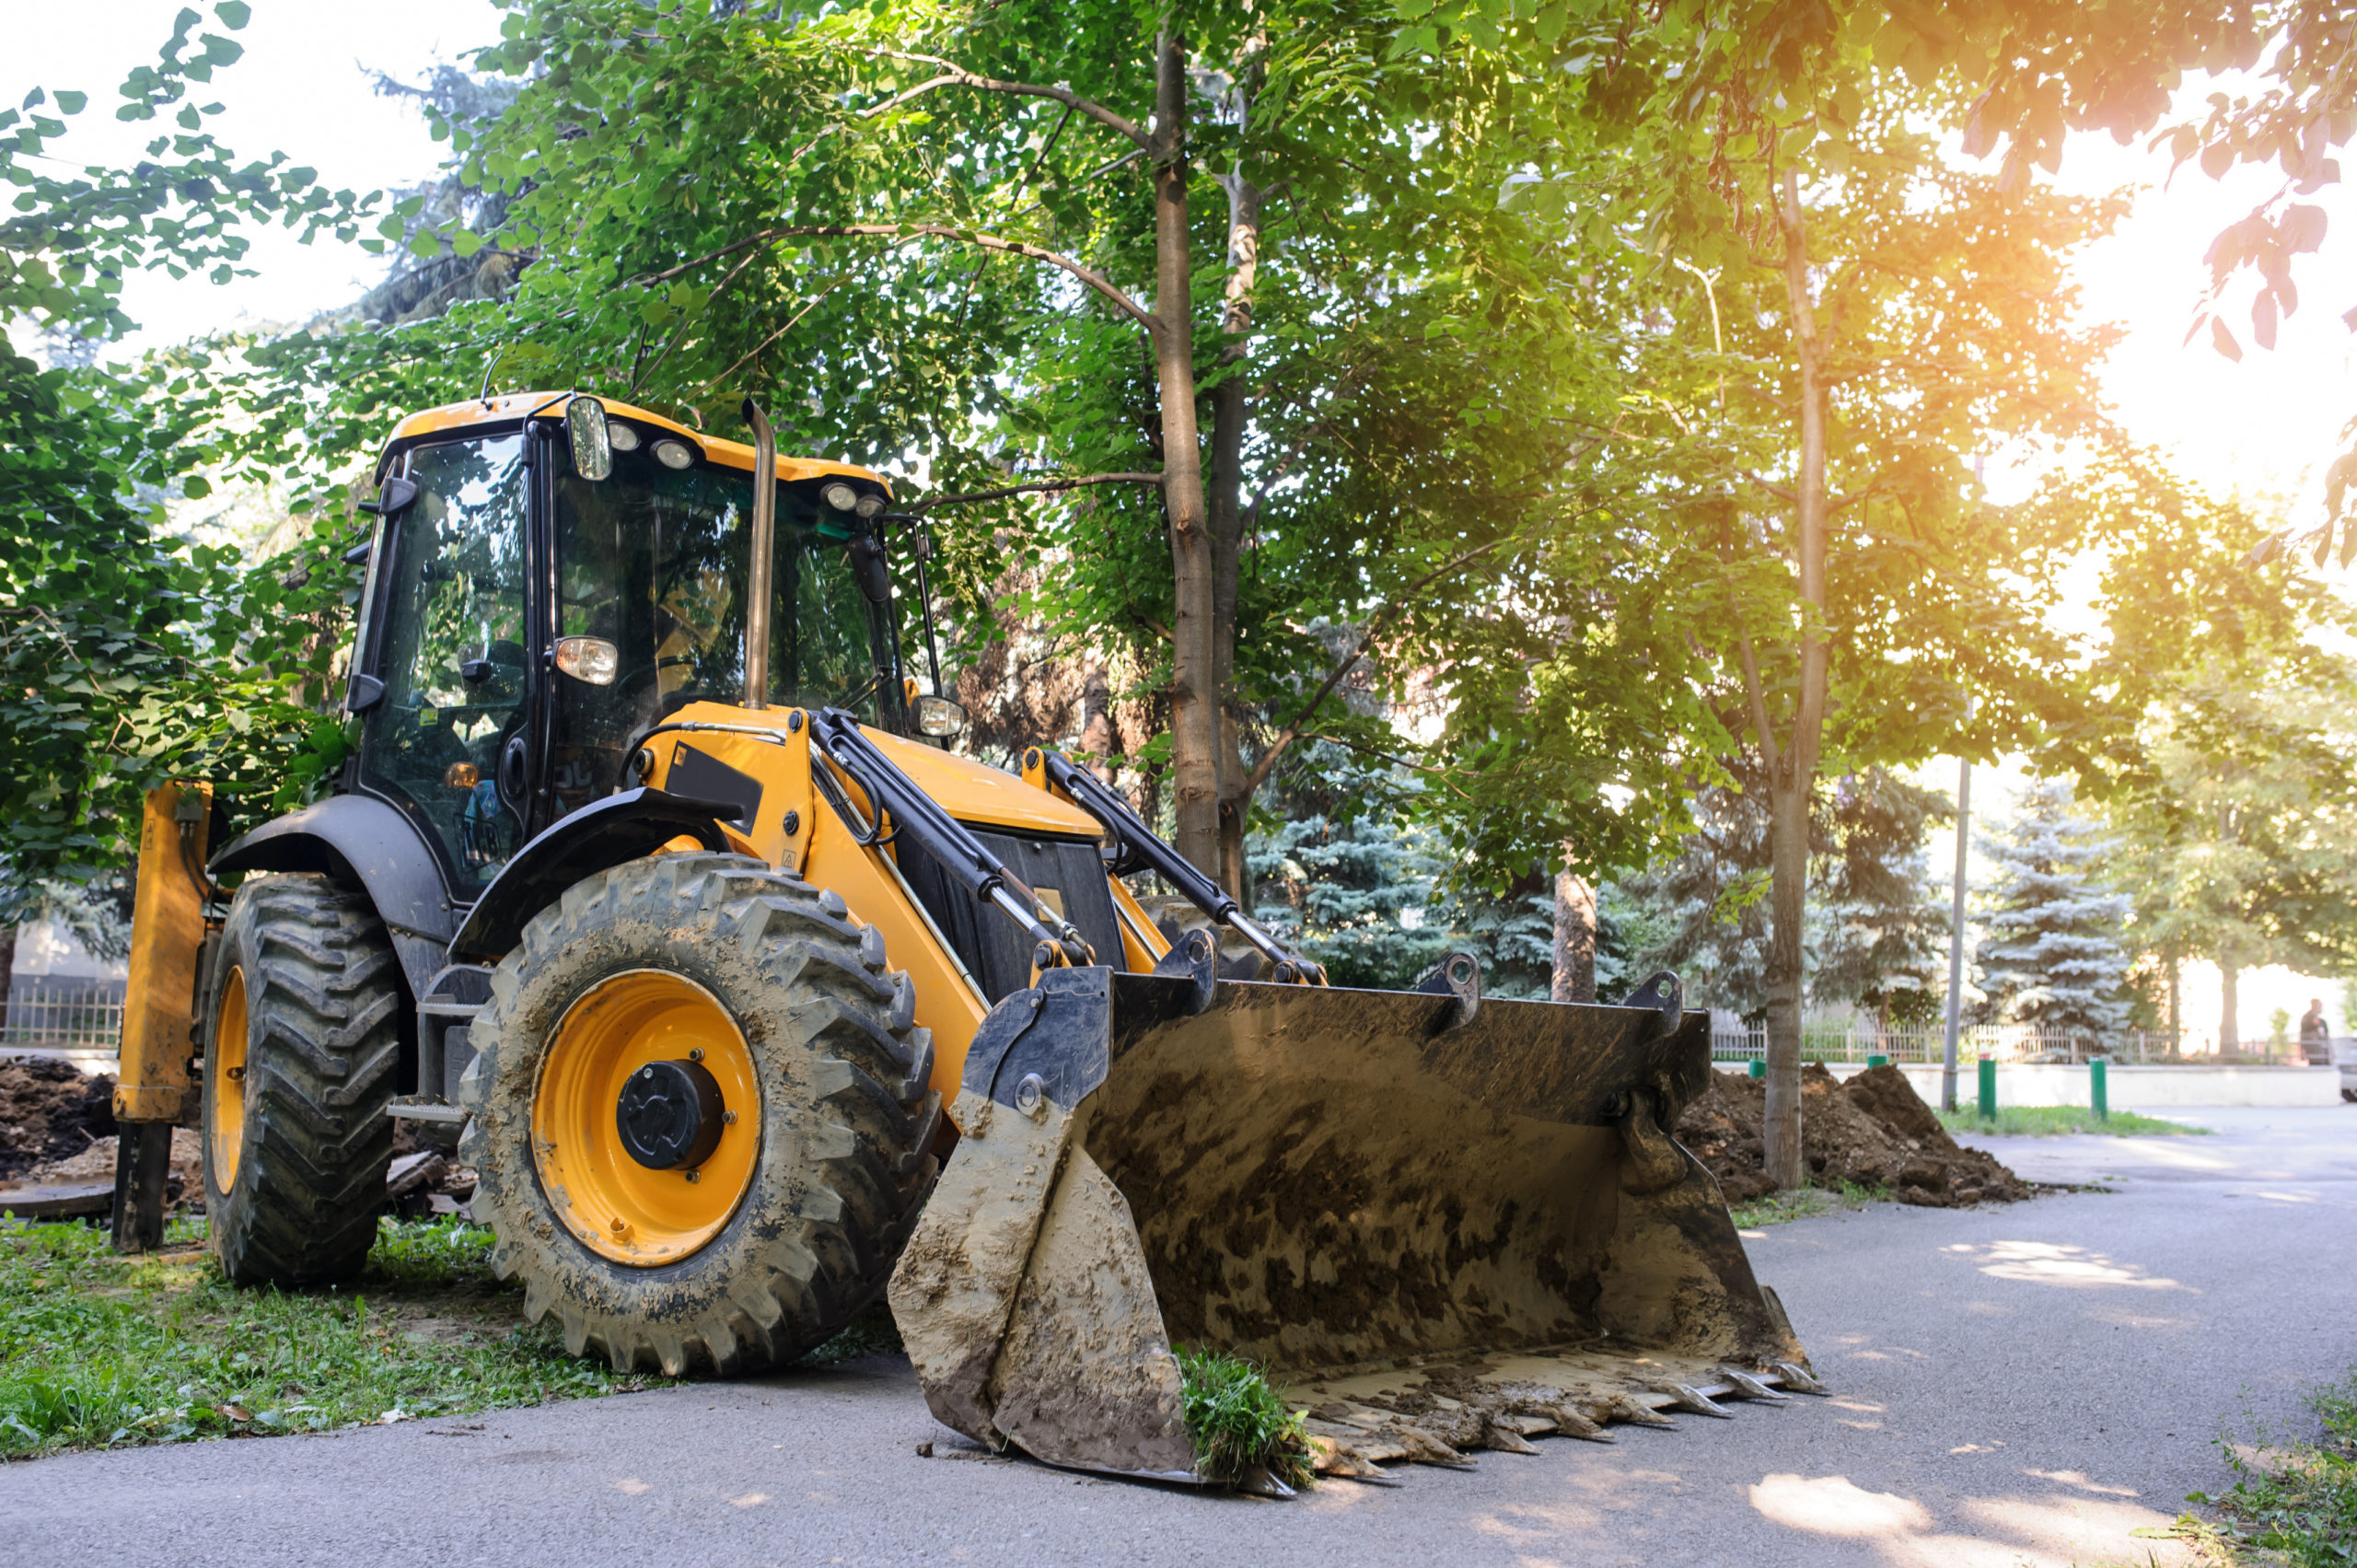
Mode of Demolition
There are a few different modes of demolition, and usually, the choice of what approach you use depends on the demolition sites and what is being torn down at each location. In addition, the type of building materials that are in place in these structures is also considered.
Some of the approaches that are taken include a sledgehammer, bulldozer, wrecking ball, excavator, and more.
Asbestos Presence
Asbestos is a dangerous substance made up of several minerals that naturally occur in nature and fibers that resist heat. Asbestos was installed in thousands of homes across the United States before the dangers of asbestos and its links to cancer were discovered. Sadly, asbestos has been found to cause lung, ovarian, and laryngeal cancer and is the primary cause of mesothelioma, which is cancer that forms in the lining of the lungs or abdomen.
If asbestos is present in a home or building, it needs to be removed by a professional that knows exactly how to remove it and dispose of it. Asbestos found in demo or renovation work often causes the most dangerous exposure, and state and federal regulations need to be closely followed to maintain a healthy environment.
Soil Contaminants
During a large demo like a house demolition in NJ, the soil will be disturbed either because of the demo itself or the traffic of heavy equipment and trucks that come and go from the work site throughout the demolition process. When the soil is disturbed, there can be dirt and sediment carried away by rain and snow, taking it to waterways and polluting it in the process.
It’s important to know that the law requires you to take precautions to avoid such water contamination through sediment control measures. This is where your contractor can help you make sure that such precautions are being met.
Oil Tank Disposal
If you are removing an above-ground oil tank, the process can become fairly complex. You need to hire a pro that knows all about oil tanks and the disposal process that goes with them. While regulations regarding oil tank disposal are different in every state, there are most likely forms, permits, and inspections that need to happen. Do what you need to in order to get your oil tank emptied, cleaned, and removed properly to avoid leaky oil tanks making a mess and resulting in contaminated groundwater, polluted soil, and more. What might seem to be a simple project can lead to something much more involved and costly if not handled properly.
Salvage, Reuse, and Recycle
If you are undergoing a house demolition, New Jersey homeowners should consider exactly what they will be removing. Can you salvage, reuse, or recycle anything? It may take more time, but these small choices can add up to how the environment is impacted.
Things like appliances, cabinets, wood, stone, and more can all be taken from a home and reused in amazing ways in a rebuild or in other homes or buildings. Every bit that is reused or recycled is a little bit that is kept out of the landfill.
Choose Mikula Contracting for Your Demolition Project
Mikula Contracting knows how important your New Jersey house demolition is to you. However, we also know what a negative environmental impact it can have if it’s not carried out in the right way. Our team is experienced in demolition and works hard to obtain the required inspections, permits, and more, so you don’t have to think about it.
Mikula Contracting has you covered if you are getting ready for a house demolition, small or large. Learn about what we can do for your home. Call us at 973-772-1684 to learn about the demolition services our team provides in the New Jersey area.
Pool Excavations Effect on the Environment
If you are ready to get rid of an old pool in your backyard that costs you more money than it's worth, pool excavations But what does an extensive project like this entail? While it is essential to remove your inground pool the right way, you must also consider the implications that pool removal can have on the environment.
Anytime you excavate a large structure from your property, there is waste involved. Therefore, teaming up with the right excavation team for your backyard pool project is vital to getting the task done responsibly.
Swimming Pool Excavation: Step by Step
The construction process for removing pools and spas requires heavy equipment and a team of experienced pool excavators. You can’t just start digging and remove the pool chunk by chunk. Instead, there is a process to ensure the inground pool is removed correctly to set your land up for future projects.
1. Drain the Pool
Did you know that chlorinated water can damage your trees and plants? Before draining your pool, make sure that you do not chlorinate your pool for at least a week. Then you can test the water and wait for it to reach a PH level between 7 and 8.
If you happen to drain your pool without checking the water, you’ll need to flush out the chlorinated water by irrigating your yard. Take care of the vegetation in your yard by always checking the water before draining.
2. Remove the Pool Decking Materials
Make a plan about how you are going to remove your pool and pool decking. Whether you have a concrete or wooden pool deck, it probably won’t remain in place once the swimming pool has been removed.
Take apart the deck and haul it out to make room for the dig process. Physically lay out where the machinery can find access to your old pool. Then your pool excavation will be ready for the next step.
3. Make Way for Heavy Equipment
You may need to remove a few fence panels to prepare a path for large excavation equipment, such as a dump truck and a mini excavator. However, these temporary changes to your yard will be worth it when you no longer have to pay for pool maintenance.
Also, be prepared for the heavy machinery to damage your landscaping, including grass and plants that may be in the pathway from the street to your pool. You may have to replace the landscaping in these areas, so plan for the time and cost that may be required.
4. Remove the Pool Materials
If you have a fiberglass pool, the materials are no use to anyone besides pool contractors. They may be able to use some of the materials in their next pool building project. Either way, trusted pool excavators will know the best way to dispose of your pool materials with the least impact on the environment.
The last thing you want to do is contribute waste as large as a swimming pool to the landfill. Instead, talk with your pool excavators to find out their plans for your old pool materials.
5. Backfill the Hole
Now that you have a massive hole in your yard, what’s next? First, be careful to keep kids and adults away from the hole. It is not a safe place to play. Safety fencing is required and used around large holes in the ground. But people should still keep a safe distance as a precaution. The wood forms placed to support the hole from falling may be removed at any time during the process of preparing the land, creating a situation both dangerous and unpredictable.
Next, it’s time to fill the hole. The first step is to backfill the hole with backfill dirt. This inexpensive dirt offers a good consistency for filling a hole in your backyard. Pool excavations require compacting the earth so that the hole doesn’t sink in the future.
6. Prepare the Land for What’s Next
After the hole is backfilled, you must place topsoil on the top layer to ensure that grass and plants will grow in the space that was once occupied by a swimming pool. Contribute to the health of your property by bringing in nutrient-rich soil.
If you have plans to pour a patio or sports court on the area that was once your swimming pool, you will not need topsoil. Preserve any part of the pool deck that may evolve into your outdoor patio. Minimizing waste is a must during a pool removal project.
When you think about all the steps that pool excavations require, there are many opportunities for missteps along the way that could widely impact the environment. Hire pool excavators who are environmentally conscious and will lay out the implications that the project may have on the environment.
Complete pool excavations are worth the cost, so your property can be free of any sign that a pool existed. Also, if you decide to install a new swimming pool down the road, you will have the freedom to do so without digging up an old, covered-up inground pool.
Hire Professional Contractors For Your Pool Excavation Project
Pool excavations can be an overwhelming undertaking. You want to get it done right the first time. Hire our trusted Mikula Contracting as your pool excavators to tackle the project in the least amount of time. We will have the equipment and know-how to dispose of the materials in a way that is consistent with preserving the environment. Contact us today to get started.