A Guide to Excavation Cost For A New Home
A Guide to Excavation Cost For New A Home
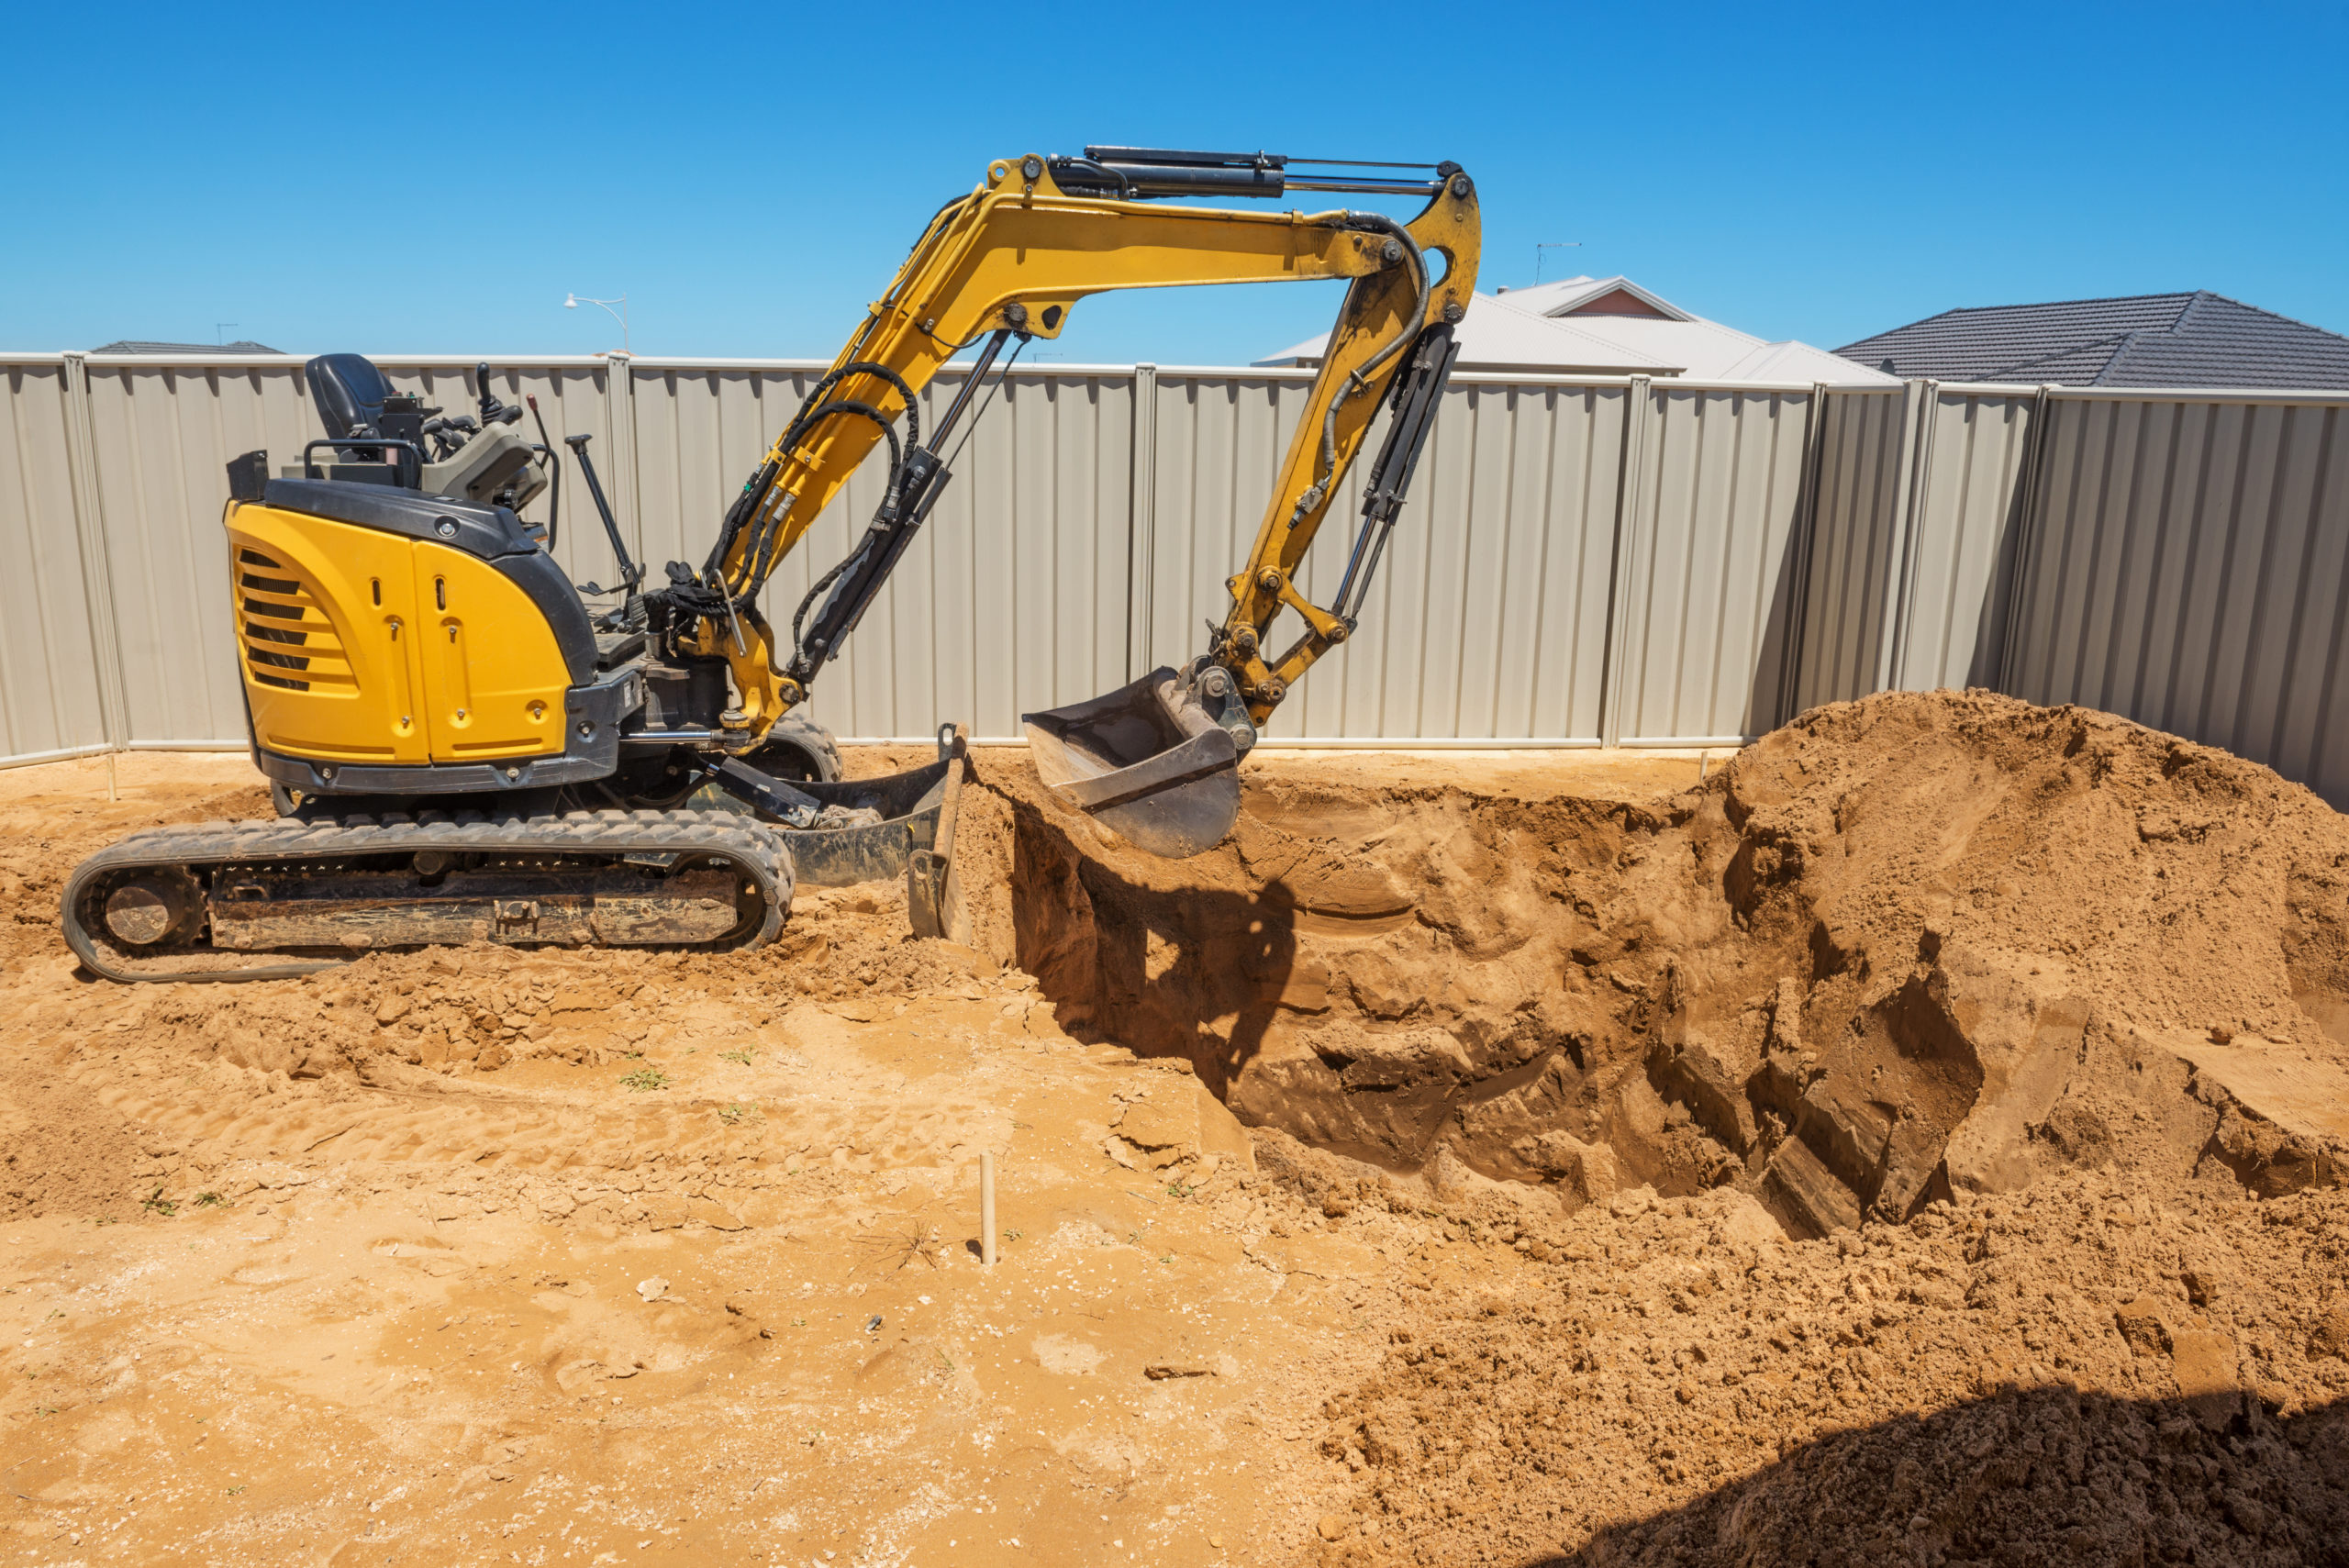
You have recently bought a new piece of property and are ready to get building your dream home. The excavation cost for a new home is one of the first things to consider when planning the project, because, it is important to remember that every step of the project needs to be done properly, and that starts with the ground.
Excavation is vital for laying the brand new house’s foundation, and it is an important step in installing all of the underground piping. It also ensures that the land is safe to work upon.
Excavation involves removing all existing vegetation, rocks, and debris from the land to create a level building site. The excavation may also include preparing for gardening or landscaping, improving the view, or increasing fire safety. The land is cleared and leveled or regraded. The cost of the land clearing depends on the size of the lot, the necessary machinery, the amount and density of vegetation, and the labor required.
One of the first steps when building a new home is surveying the land. Look at the full property, identify which trees and greenery will stay. You may not want to clear the land entirely. Mature trees provide much-needed shade for the yard and keep utility costs down inside the home.
Another thing you want to consider as you are planning your excavation is the layout of your driveway in relation to your new home. You may also want to take into consideration additional structures such as driveways, sheds, or playsets.
If you want to build a pool, that will also require additional excavation. Whether below ground or above ground, pool planning has a lot of excavation considerations. You may even want to think about grading to allow for changing depth in the pool.
Once you have made those decisions, measure out the piece of land that will need new construction excavation.
Excavation costs for a new home can vary based on the type of land you are excavating. The primary factor is just how much dirt needs to be moved. Typically, heavy machinery for removing large quantities of soil is required. Oftentimes the dirt can be used in other areas on the property.
Unexpected water under the soil level, excessive clay, or rocky formations that hinder digging and removal could all increase project costs.
Another factor to consider for new home excavation is whether or not you want a basement. Basement excavation involves digging out a foundation for a house with enough room for a basement versus just a standard foundation. This is useful if you want to use the extra space for another level or at least another room in your home.
DIY vs. Hiring a Professional
Many people think they can handle excavation projects themselves. Equipment for digging is usually available for rental. Excavation can seem exciting. Getting to operate heavy machinery can be appealing, but the excavation process is actually quite intricate and detailed.
When you are making big changes to your land, you must apply for the proper permits to ensure that the excavation process will be done safely. Often the permit process can be difficult to navigate.
There are different types of equipment that are needed for different aspects of the job, such as:
- A backhoe
- A skid steer
- A laser level
- An excavator
Most large pieces of equipment take time to figure out how to use. It takes even longer to learn how to use them correctly and efficiently. Some really large pieces of equipment may require special credentials or training to use. In this case, it may be best to bring in a professional.
Another factor to keep in mind when debating whether or not to do a project yourself is not just the cost of the project, but the cost of your own time. How much is your time worth? Are there more valuable ways you can use your time in comparison to hiring a professional?
It may seem more expensive to hire someone initially. However, they will probably get the job done much faster than you would by doing it yourself. Additionally, it is often cheaper to have someone do the job right the first time. You could end up making mistakes that are very costly to repair.
Is it Wise to Do it Yourself?
You might feel like you can handle your property’s excavation project yourself, but with so much room for error, it is strongly advised to hire professionals who can ensure quality service, safety, and certified experience.
People who choose to forego the excavation process or do not do it properly often suffer the consequences later. These consequences can include the foundation sinking and your home shifting with different ground conditions. To avoid these disastrous possibilities, ensure you have the land properly and professionally excavated.
Professionals who are certified to operate heavy machinery and are trained in excavation work often have safety certifications that are not available to members of the public. They also have training and experience in identifying potential issues before they become problematic and expensive.
One example is that someone who has a lot of experience working with different types of soil can identify inconsistencies and issues that could indicate contamination. Soil that is contaminated with toxins can have major implications for your health, especially if you are building your forever home.
Soil contamination occurs when toxins get mixed with the natural compounds of the soil. These toxins can come from chemicals or other organic compounds. They could also be a naturally occurring toxin due to certain types of heavy metals in the ground. Contamination can come from many places including:
- Improper waste disposal
- Failure of a septic system
- Livestock manure runoff
- Farming chemicals
- Nearby industrial waste or emissions
- Failing underground oil tanks
If you have soil contamination, you will want to have a professional on-site who knows about the different strategies for soil remediation.
Work with Excavation Professionals
There are plenty of projects that are great to do yourself, however, excavation is one that is best left to the professionals. Contact us at Mikula to learn about our residential excavation services.
What is the Average Cost of an Excavation Project?
What is the Average Cost of an Excavation Project?
Excavation projects come in different shapes and sizes, and there are many factors that go into the average excavation cost of a project.
The average excavation cost for a commercial excavation will depend on the type of project, the extent of the project, and if it is a residential or commercial property. Whether your company is going through a major development or expansion or if an environmental cleanup is necessary, there are various factors that go into determining cost.
Certain projects are similar for commercial and residential projects, like pipe repair or drainage issues.
If the water line to your building or home stopped working, it could require excavation services to repair it. This ensures that workers can access the affected line without causing further damage.
Perhaps the water line burst and has caused excess water. This can damage your foundation and create health and safety issues.
With so many plumbing, electrical, and septic systems located underground, excavation services are usually necessary to fix problems in these areas.
You may also need excavation services like:
- trench shoring
- underground utility installation
- oil tank removal
The average excavation cost for residential projects is typically less than a commercial project. However, the cost breakdown is similar.
The Average Cost of an Excavation Project
As mentioned above, there are several factors that can affect excavation costs. With that, it is hard to determine the exact cost without getting a quote directly from an experienced residential and commercial excavation company. However, typically, the average cost ranges from $50 to $200 per cubic yard. However, again, the average cost can vary depending on other factors.
Breakdown of Costs
The type of excavation is going to determine the cost factors, but some costs are a given no matter the type of project.
Permits are a standard cost. Permits are generally required before undertaking an excavation project that could disturb the surrounding environment. Most excavation projects require permits from the city or county to ensure the project is being completed safely and up to standard. Part of the permit cost may also include a site survey to ensure there are not any electrical or plumbing lines that will be impacted by the project.
The excavation of the soil is a standard cost usually per cubic foot or cubic yard. If the project is removing topsoil, the cost may be calculated in square feet or square yards instead of cubic.
Depending on your project, you may have the same company doing grading and other prep work that may add money to the cost of the project, but save money by having the same company do the work. Additionally, the work might get done faster by not having multiple companies doing different parts of the project.
Soil remediation may be a cost or it may be the basis of your project. Soil remediation is the process of removing or replacing the soil to get rid of contamination. Soil contamination occurs when toxins get mixed with the natural compounds of the soil.
If you have had a spill or discovered improper waste flow on your property, you may need soil remediation to restore the safety of your land.
Some common soil remediation strategies include bioremediation, soil washing, and thermal desorption. Some of these soil remediation technologies are used to separate out the chemicals.
Sometimes it may be necessary to remove the contaminated soil and replace it with clean fill, especially if you do not have the time to deal with bioremediation.
Another standard cost for excavation is dirt removal. Both commercial and residential excavations have the option of reusing the dirt on-site. However, if there is not enough space for the amount of dirt being removed, or you cannot use all of it on your property, there is a cost for hauling and disposal.
There are a number of factors that can drive up costs that may be unexpected. Besides soil remediation for unexpected contamination, you may end up finding unexpected challenges during excavation.
Having to move large boulders, rocky soil, or running into potentially long-buried things can complicate your excavation project and increase the cost.
Prices Depending on Size of Project
Regardless of whether your project is commercial or residential, it is the size of the project that is going to determine the price. Clearing a large piece of land or digging deep into the ground is much more expensive than topsoil clearing and leveling for the installation of a pool.
Pool removal is a prime example of variables based on the size of the project.
- Before the removal of any inground pool, whether residential or commercial, it must be drained.
- The bottom of the pool, as well as the sides, will be broken up into small pieces and transported off your property. Properly disposing of the waste from the pool involves recycling concrete, treating the water for reuse or disposal, and disposing of or recycling other equipment connected to the pool.
- Of course, a commercial pool is going to have more water, more chemicals, and more waste than a residential pool. Either way, junk removal is a lengthy process and should be included in the cost of your pool removal.
- After that element is completed, you will have a hole in your property. A variable cost factor is how much backfill material is required to fill the hole. Compacting and leveling is a standard service that should not fluctuate too much based on size.
One cost factor that may be impacted by the size of the project is labor. Larger projects take longer and require more manpower on-site. This is another increase in the cost of the project.
Equipment is a variable factor. The larger the project, the more heavy equipment is needed. However, larger equipment is needed to complete the project quickly and safely. Larger equipment can also increase costs due to additional safety measures and the need to have specially trained operators.
When considering an excavation project, you may want to consider a company that has a wide range of expertise in different types of excavation and offers a variety of services so that you do not have to outsource multiple parts of your project.
Get multiple estimates from different companies. Ask for recommendations from local hardware and home improvement stores. Talk to your neighbors, check your local social media pages or groups, and access websites that provide ratings for companies.
Once you’ve selected a company, ask detailed questions about their experience and equipment. Verify their certifications, insurance, and licensure. Request a contract or agreement that specifies the work to be done and the rates to be charged. Make sure you have agreed upon estimates for unexpected hiccups in the project.
Get a Quote From an Experienced Excavation Company
At Mikula, we specialize in providing exceptional professional and residential excavation services. Call us today to get a quote for your project today.
Using Test Pits for Soil Exploration
Using Test Pits for Soil Exploration
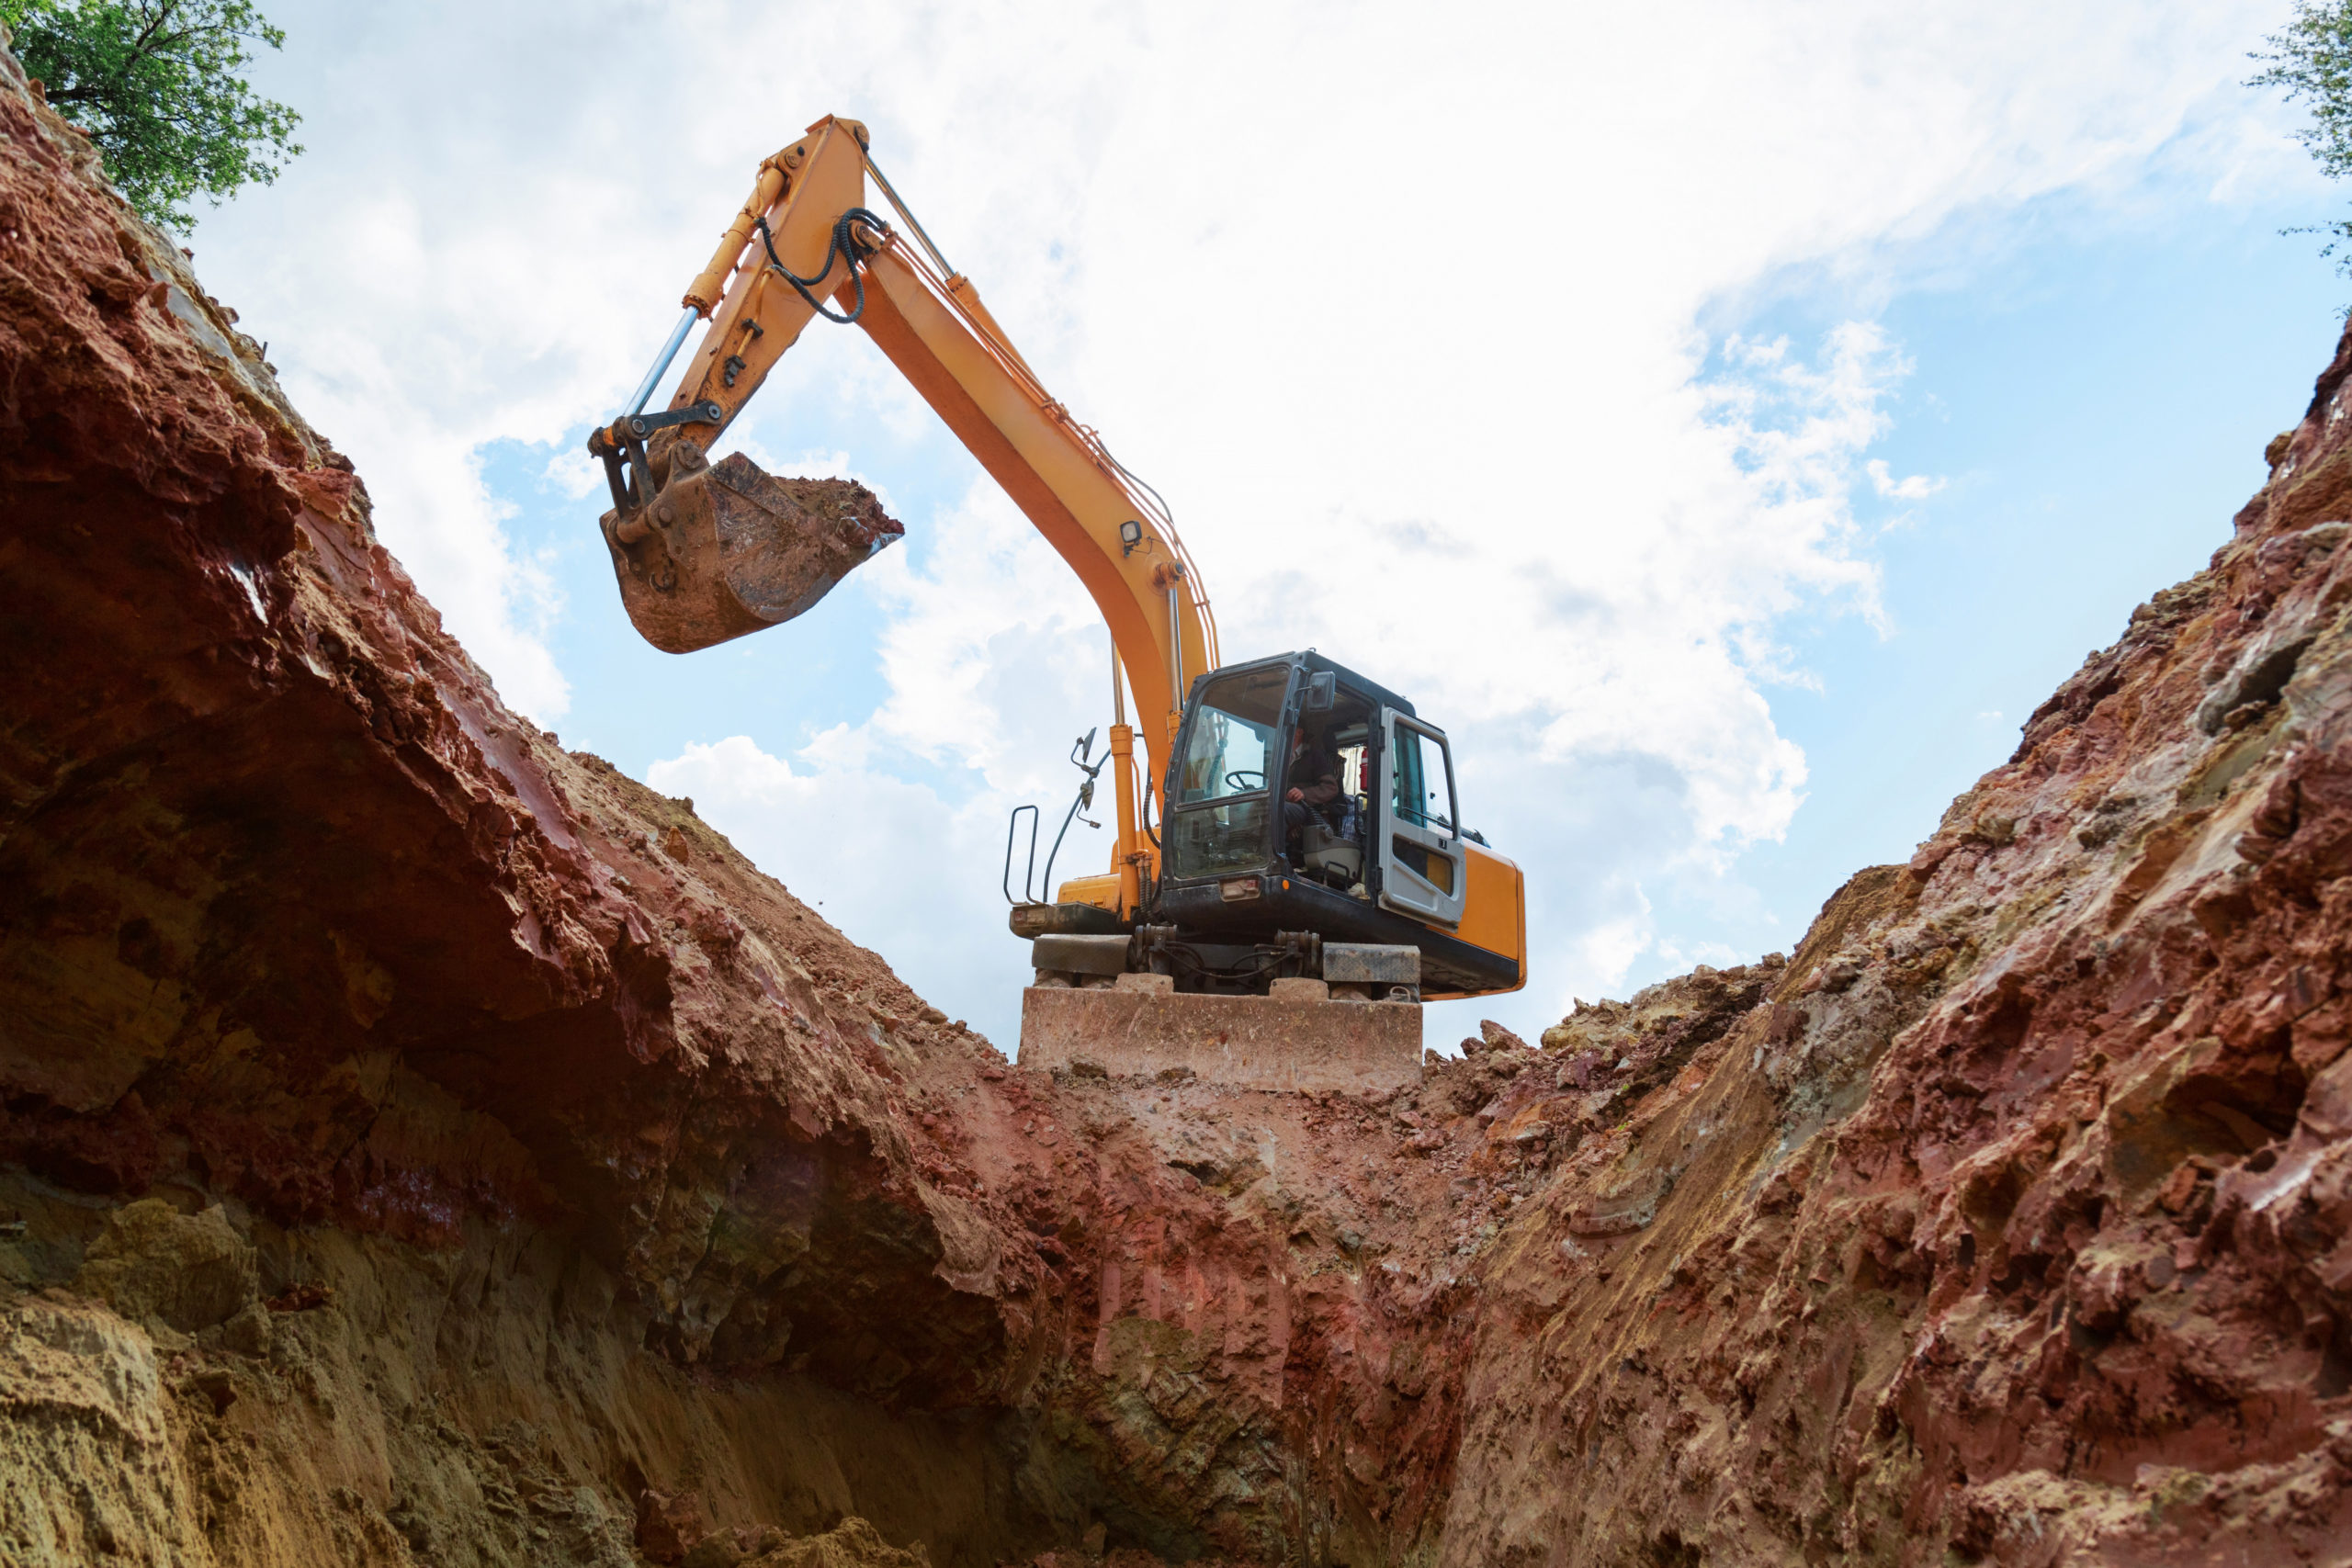
Surface exploration can provide you with many clues about the stability of the ground. However, it doesn’t provide you with the full picture. For that reason, many contractors and engineers will utilize test pits for soil exploration.
Just as the name would imply, a test pit is a hole dug into the ground that allows you to test the soil. They often aren’t very deep, but they provide great insight into the composition of the soil and its layers. Not to mention, a soil pit is one of the most affordable options for soil exploration.
That’s not all!
In this article, we’ll cover the purpose of soil testing so that you can better understand how a test pit is used. We also cover some of the different options for soil exploration methods so that you can compare them to test pits and trenches.
Purpose of Soil Exploration
Geotechnical engineers and contractors in New Jersey often want to explore the soil for safety reasons. They give you the opportunity to:
- Look for Soil Properties That Could Impact Construction: When you explore soil, it’s important to look for any soft matter, such as clay or sand. These materials create instability. You should also look for sandy loam soil as it exhibits great drainage properties.
- Determine Materials for Construction: More often than not, you won’t find the perfect soil composition in your test pit. That’s okay, however. There are many ways you can adjust the type of construction materials to fit your land’s soil. Soil exploration allows you to see which materials will work best and the extent of adaptations you will need to make.
- Locate and Check Groundwater Conditions: Groundwater can be a blessing when it’s in the right place and a curse when it’s in the wrong place. If you are building a home in an area with a high water table, you will have to be cautious of foundational issues and basement flooding. On the other hand, a water table can be great if you need to put in a well!
- Diagnose Cause of Existing Structural Failures: In some cases, soil exploration might be done after construction. If an existing structure shows signs of structural issues, including shifting or cracked foundation, you might need to examine the ground beneath it.
Soil Exploration Methods
When you are testing ground conditions, there are several factors you must consider. These factors can help you determine which tests to perform. They can also aid in making predictions about your soil and its stability. To make sure you get the most out of your soil tests, you should consider:
Excavated Test Pits
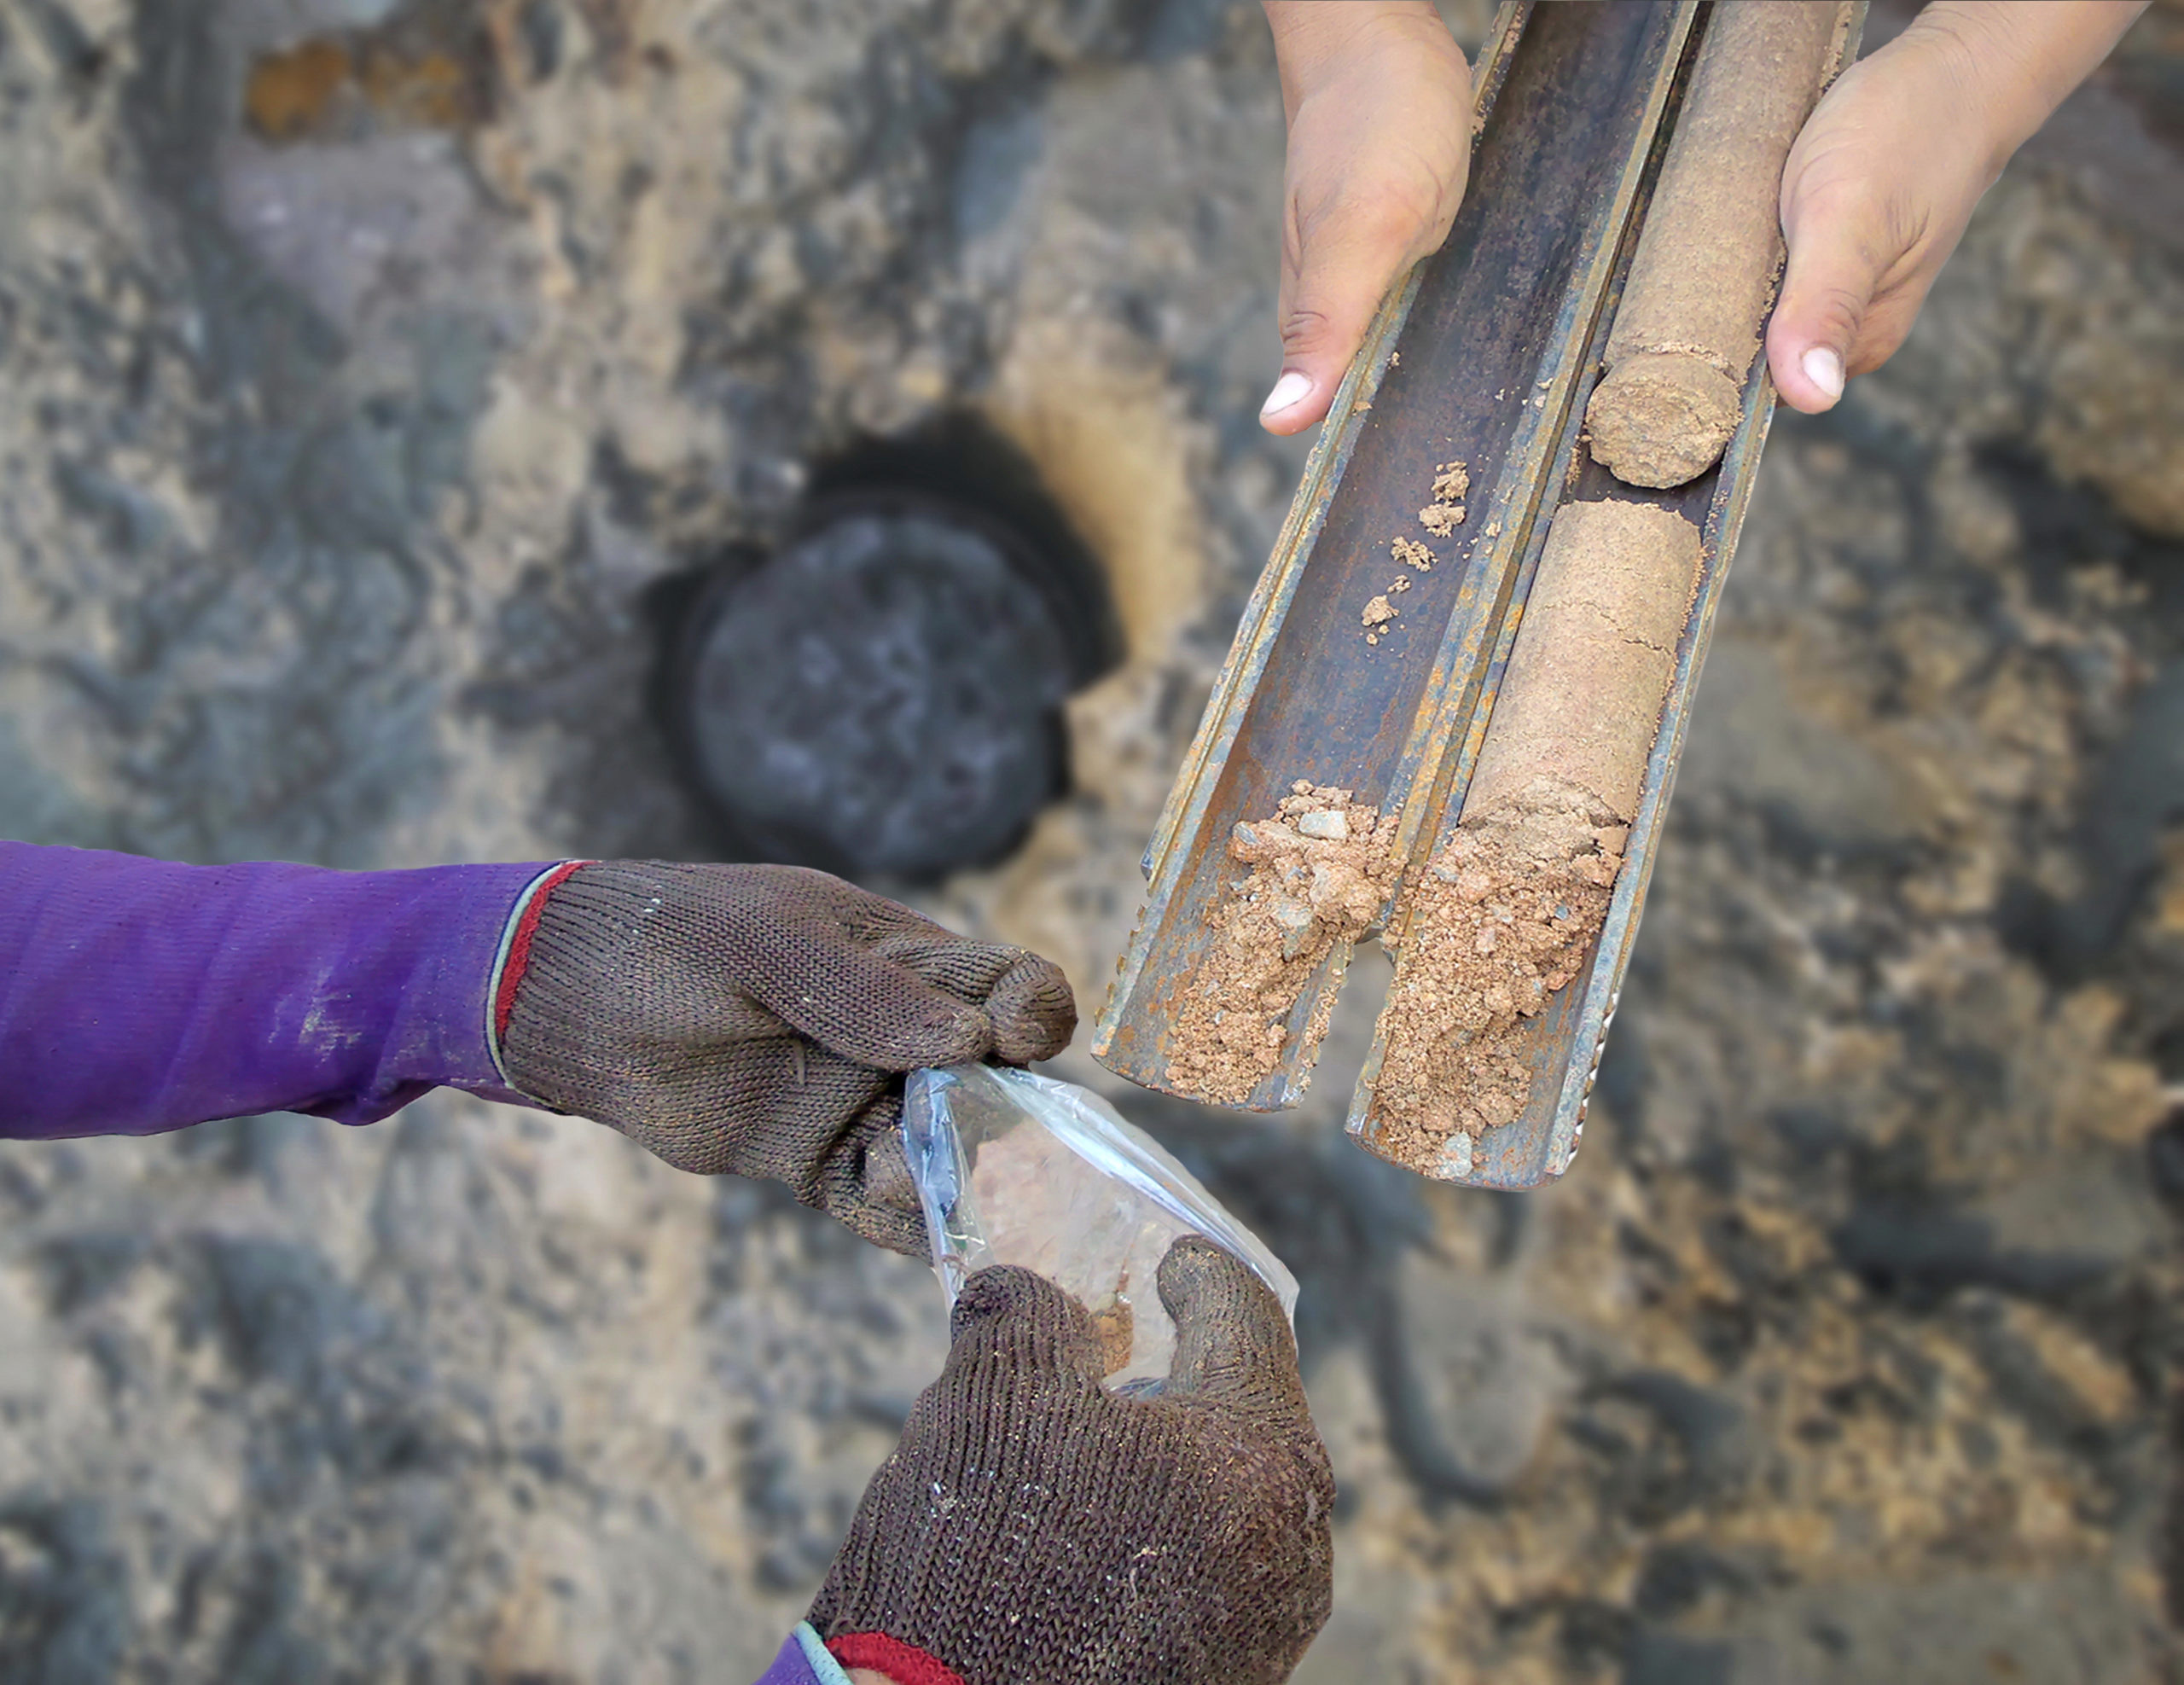
Test pits are one of the most common methods of soil exploration. They are perfect for looking at shallow depths as they are simple and fast to dig. You can do so manually with the help of local labor. When done by hand, a test pit is one of the most economical soil exploration methods. In some cases, you may prefer to hire contractors to use heavy equipment excavation tools.
We also find this method especially useful because it allows you to observe the soil profile up close. You can easily see the variation in each layer, and you can examine the different materials. This view can help you diagnose any fill material that may pose a threat to the stability of the ground.
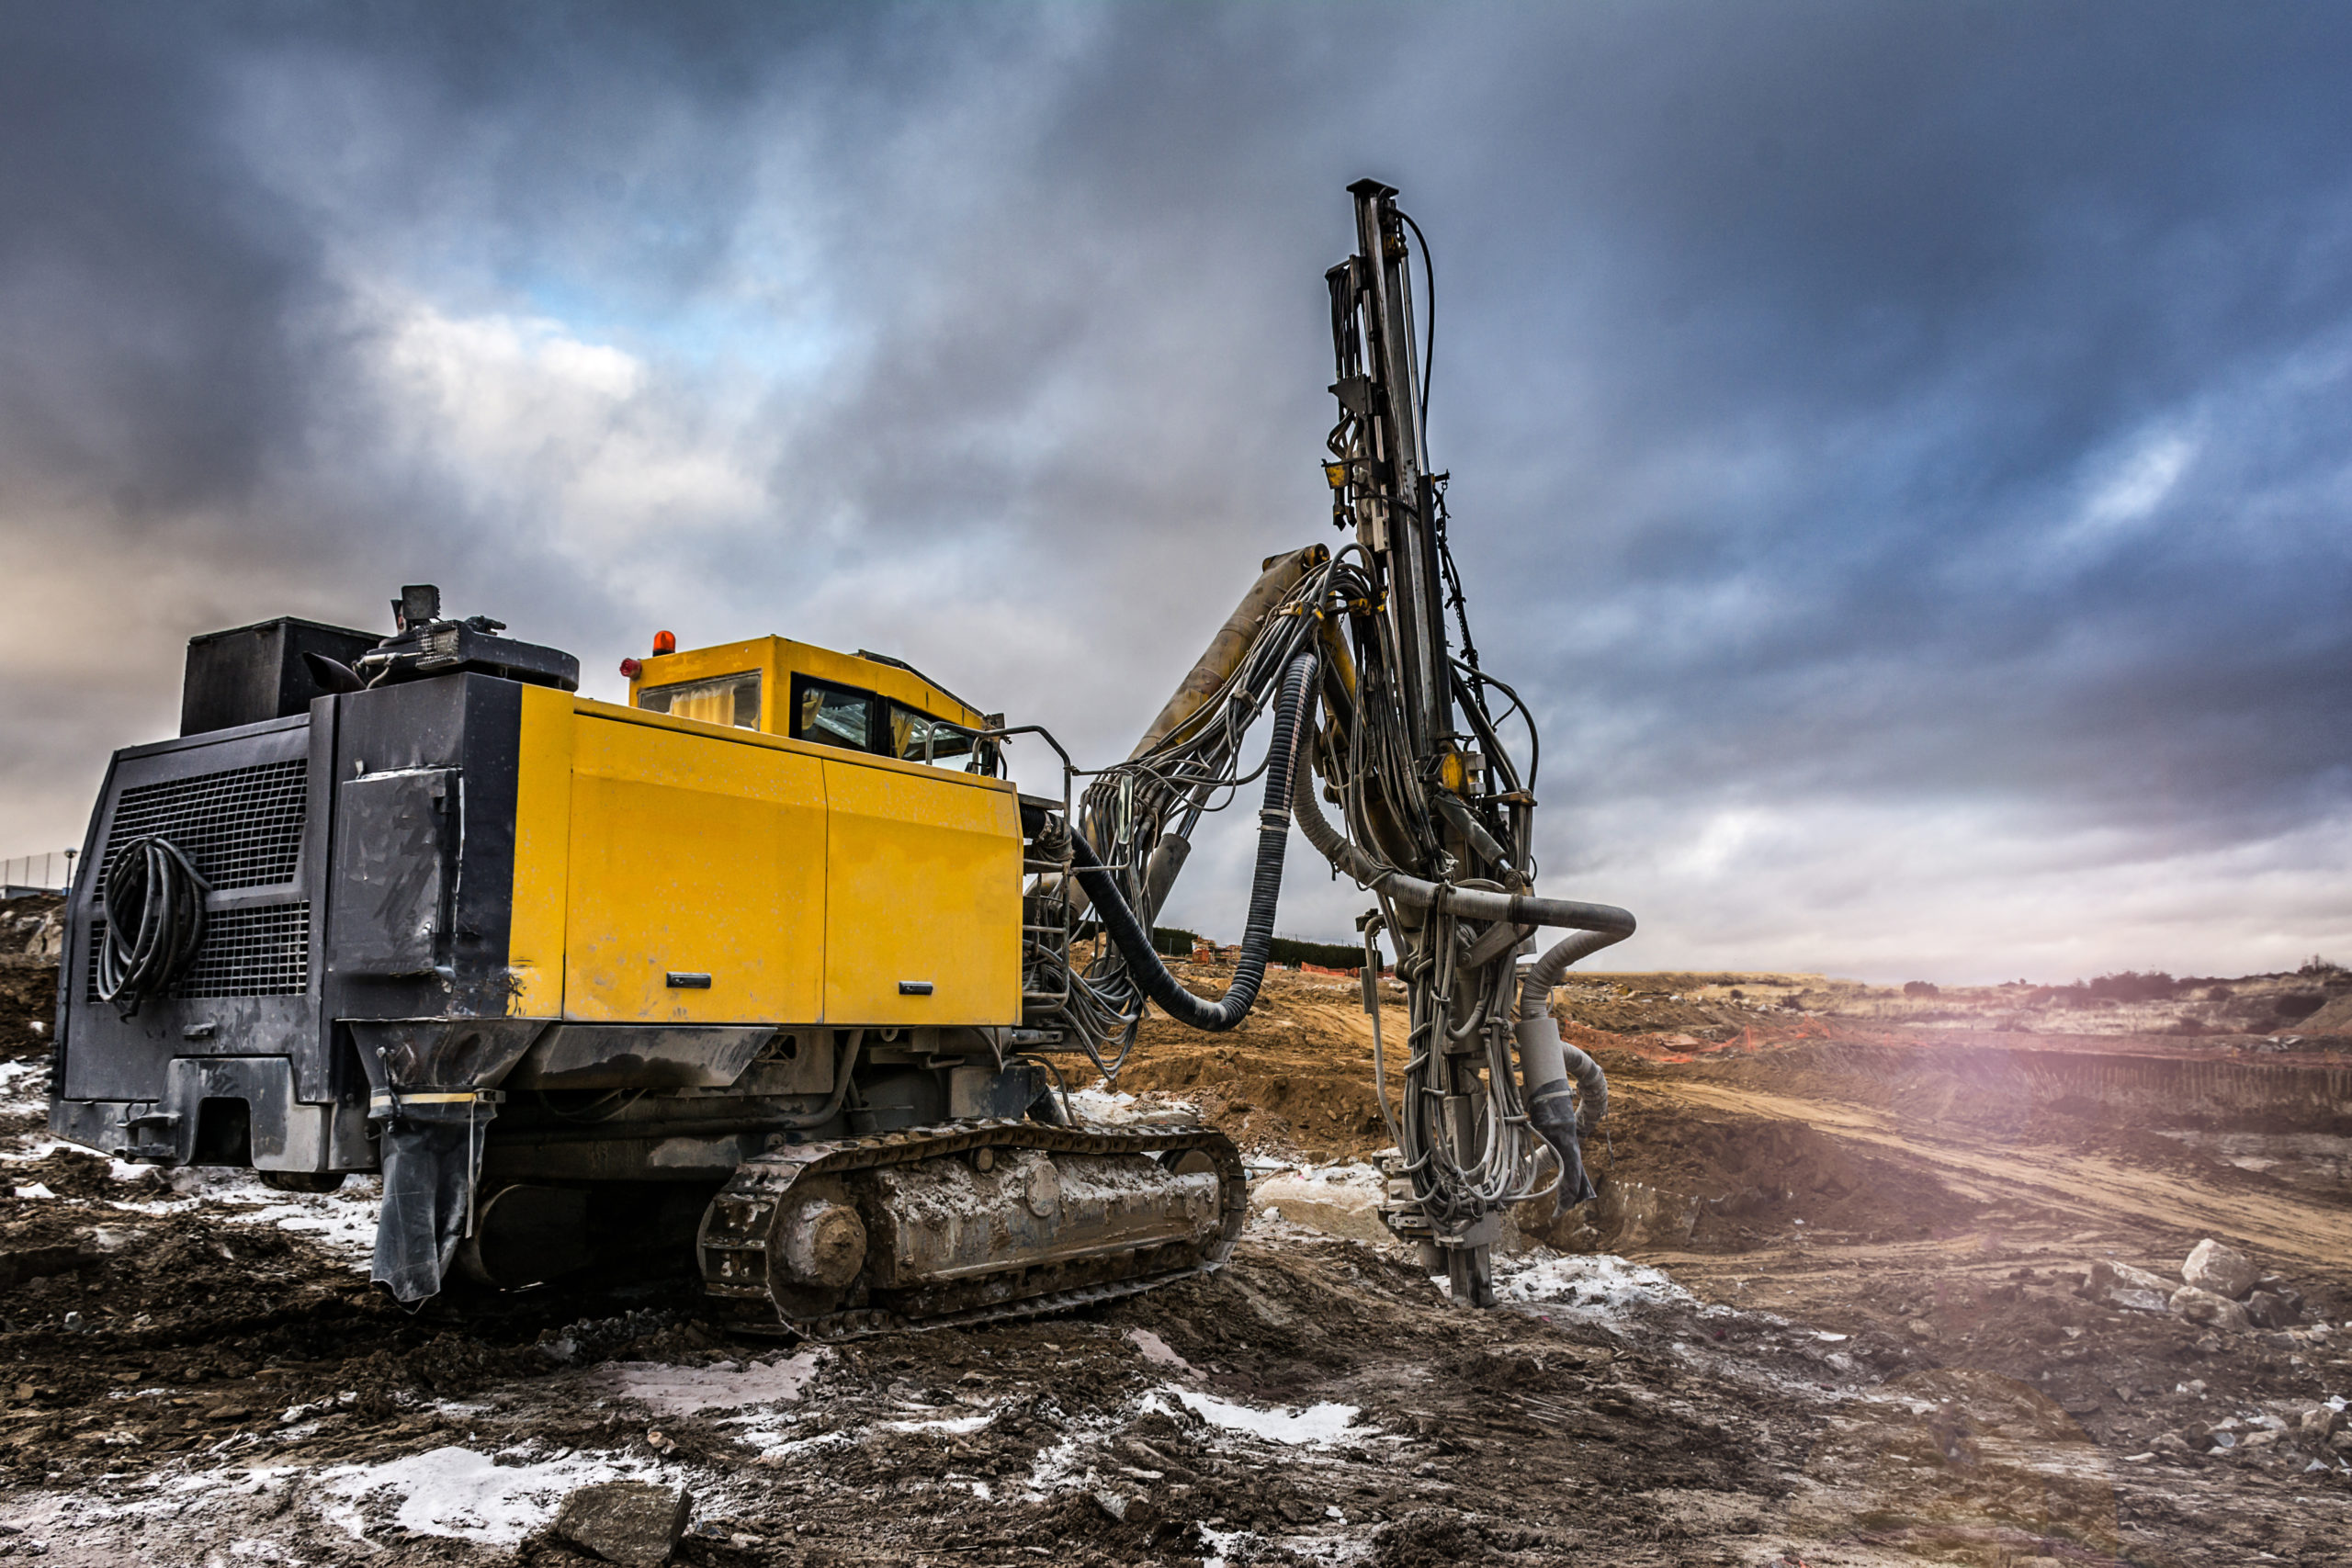
Auger Boring
If you need to reach more depth, auger boring is another option. It is a method used for shallow or deep collections. It is done by using an auger to drill into the soil. As it makes its way down into the ground, the auger fills with soil, and it brings the samples to the surface where soil experts can examine them.
While this method allows you to reach greater depths, it is more costly. Not to mention, the process causes a lot of disturbance while collecting the samples. That means that it can be challenging to see changes in the soil strata. Using this equipment can also be much more expensive than manually digging a pit.
Wash Boring
When dealing with softer materials like clay and sand, wash boring is the better option for soil exploration. The name comes from the jet stream of water sprayed through a hollow drilling rod. The fragments then separate from the water and collect in soil samplers attached to the bottom of the drill rod.
This quick and straightforward method is relatively inexpensive. It’s perfect for gathering undisturbed soil samplings. You can even use it in areas with limited accessibility. For example, it’s ideal for testing in swamps or on water.
Percussion Drilling
The percussion drilling method is also known as cable tool drilling. It is often used to dig wells. However, it is also a popular method for examining soil in areas with boulders and rocks. You can even locate cavities and weaknesses in the rocks by comparing drill rate changes. It’s important to keep in mind that the blows of the chisel in percussion drilling cause disturbances to the soil at the bottom.
Rotary Boring
Lastly, you can use rotary boring. It is one of the fastest methods. Despite its speed, it doesn’t disturb the soil as much as some of the other methods. Unfortunately, the cost and bulkiness of the equipment deter contractors and engineers from using it. The drill also doesn’t do well with soil that contains large pieces of gravel.
Use a Test Pit to Explore Soil at Your NJ Construction Site
If you would like assistance with digging a test pit or trench, Mikula is happy to help. Our contracting company has over 75 years of experience with excavation services. Therefore, you can count on our experts to dig a safe test pit for you and your geotechnical engineering crew.
To get started with your soil test pit excavation, give us a call. We are happy to schedule a consultation before we dig to discuss your soil testing needs. You can also reach out to our service representatives by submitting our online quote form.
How Much Does It Cost To Excavate Land?
How Much Does It Cost To Excavate Land?
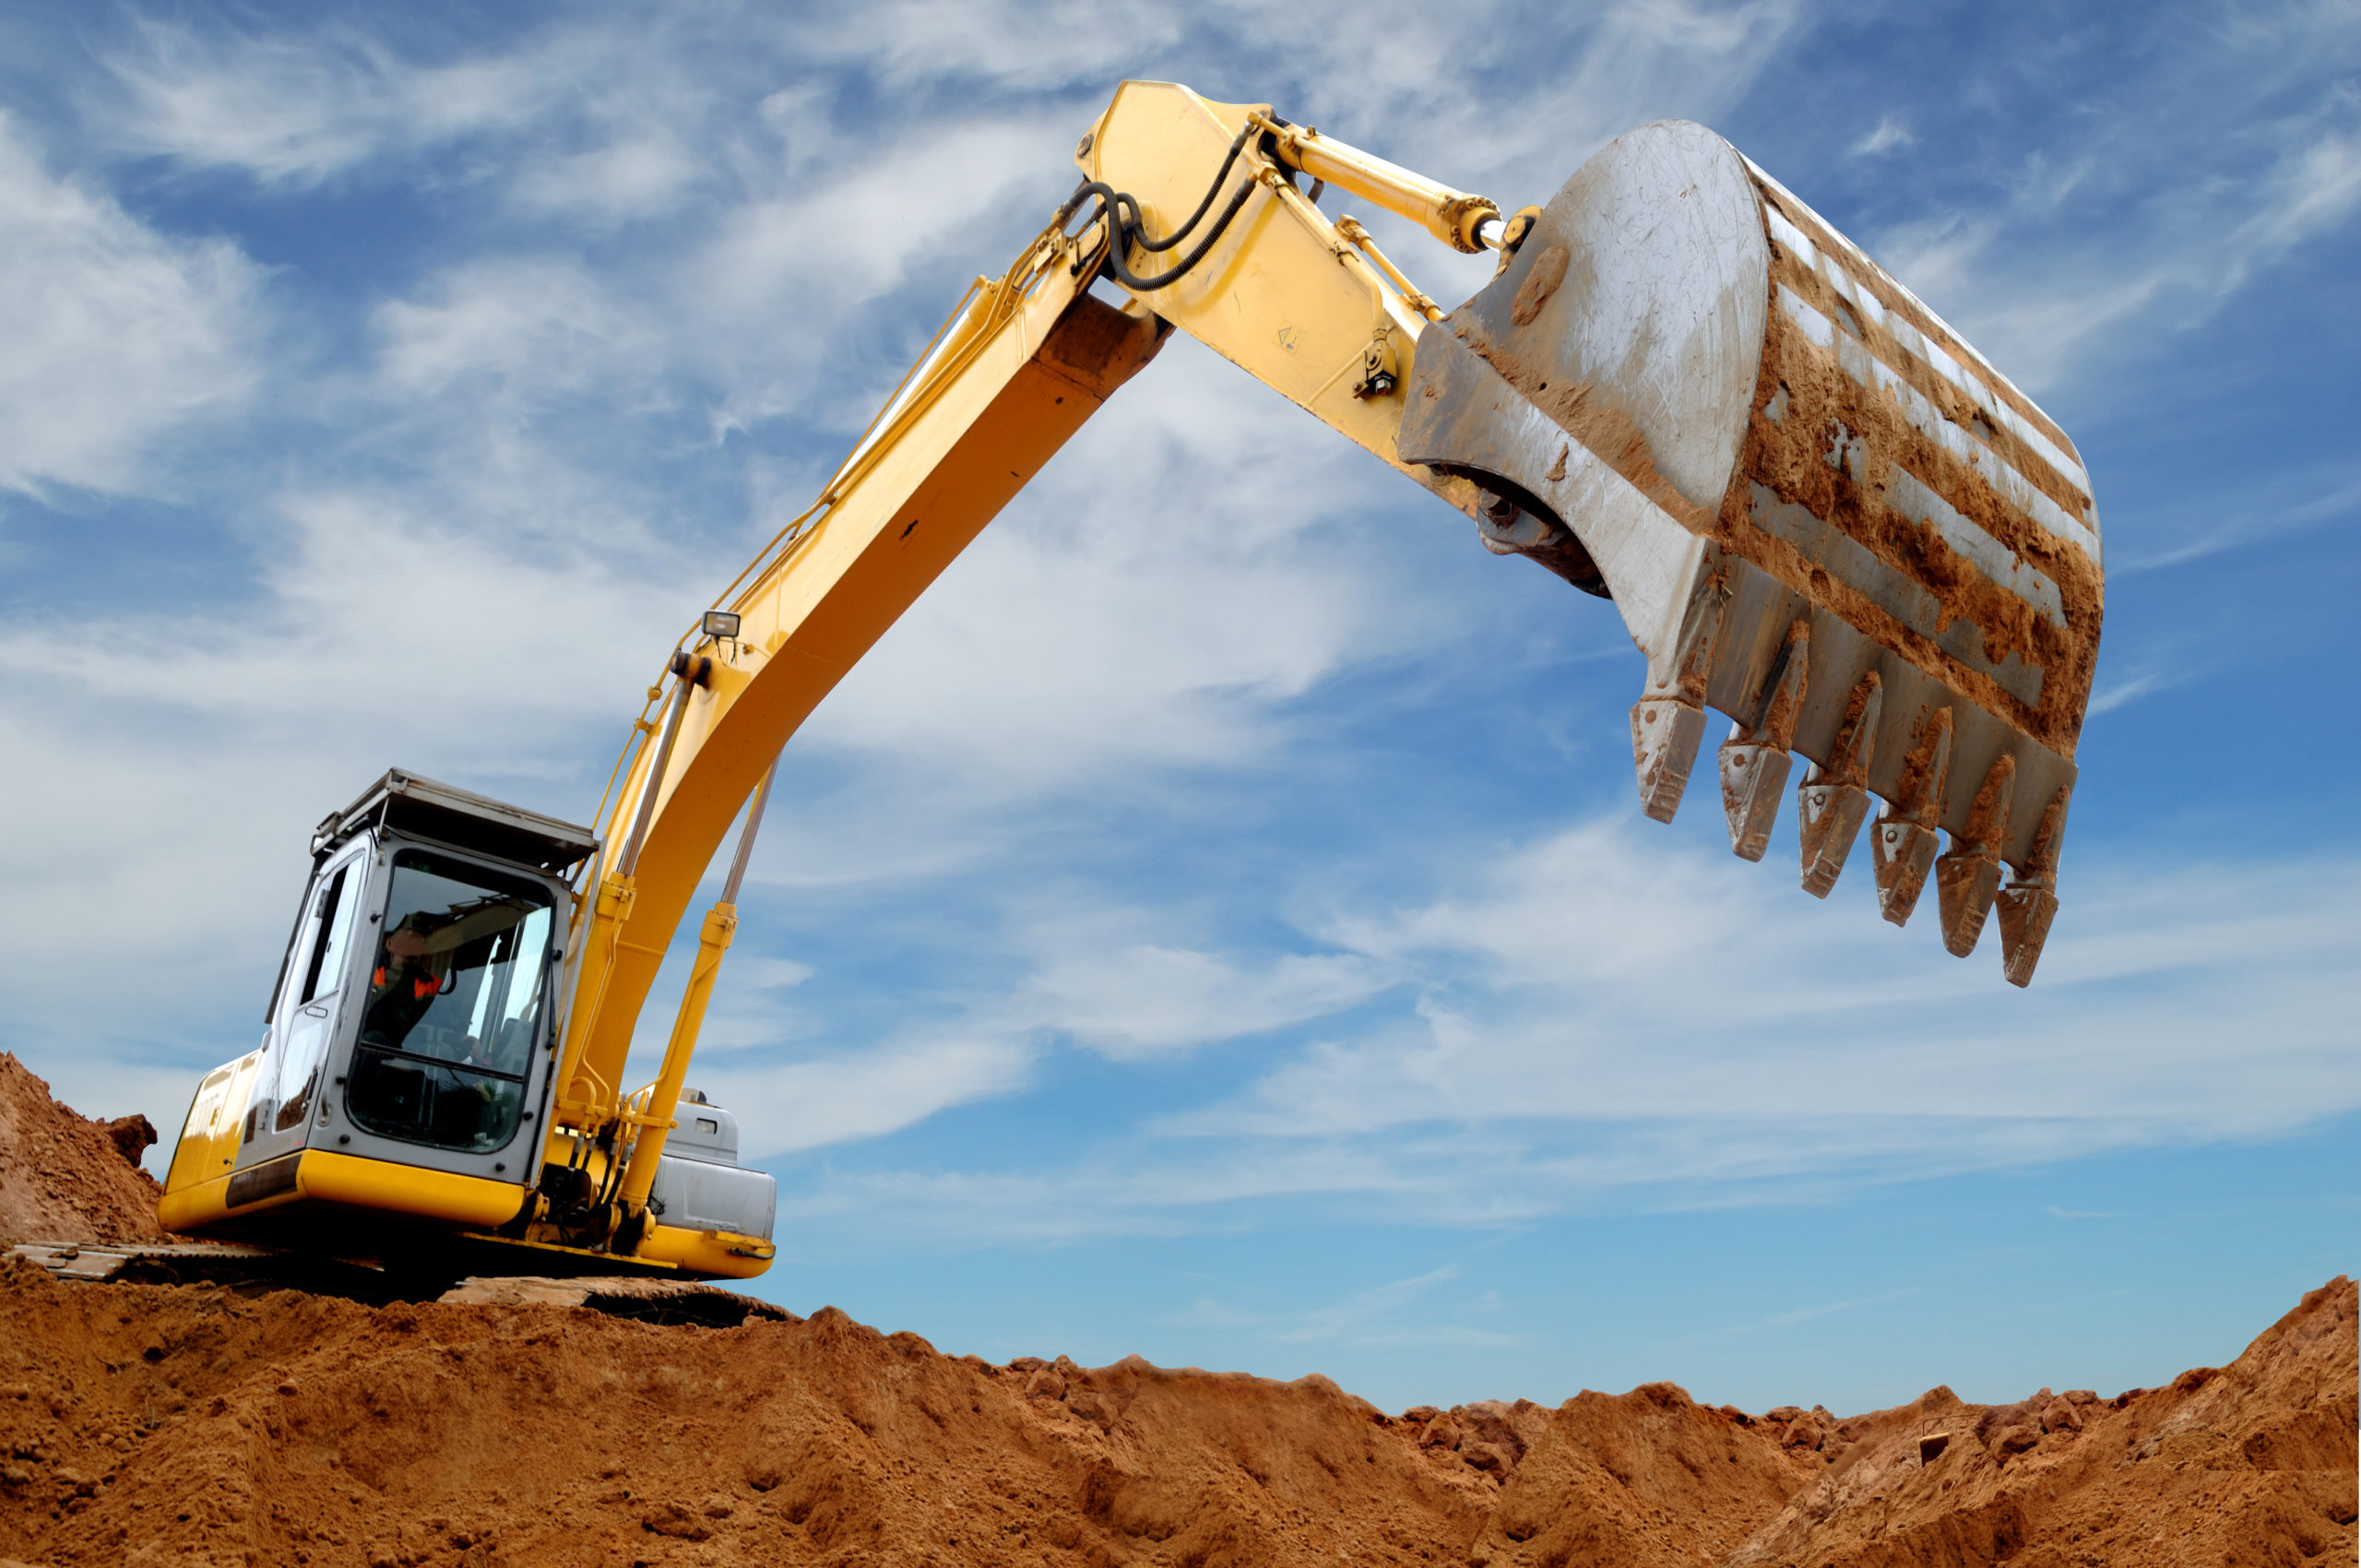
There are many different reasons that you may need land excavation done. Anything from simply digging a hole to see if you can find a leak in one of your underground pipes to larger projects that entail heavy machinery and a full team can be considered land excavation. Depending on the size of the project, you could end up paying a large amount of money for a project to get done.
If you have never had land excavated before, you may still be researching what a land excavation project entails and how much does it cost to excavate land?
We’ve got the answers you need so that you can make sure you’re getting the right work done for the right price.
Types of Excavation Projects
The cost of your land excavation is going to depend primarily on what type of excavation you need to be done. This guide is a great indicator for the scope of the project which will affect what types of machinery, price per square foot, and, ultimately, the total cost of your land excavation project.
One way that experts classify the different types of land excavation is by the types of materials that are being excavated. The main land materials that are commonly excavated are:
- Topsoil- Topsoil is the outermost layer of soil or dirt. This layer supports and includes vegetation, meaning that the material being excavated here is moister than other types of material. This is important to remove as quickly as possible, making it the first step in any land excavation project.
- Earth- Earth is classified as the layer underneath the topsoil. This is generally removed using a scarper but may include rock and boulder materials that require the use of a drill for removal.
- Muck- Muck is any earth material (topsoil or earth) that has a high concentration of water. As the name suggests, this includes things like mud and undesirable soil. Since it is so unstable, it’s often spread out over a larger area, allowing it to dry before it can be used for anything.
Here are a few of the most common types of excavation that both residential homes and commercial properties alike may need to be done at some point or another.
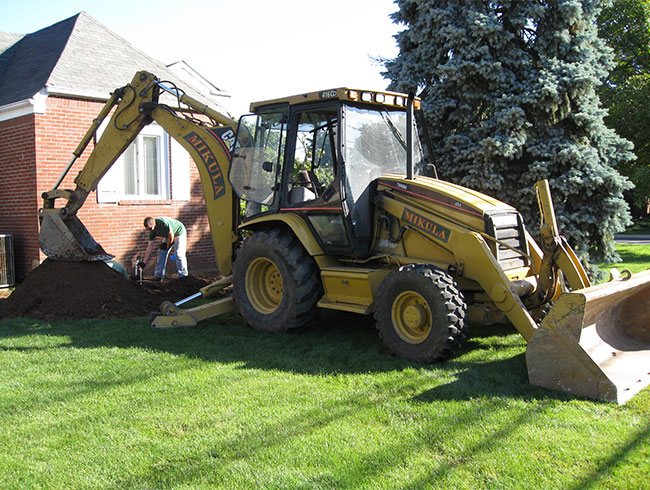
- Securing Foundation- This type of land excavation is necessary for any building, whether it be a home, a small business, or even a huge office building. If you’re building a new home, the most important part of it is the foundation. In order to build a solid foundation, a large amount of soil must be removed to make space for pouring concrete, ensuring a level surface for the rest of the construction.
- Drainage Solution- To avoid things like flooding that could cause damage, it’s recommended to have some sort of drainage solution that leads rainwater away from the property. In order to do this, however, land excavation is necessary to make way for a pipe or seepage pit installation.
- Pipe Damage- One of homeowners’ and businesses’ biggest fears when it comes to their home is a pipe leak or break. When this happens, it can lead to flooding and severe water damage to your property. If your pipes are damaged, you will need professional land excavation to get to those underground pipes so that they can be repaired.
- Environmental Cleansing- For a variety of reasons, the soil surrounding your business may become contaminated with things like sewage or improperly disposed waste. When this occurs, the soil must be removed to prevent the contaminated land from causing environmental or even health problems and also needs a team of general contractors to ensure the land is removed and disposed of properly.
As you can see, on top of the square footage and equipment used, issues like toxic materials and types of soil affect the overall cost of any particular land excavation project.
What also factors into total cost here is how the contractors or company you hire choose to charge for each project. It’s generally up to them, based on the scale of the project, cost of labor, and equipment used, to decide by what metric they will charge.
- In general, the hourly price of land excavation will run from $100-$180.
- If you’re being charged per cubic yard, your costs could be anywhere between $50 and $200.
- Yard grading typically starts at about $1,000 per project but could cost up to $6,000 and beyond.
- Equipment charges can cost from $100 to $150 per hour depending on how much heavy equipment is needed.
Of course, these charges also vary depending on the type of project that needs to be done. The price for something like a residential swimming pool excavation, for example, can vary greatly depending on whether your land is mostly soil or rock, making it a much larger investment for some than for others.
How to Know if You’re Being Overcharged
Keep in mind when asking yourself, "how much does it cost to excavate land" that the price of land excavation is not only dependent on the quality of the team - it is also dependent on the quality of land they are working with and the scope of the project.
Ultimately, the best way to know if you’re being overcharged is to compare the cost with other local top-rated contractors and read through each company’s reviews. You can always get multiple bids on your project and hire the contractor that seems like the best fit based on your research, their portfolio of work and quality of customer service.
Contact a Trusted Contractor for Your Land Excavation Project
At Mikula Contracting, we’ve successfully completed countless commercial and residential land excavations across New Jersey. When you work with our team, we’ll not only take care of all permits and inspections, but we’ll also make sure your excavation project is completed on time and within budget. Contact us for a quote today.
Why Are Test Pits For Soil Testing Important for Construction Projects?
Why Are Test Pits For Soil Testing Important for Construction Projects?
Whether you’re building a large retail shopping center or a home, soil testing should be one of the first steps you take. Site investigations help you better understand the soil on which your building will stand. If it happens to have a low bearing capacity, you could find yourself having several foundation and structure problems immediately or down the road.
Not only can soil determine potential safety hazards, but it can also raise awareness of financial risks. After all, you won’t want to invest money in building a house that could come crashing down one day. Even in less severe cases, you could find yourself constantly spending money to maintain the foundation.
When you hire a team of geotechnical engineers, they use test pits to examine the site’s soil closely. From there, they can take that information and determine many design aspects. In fact, your soil test can dictate:
- Building Feasibility
- The Type and Depth of Foundation
- The Type of Materials Used
- Height, Size, and Weight of Building
- Any Modifications or Improvements to Soil
That’s not the only reason that you should examine ground conditions before you build. A soil test can help you identify many potential problems. However, there are also many factors to consider when you look at your soil. We know it can be overwhelming to take in all of this information, so read on to learn more about the importance of using test pits for soil testing.
Find Potential Problems Before You Start
With the help of geotechnical engineers, you can diagnose complications before they even occur. Test pits provide valuable insight into issues that could cost you more money in the future. The following are just a few of the potential problems you can spot with a soil exam.
Soil Contamination
Unfortunately, oil spills, chemical leaks, and other events can lead to soil contamination. Not only can this impact the properties of the soil, but it can also be a danger. For example, homes that rely on wells for water shouldn’t be built in an area where the soil has been polluted, as it could be a sign of possible water contamination. Testing the ground can help you decide whether you want to go through with remediation or if it’s better to abandon the project site.
Water Table Location
You can also use test pit excavations to determine the water table location. The water table is underneath the soil layer. It is typically where you would find more compact soil. The water then fills in the gaps in this area to create the water table.
It’s important to understand that the water table can rise or lower depending on rainfall. Therefore, its location would impact how deep your foundation could go. If you build in the water table, foundation shifting and basement flooding can occur.
Underground Oil Tanks & Structures
Did you know that many homes used to heat their home with an underground oil tank? Sometimes these tanks were left behind, so it’s important to dig a test pit to locate these systems. A soil trench can also help you find filled-in underground pools or other structures that might impact your construction plans.
Groundwater Pooling
For solid construction, you need to avoid areas that get oversaturated. This could cause the soil to shift and sink, which could crack and damage your foundation. Along with structural issues, it can also lead to flooding. Fortunately, your soil test can help you uncover areas with poor drainage.
Landslide Potential
Site investigations help engineers determine landslide risk. This type of test is especially important if your construction site sits close to a mountain or hillside. While these sites might provide beautiful views, they could be dangerous for construction. Even if you are able to build the home, it could be hazardous to live there if landslides are likely.
Factors to Consider When Testing Ground Conditions in New Jersey
When you are testing ground conditions, there are several factors you must consider. These factors can help you determine which tests to perform. They can also help you make predictions when you add them to your findings. To make sure you get the most out of your soil tests, you should consider:
- The Project Type: Not all construction projects require the same testing. For example, if you are building a mine, the analysis would be much different from that of an amusement park site. The same could be said for comparing an apartment building site to a single-family home location.
- General Soil Classification: A quick preliminary test before digging trenches can tell you the general classification of the soil and rock. With this information, you can look at those soil properties and determine what type of further testing might be necessary.
- Groundwater Variation: As we mentioned, water tables can rise and lower. These changes can greatly impact the stability of the ground. Therefore, you should always keep groundwater variations in mind.
- Costs for Testing: If you are working with a limited pre-construction budget, you might not have the option to run every imaginable soil test. For that reason, you should prioritize the ones that would provide the most valuable information for your project.
- Variation in Soil: You should never expect that soil is uniform throughout one site, especially if it is large. Instead, it would help if you dug multiple test pits for soil testing to give a more accurate reading. Still, you should always keep in mind that things may be different in unexcavated areas.
Hire Experts to Dig a Test Pit for Your NJ Construction Site
If you would like to hire professionals to dig test pits for soil testing, you’ve come to the right place. At Mikula Contracting, we have plenty of experience with excavation for soil evaluations. Therefore, you can count on our contractors to carefully dig holes throughout your construction site. You can call our helpful service representatives to learn more about our excavation services, or you can submit our online form to request a free quote.

What is Contaminated Soil?
Contaminated soil is soil infused with a chemical substance that is not good for the environment and not good for the growth of plants and vegetation. Oftentimes, it is an accident to spill the substance into the soil. Other times, it is an effect of using pesticides or other substances used to kill weeds. Unfortunately, people who live near contaminated soil suffer dire consequences. Read on to learn more.
What is considered contaminated soil? Any soil that is tested and comes up with harmful chemicals or substances inside is considered contaminated. But that doesn’t mean the soil is worthless. You can look into soil remediation services to clear out the toxicities from the soil and make it clean again.
If the soil contamination has something to do with an oil spill, then environmental cleanup services are required. An oil spill can spread quickly, hurting plants and animals, seeping into the groundwater used for irrigation, and showing up on surface waters in oceans and lakes.
While we look at what is considered contaminated soil in the United States, we can start with the causes of soil contamination and how it can be prevented.
Causes of Soil Contamination
The causes of soil contamination come from hydrocarbons PAHS, which are a class of chemicals found in crude oils and gasoline. These hazardous wastes seep into the natural soil and cause contamination that doesn’t just flush out with the rain. Therefore, soil remediation is required to make the soil uncontaminated and clean.
Pesticides
What is considered contaminated soil? Pesticides used for growing crops are considered a contaminant to the soil. This is because large amounts of pesticides seep into the soil and make it contaminated. In many countries, the use of pesticides is highly regulated.
Pesticides are used to deter pests from ruining the crops while growing. While the pesticides keep the bugs away, they also create toxicity to the soil in large amounts. It is vital to limit pesticides so that the soil can be used to grow more crops.
Herbicides
Herbicides are also used to aid in the growth of crops and keep weeds from destroying the growth of vegetation. Again, the amount of herbicides used is vital to keep under control. What is considered contaminated soil? Large amounts of herbicides will lead to contaminated soil.
Improper Disposal of Waste
Another way that soil can get contaminated is when hazardous materials are poured into the soil by mistake or illegally. The contaminated sites cause detrimental effects to the environment and the people who live nearby.
It is important to look out for signs of improper disposal and report it if you see any illegal activity surrounding the disposal of oil or gasoline. If you have oil you need to discard, you can take it to any mechanic shop or recycling center, and they will take it for you. Oil should never go out in the garbage can, even if it is in an airtight container.
Health Effects
The problem with hydrocarbons getting into the soil doesn’t only lie with plant growth. Here are other ways improper disposal and contaminated soil are a risk to human health:
- Contaminated Drinking Water: An oil spill can get into the pipes and come out in the drinking water. If your drinking water has an oil sheen to it, do not drink it. Get it tested immediately to find out if your drinking water is dirty from polluted soil.
- Toxic Fumes: If hydrocarbons are in your soil, you may be breathing in toxic fumes inside the house—oil and gas and strong contaminants that let off a poisonous gas as well. Be aware of these smells, and do not ignore the fragrance of oil or gas inside your home. Instead, investigate and find out what is causing the problem. What is considered contaminated soil? You may find out that your soil is contaminated by tracing the cause of a toxic smell.
Health problems can occur when humans ingest or breathe in chemicals like oil or gasoline. In addition, when the spill is in the soil, it is likely to seep into a place where humans will be affected by the contaminated lands. What is considered contaminated soil? Any soil that is infused with industrial wastes is deemed to be contaminated and a threat to human health.
Ecosystem Effects
Clean soil is essential for keeping a healthy and robust ecosystem. The last thing we want is the spread of contaminated soil, leading to health problems and dirty water, plants, and food sources.
- Contaminated Ground Water: As the oil leak spreads through the soil, it can seep down into the groundwater. This water is used for irrigation and should not be poisoned by oil. However, contaminated groundwater could spread the contaminant around the community.
- Spread of Contaminated Soil: If the oil spill is on your property, it’s important to take care of it right away. Oil spreads through the soil and can go into to your neighbor’s property and be a cause for litigation.
- Damage to Animals: Contaminated soil also has an effect on animals in the surrounding areas. They also rely on clean water and healthy vegetation to live and thrive. Animals that live in water that is contaminated by oil are covered in the sticky substance and get sick and die.
Contaminated soil has significant effects on the ecosystem. When you learn of industrial activity that leads to soil contamination, you must take quick action to remediate the problem. No matter the type of contamination, clean soil is vital to our ecosystem.
You can do your part by reporting any suspicious activity surrounding hydrocarbon disposal. Also, be sure not to drop your oil into the trash can and hope no one notices. This has severe consequences and can result in fines and punishment. If you don’t know where to dispose of your oil, contact your local recycling center to find the proper place to dispose of hazardous materials.
Soil Remediation Solutions in NJ
At Mikula Contracting, we can work with our trusted environmental firms to identify what is considered contaminated soil and help you resolve the issue. Our services include test pit excavation and our environment firm partners excel at soil remediation. Let our team help you with your soil remediation project today.
Our family-owned business has been serving members of the New Jersey community for over 75 years now. The combined experience in our team amounts to more than 200 years. We have seen it all and learned from our experiences. You will get the best in quality of work and customer service when you choose Mikula Contracting.

What is Environmental Remediation?
What is Environmental Remediation?
Have you recently purchased property that chemicals have contaminated? If so, it’s easy to let that stop you from moving forward with your construction project. However, soil contamination isn’t the end of the world. While it should be taken seriously, there are several soil remediation methods you can use to restore your soil to a healthy condition.
No matter the cause of contamination, you should seek out environmental remediation services. It is important that you eliminate the chemicals, not just for your own human health. The United States has strict standards for environmental standards and dumping practices. Therefore, you could be responsible for contaminated soil even if you did not cause it.
The Basics
Soil remediation refers to the process of purifying and revitalizing soil by removing any contaminants. These contaminants can come from a variety of sources. However, they typically result from human activities, whether they are direct or indirect.
Why is soil remediation so important?
Pollutants in your soil eventually can cause groundwater contamination. If you use a well as your water source, this could cause you to directly ingest dangerous chemicals, many of which are carcinogenic.
Even if you don’t drink groundwater, contact with contaminated soil can still cause exposure symptoms. Depending on the type of pollutant, you could experience everything from skin rash to neuromuscular blockage.
Examples of Soil Contamination
The key to moving forward with soil remediation is identifying the pollutant. If you live next to a chemical plant, it might be easier to figure out the culprit. However, there are many cases where your soil could be contaminated without your knowledge. You could even be causing the pollution without realizing it.
The following are just a few of the most common types of soil contaminants that require soil or groundwater remediation:
- Solid or Liquid Industrial Waste
- Excessive Pesticides and Fertilizer
- Septic System Failure
- Improper Disposal of Waste
- Leaching from Landfill
- Damaged Storage Tanks Underground
How to Check for Contaminated Soil
Unfortunately, many of these chemicals are difficult to detect. If you suspect that your soil and groundwater may be affected by pollution, we recommend a site assessment. Hiring a professional can ensure the most accurate results because they do thorough inspections and testing. In fact, they carefully check for contaminated areas by:
- Taking a Soil Sample: To start, a soil expert comes to your property to take a sample. From there, the sample gets sent off to a lab, where it will be tested to see if there are any chemicals or unwanted compounds. The test also tells you the level of contamination in the soil.
- Undergoing Additional Tests: If the results indicate that you may be dealing with pollution, your soil expert will recommend more tests. These findings can show you the extent of contamination on the property. Experts often will want to check groundwater and surrounding areas to see how much contamination has occurred.
- Checking the Land’s History: Your soil inspector will also need to look at the history of your land. If it was on or near an industrial site, it could need more in-depth testing, which can check for a wide variety of contaminants. You should also check to see where most of your surface water comes from.
Common Soil Remediation Methods
If your test results indicate that you are dealing with any kind of pollution, soil remediation is the next step. Your soil expert can help you to contact a remediation team. These professionals put together a treatment plan for the removal of contaminated soil.
Your remediation plan typically depends on the type and severity of the pollution, but there are four main methods: soil washing, air sparging, thermal desorption, and bioremediation.
-
Soil Washing
As the name implies, this method of remediation involves washing the soil to clean it. You could compare it to the pump-and-treat process of cleaning contaminated water. It can only be done off-site as it requires the soil to be washed with a liquid before it is scrubbed. From there, the clean soil is separated from the contaminants and wash water. While it is effective, it is often impractical and expensive for homeowners.
-
Air Sparging
This method works best for contaminated sites with toxic gas or vapor. Unlike other remediation technologies, you don’t have to extra the soil for treatment. Instead, large volumes of pressurized air are injected into the ground to remove compounds typically filtered by carbon. You can make it more effective by combining it with soil vapor extraction.
-
Thermal Desorption
Thermal remediation is another ex situ method, which means you must remove the soil from contaminated sites. It is then sent to a facility where it is fed through an oven on a conveyor belt. The heat helps to extract contaminants subject to evaporation, such as polluted water or water-based compounds.
-
Bioremediation
If you prefer the convenience of in situ techniques that don’t require excavation, bioremediation might be your best option. It differs from other remediation projects because it doesn’t rely on mechanics. Instead, it combats the chemicals with biological organisms.
What does that mean?
Your remediation team applies a carefully engineered combination of aerobic and anaerobic bacterium. The bacterium is chosen based on their ability to feed on the pollutant. You don’t have to worry about the bacterium becoming a separate problem, however. Much like yeast, they die off once they consume all the contaminants. Keep in mind that this method requires specific conditions to be effective.
Dig a Test Pit for Your NJ Construction Site
If you and your remediation crew have selected an ex situ method, Mikula Contracting is happy to help you with your soil remediation project. We have several skilled contractors ready to help excavate your site. We can even help you with soil test pits if you are in the beginning stages of environmental remediations.
You can get started with your soil remediation project by calling our helpful representatives. We also have a simple online form that you can fill out to request a quote for our services.
What is Test Pit Excavation?
When you are ready to start new construction, you may already be aware that the site must first be inspected and evaluated. But where do you start? One of the best ways to gain a sampling of the soil is through test pits and trenches. What is a test pit? The short answer to what is a test pit is when an excavation team digs multiple holes or trenches on the property to collect samples of the soil.
Let’s explore this further.
What is Test Pit Excavation?
A big part of site investigation before building on the land is test pit excavation. When you ask, what is test pit excavation, you will find out why you need it.
An excavation team will carefully take samples of the soil, digging a few feet below the projected construction dig. And then, the soil will be evaluated for rock ratio, the softness of the soil, and contamination.
Here are some things that a test pit excavation can discover:
- Layer of Shallow Rock: Some areas of the country have layers of rock right under the shallow surface of the soil. When a contracting team knows about the rock that will need to be dug out, it can prepare by using different equipment and altering the timeline for the project.
- Water Table Location: The water table is a layer of water underneath ground soil. It is when soil is considered compact without oxygen flowing through it. The water table can change with the seasons, but it is always an asset to know where it starts on your construction site.
- Soil Contamination: If there were an oil spill or hazardous chemicals in the soil from a previous time, you would want to know about it before building a residential or commercial building. Contaminated soil can be detrimental to the public and is not a suitable growing area for plants and vegetation to grow. Imagine finding out about contaminated soil at the end of your construction project. It would be damaging financially.
- Potential for Growth: Contaminated soil is not the only earth that plants will not thrive on. There are types of soil that are very dry and rocky that will not grow greenery easily. You can find that out through test pit excavation. And then you can bring in your own clean fill to fix the problem.
When you find out, what is a test pit, you can discover so many things. It is vital to conduct test pitting services before a big construction project to avoid a setback when so much money has been invested.
Why Choose Test Pitting Services?
Say you were to find out what is a test pit after you started on construction? If you start without knowing what is a test pit, then you may have invested a lot of money in a land that is filled with contaminated soil and required soil remediation. Or you may find that the earth is susceptible to landslides or sinking and will not offer a solid ground for a building.
When you hire a geotechnical engineer to show you what is a test pit, you will learn about the soil before starting the project. Then you don’t have to put the timeline on hold when you discover setbacks with the ground late in the construction process.
Is a Test Pit Always Needed?
Is it widely known what is a test pit in the construction business? Many contractors have learned their lessons when finding out late in a project about a problem with the soil. Test pit excavations are needed on any project that you would like to avoid surprises.
The more you know about the land before starting construction, the less money your project will cost. Also, because you are prepared on what is a test pit and how it will teach you more about the soil, you won’t have any surprises come your way during construction.
Who Benefits From Test Pit Excavation?
What is a test pit, and who benefits from it? If you are a contractor, homeowner, or commercial landowner, you will benefit from test pit excavation.
Mikula Contracting has been in business for over 70 years serving the Northern New Jersey communities. We have built a reputation of trust, expertise, and care over the years. You can enlist our team for help in your test pit excavation.
We also offer other excavation services:
- Removal of Large Equipment or Structures: Whether you have a garage or swimming pool to be removed, our team can take care of it. Large structures like underground oil tanks or playgrounds are part of our excavation services.
- Addition of Clean Fill to a New Construction: Leveling land includes filling in parts of land that are lower than the rest of the area. Our certified clean fill is exactly what you need to get your land up to grade for your new construction.
- Removal of Dirt for Leveling Land: When you think of excavation services, you may picture a large excavator moving dirt around. Your childhood fantasies can come to life when you discover that’s what we offer at Mikula Contracting. We move dirt. Let us take large amounts of dirt off your hands so that you can start on your contracting project.
Our team is happy to meet your excavation needs in New Jersey. You can count on us to prepare your land for new construction by knowing what is a test pit, building test pits and trenches, testing the soil, and soil remediation and removal. If you need new earth brought in for a project, you can rely on us for certified clean fill.
NJ Test Pit Excavation Contractors
At Mikula Contracting, you can find trusted test pit excavation contractors. Our team is experienced in test pits and trenches and can work to get you the results you need before starting new construction. Contact us today to ask all of your questions. We want to help you understand what is a test pit and use it to your benefit.
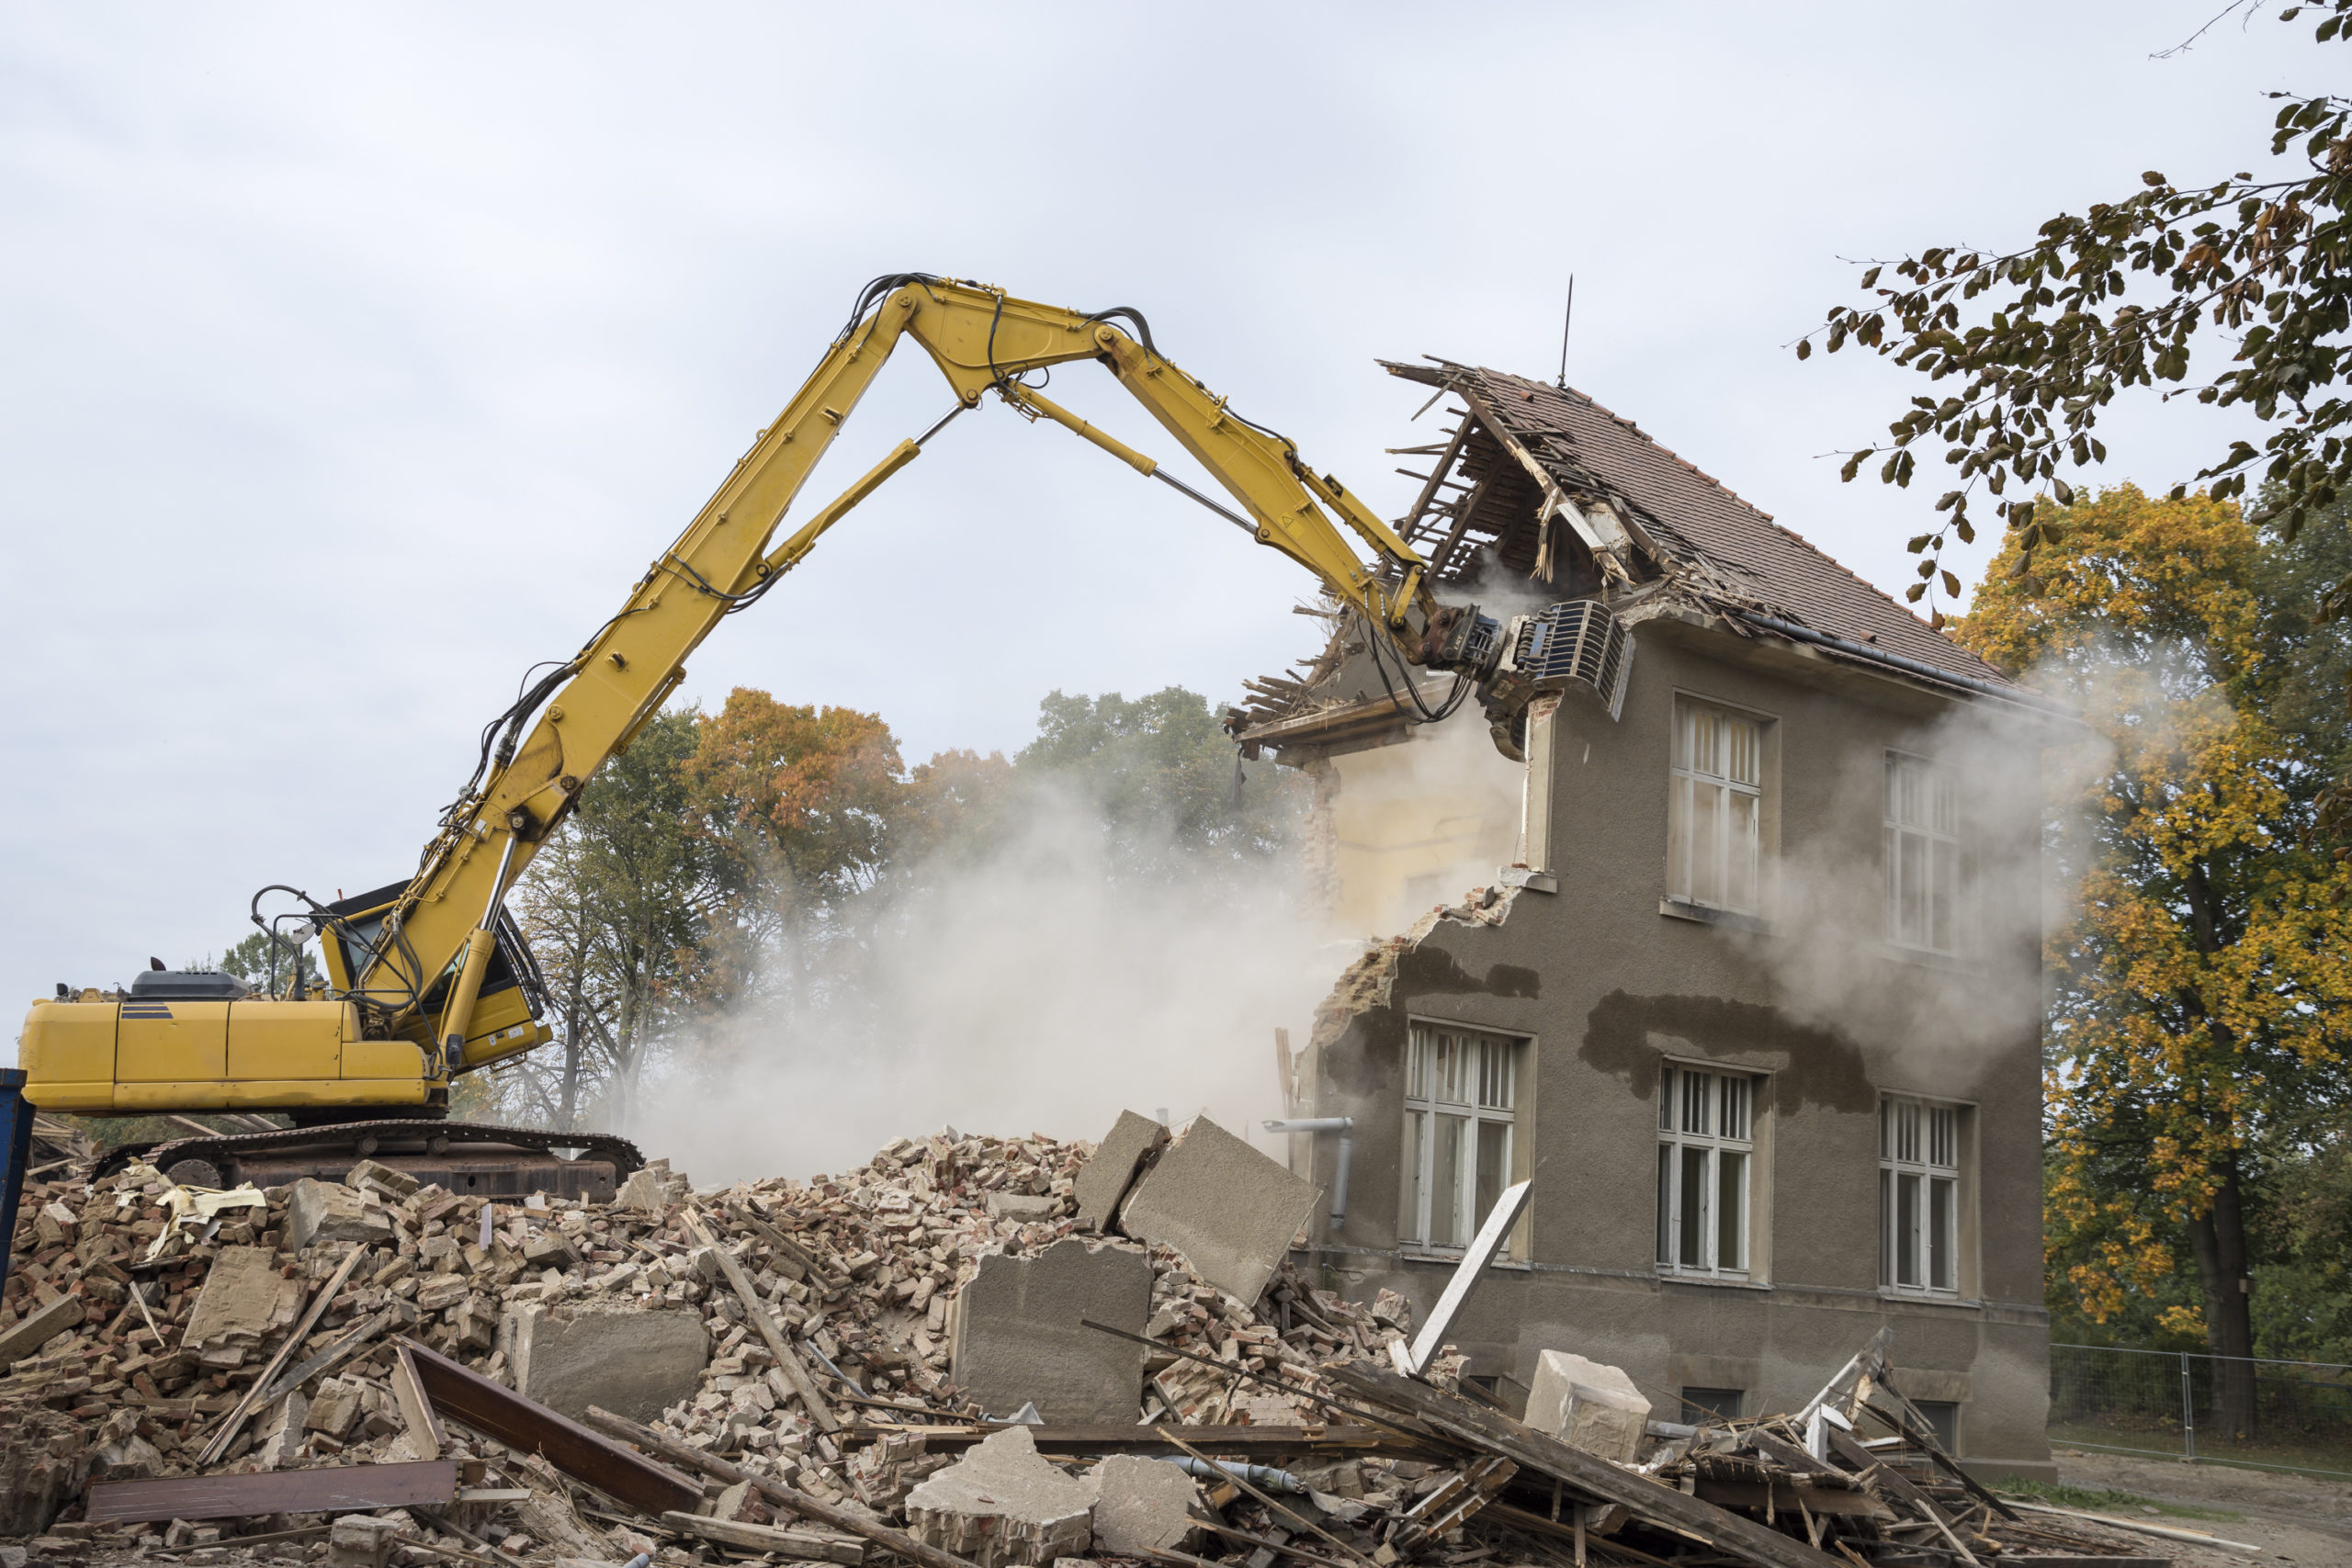
Cost to Demolish a Garage
If you are looking to demolish an old garage taking up space in your backyard, there are a few things to consider first. The job will take more than a wrecking ball and sledgehammers banging into the structure. You will need to take down the building safely and then do the necessary work of removing all the debris.
A garage demolition cost is more complex than you might imagine. Consider the step-by-step process with its corresponding costs to get educated. And then let professionals take care of the project.
Factors Affecting Garage Demolition Costs
A garage demolition is a hefty project that is best done by professionals in the construction business. When you hire experienced contractors with the correct procedures and safety equipment, you can trust that the job will be successful. But what is the ball-park demolition cost?
As with any home improvement idea, the cost varies from project to project. It depends on the size, the location, the material, the concrete slab, the permits, and the dumping fees. You will find that you can estimate a garage demolition cost, but be prepared for fluctuations specific to your garage.
Attached or Detached
The cost to demolish an attached garage is more than a detached unit. First, the team has to take weight-bearing beams into consideration that may be holding up parts of the house. And then they need to take extra care not to damage any parts of the home as the garage crumbles to the ground.
A detached garage is a simpler job and leads to a lower garage demolition cost. When the garage is free-standing, the demolition can get underway without worrying about damage to nearby structures.
Size
The average garage demolition cost in the United States is $4-$8 per square foot. While the square footage is a significant consideration in the overall price, there is still more to consider. If you have an oversized garage that you would like to make smaller, you can look into a partial demolition.
This decreased size will cost less to demolish. But then you’ll need to consider the reconstruction of the outside of the remaining garage.
Overall, the more stalls you have in your garage, the higher the garage demolition cost. Ponder on a new purpose for the garage over demolition if the structure is in good condition.
Material
When looking into the garage demolition cost, brick garages will be the most expensive based on the weight of the material alone. Garages made out of wood will be on the lower end of the demolition cost. Any materials that can be salvaged for reuse will work in your favor, like cement, cinder blocks, or lumber.
The garage demolition cost will increase if there are hazardous materials involved. For example, you may find lead paint or materials like asbestos inside the garage. In this case, demolition contractors will have to work to remove the hazardous substances safely. This takes time and adds risk to the project. And that adds up in the final cost.
Foundation
If the garage sits on a concrete slab, then the garage demolition cost will increase by $700-$1500. A strong foundation will need to be demolished unless you decide to repurpose the slab for a basketball court or patio. This option will save you money if it is something you really want. Don’t settle on keeping the concrete slab and regret it later.
If you would like to use the space for a grass lawn or a pool, you can expect to pay for the removal of the foundation when demolishing a garage. Plan out your priorities before meeting with a contractor so that you don’t change your design based on price alone.
Permits
The garage demolition cost will include the cost and timeline for obtaining proper permits for the project. Therefore, every demolition contractor should have well-practiced procedures for obtaining permits.
Permits are a common reason that construction projects are delayed. Talk about the demolition permits in the initial meeting with your contractor so that you can get a clear view of how long it will be before the project can be started.
In Conclusion
When you look at the average cost of a garage demolition, you will find that it varies from state to state and depends on several factors. The critical part is getting enough education to meet with a contractor ready to ask the right questions and see how prepared they are for answering the questions.
When you show that you have done your research, a trusted contractor will talk through your concerns and display their expertise. Some red flags to watch out for are a reluctance to obtain the permits, a lack of safety guidelines or gear, and a resistance to provide examples of past projects.
You should have all your worries put to rest during your first meeting with the contractor. The garage demolition cost is worth it when you find the right contractors for the job.
Contact Mikula for Garage Demolition in NJ
Our team at Mikula Contracting specializes in residential demolition projects. We have built a reputation for ourselves in the Northern New Jersey community and are ready to prove our skills for your garage demolition. With the most updated equipment, our contractors work hard to deliver quality results while meeting projected timelines.
We know that communication is key during a demolition project. We will not leave you hanging by not showing up to the site or not returning phone calls. We will update you at the end of every day to show our progress and redirect or fix anything that is not to your liking.
We work with attached and detached garage units, hazardous material cleanup, and junk removal and recycling at the end of the project. If you have questions about a garage demolition cost, contact our team to learn more about your specific project. Then, we can come out to the site, conduct measurements, and give you an estimate. Contact Mikula Contracting today for your quote.
Types of Commercial Drainage Systems
Commercial drainage systems are vital to redirecting rain and water around your commercial property where it will not cause damage or block walkways and entrances. As you research the different types of commercial drainage, you can find out what options are best for your property.
Keep in mind that performance is an important point to consider in the decision process while you are looking into different types of commercial drainage, but esthetics are also crucial to your commercial property. You want to choose a drainage system that keeps your property looking sleek and up-to-date.
Different Types of Commercial Drainage Systems
When comparing and contrasting different types of commercial drainage for your commercial buildings, look into each system and decide which is best for you. For example, some types of drainage systems require drain pipes, while others use gravity to redirect the water to the right place. While some drains will do the job, they may not look the best on your commercial property.
Take a look at the options.
French Drains
French drains are subsurface drains that use drain pipes below the ground. These drain systems are helpful for water management above ground and way below ground with groundwater.
The main purpose of French drains is to redirect standing water to a sewer or place that the water can flow freely without pooling in problematic areas. For example, French drains are regularly used in landscaping to move water from high spots down to a lower place where the water runoff can continually flow through the drainage system.
You will find French drains in gardens, appearing as perforated pipes just below ground level. When you have a flooded area on your land, you can use French drains to redirect the water to a lower spot on the land near a sewer or gutter.
Trench Drains
A contracting team builds trenches that will collect the water runoff during a storm. The trenches are often covered with a metal grate that you can see on the ground's surface. These types of drainage systems are commonly used on commercial property. Trench drains collect excess water and drain it into the earth or direct it to the groundwater below the soil.
There are many available styles for trench drains. You can choose the type that best fits the style of your commercial property. And then have a team install the grates after the trenches are made.
Storm Drainage Systems
Underground, there is a matrix of storm drainage systems that redirect stormwater to streams and lakes. This series of pipes and channels is thoughtfully planned to salvage as much drain water as possible for reuse.
Without these types of commercial drainage systems, rainwater would pool on roadways and property, breaking down sediment and going to waste. Water is a renewable resource, and storm drainage systems offer an efficient way to collect the water.
Catch Basins
Catch basins are part of a drainage pipe system that separates the sediments in the water. As the water collects, the heavier particles sink to the bottom of the basin to allow water flow that is free of the deposits.
This filtered system isn’t necessary for some types of commercial drainage systems that are updated. But it can be a valuable piece to a storm drainage system.
Seepage Pits
Seepage pits are vital pieces to the sewage system. These deep drains collect the blackwater from toilets, dishwashers, and washing machines. This toxic wastewater mixes with a biomat inside the seepage pit that contains anaerobic bacteria.
The bacteria feed on the wastewater and cleanse it before it seeps into the soil below. This is a slow process that is proven to be effective. It is imperative to do our part in disposing of feminine products and large materials through the trash rather than the toilet to ensure that seepage pits work effectively.
Commercial Roof Drainage Systems
Along with other types of commercial drainage systems, a commercial roof drainage system is vital to keeping your roof in good shape. The last thing you want is pooling water on the roof, weighing down the materials, and causing leaks into the building.
Take a look at a few of these roof drainage options to choose which types of commercial drainage systems are right for your commercial building:
- Gutters: Everyone is familiar with gutters and how they attach to the home to redirect the water runoff. Many gutter designs take special care to keep the water off the outside of the building to reduce mold and grime buildup.
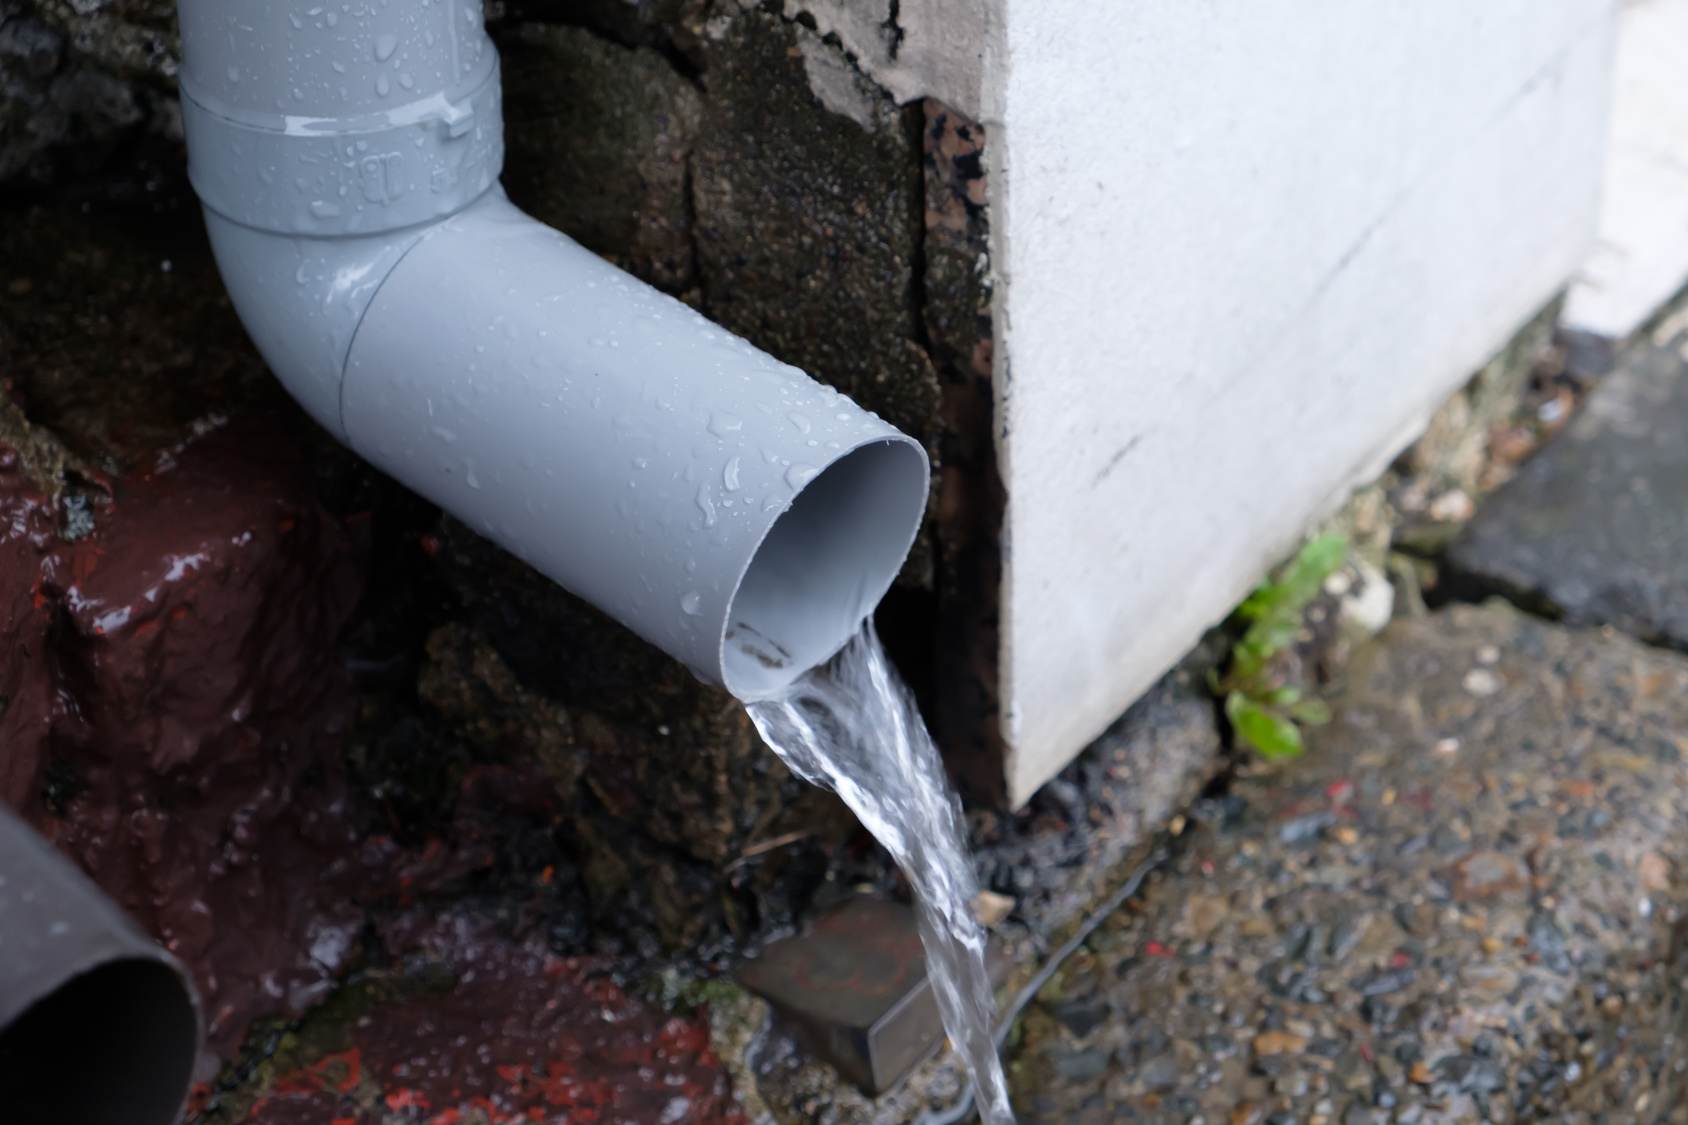
- Downspouts: This pipe moves down the side of the building. While working hand-in-hand with gutters, the downspouts carry the water straight to the ground. Mildew, mold, and moss are less likely to grow when the downspout collects the water and keeps it from pooling on the commercial building.
- Internal Drains: Most commercial roofs have internal drains where water is most likely to be collected. These internal drains move the water to the downspout. Internal drains will be found where the downgrades of the roof meet so that the water does not build up and weigh down the roof. It is common for internal drains to combine with other types of commercial drain systems to move the water to the soil below.
Consider which system is suitable for your commercial roof, whether it be scaled roofs or flat roofs. Then, when you have these options before you, a trusted contractor can help you choose which types of commercial drainage systems are best.
Commercial Drainage Contractor in NJ
At Mikula Contracting, our team can answer questions regarding your commercial drainage needs. We know how important it is to protect your property from pooling water and leaks. Contact our team to find out how we can get started today.
When you choose Mikula Contracting, you select our family-owned business with 75 years of experience working with clients. With each contract, we work to improve our customer service and deliver top-quality projects. Do not delay in setting up your initial consultation.