Is Swimming Pool Removal DIY?
There are many home improvement projects you can do without hiring a contractor, such as painting a room or planting flowerbeds. However, certain projects need professional services, such as swimming pool removal.
Why are you asking the question: can I remove my own swimming pool? Most of the time, it’s because homeowners don’t want to pay for the cost of hiring pool removal contractors. You know that you need to get rid of the neglected pool in the backyard, but you are feeling unmotivated because of the investment you will need to make for demolition and backfilling the empty space.
Here are a few reasons why you should rethink your approach if you are asking if you can remove your own swimming pool. These considerations will help you see why it’s worth the money to pay for pool removal from a professional contractor.
Avoid Future Yard Problems
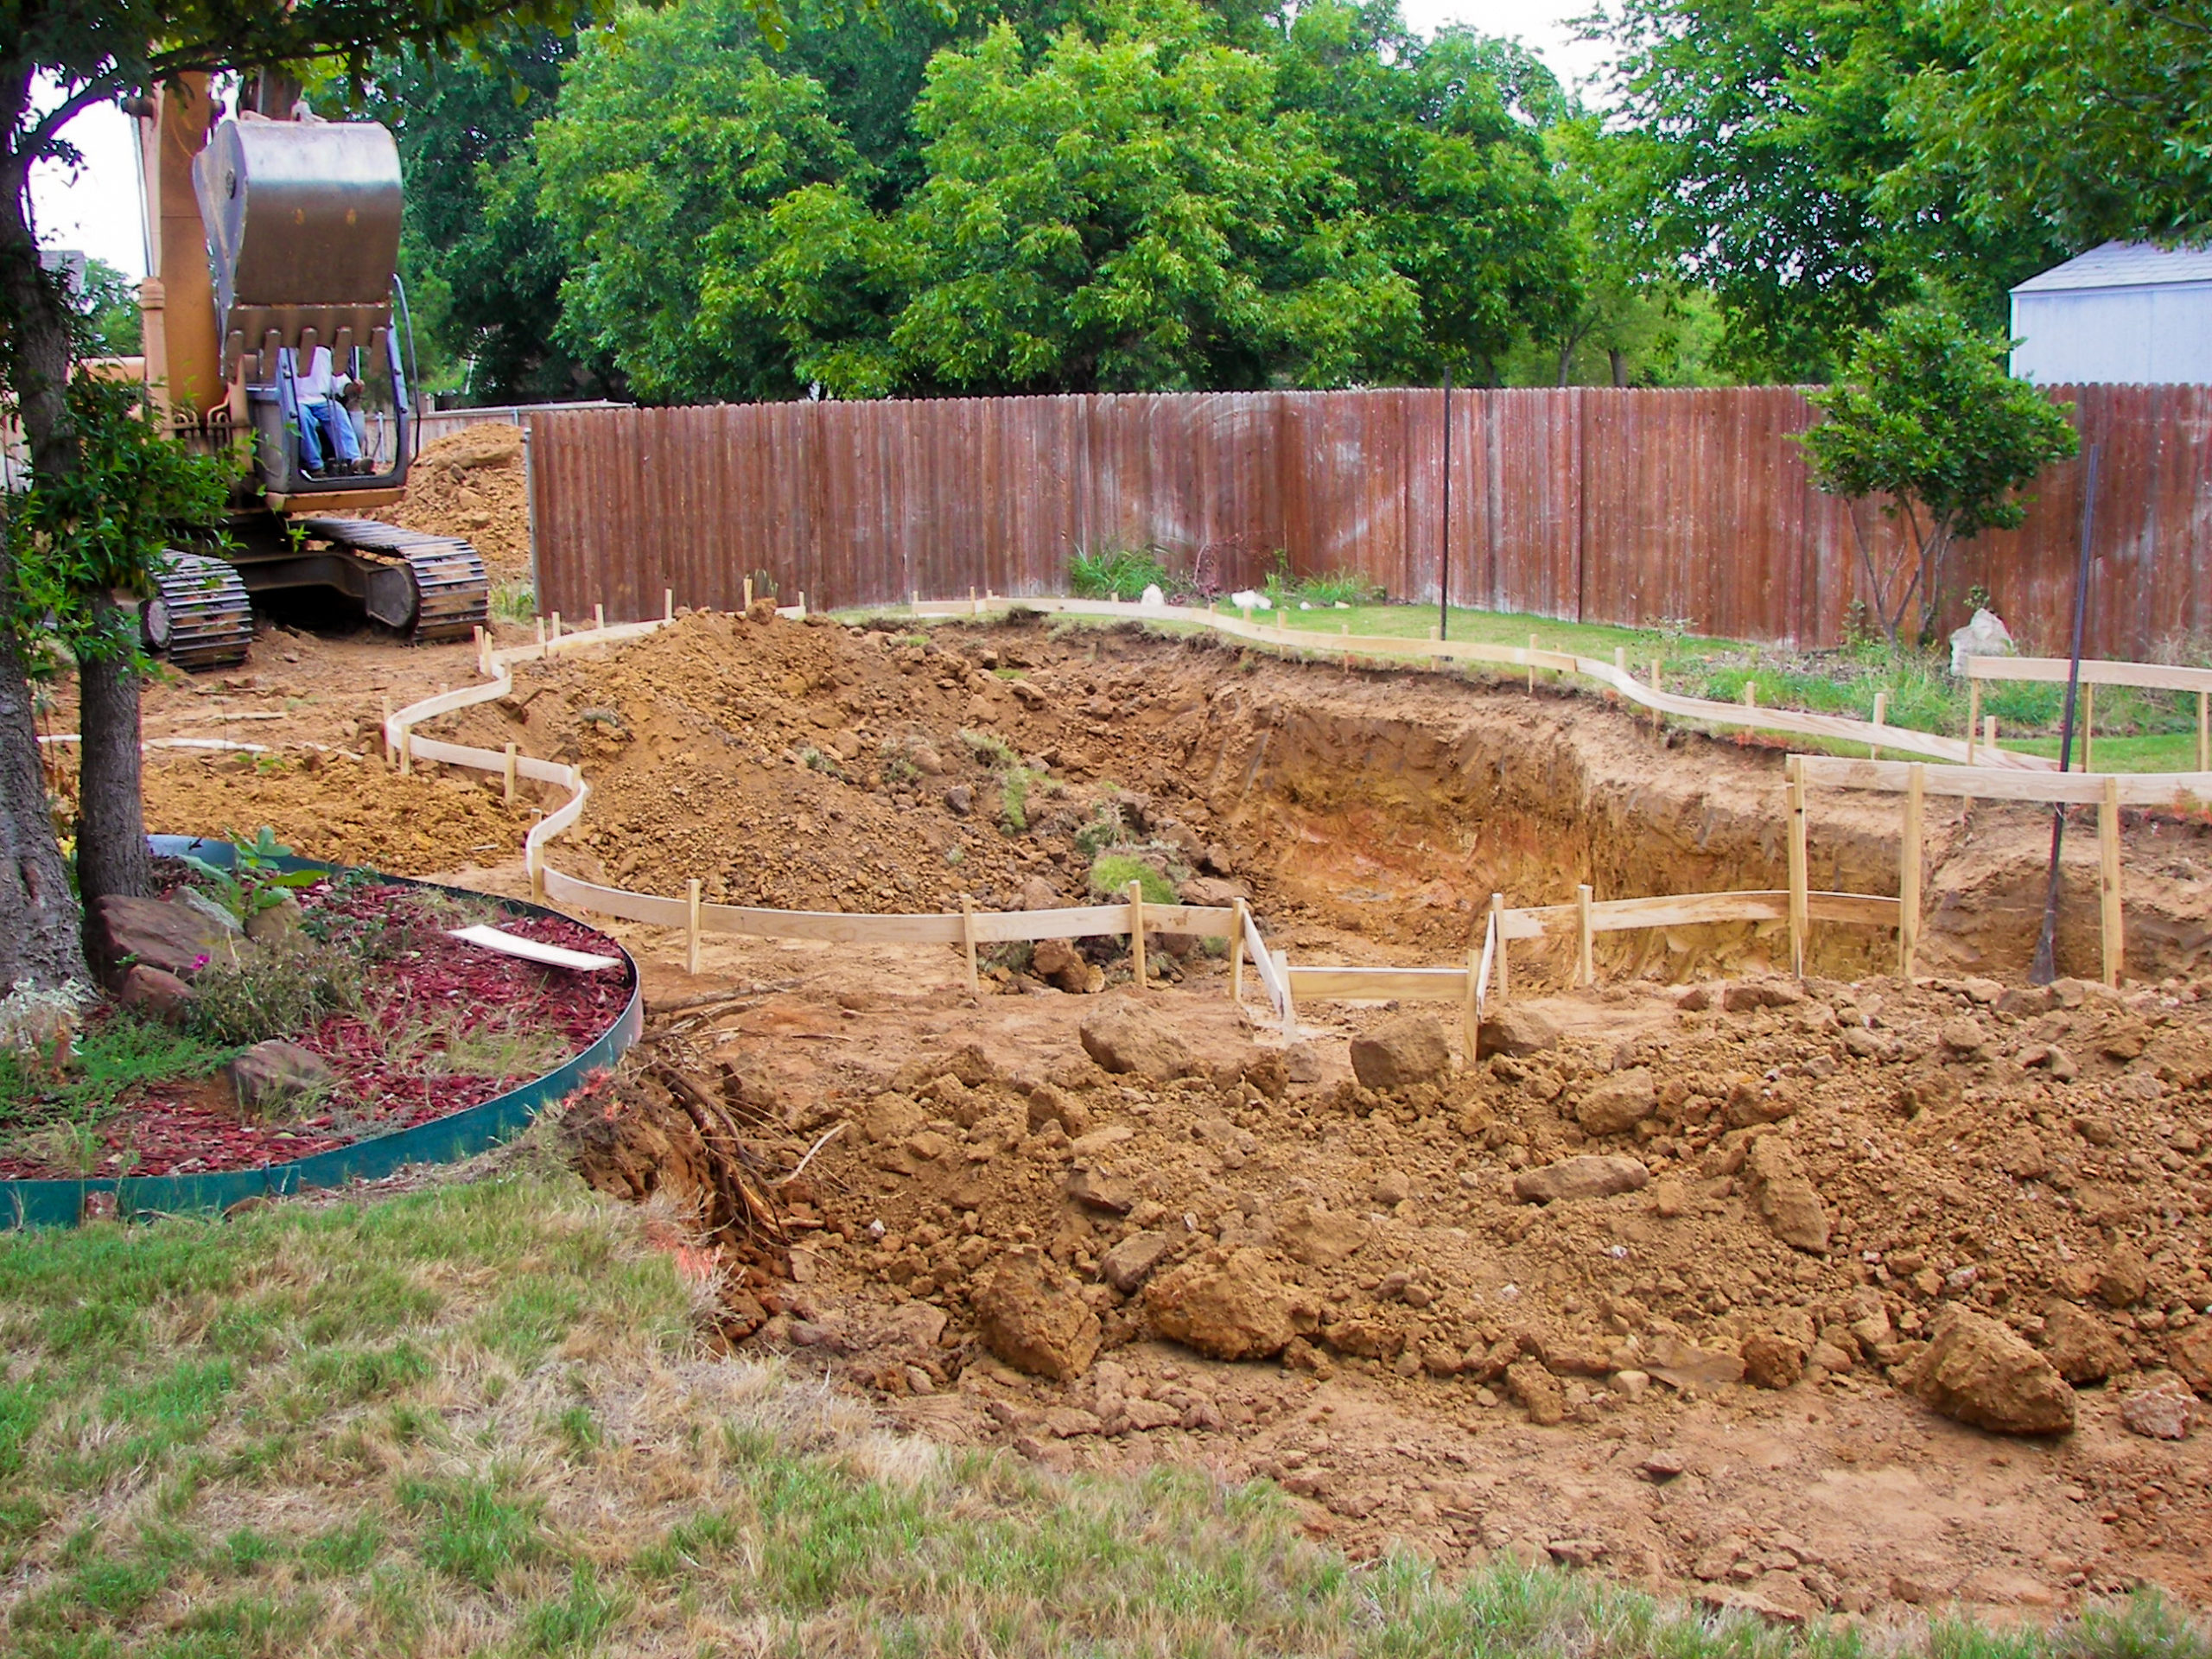
You can find plenty of videos online showing DIY demolition and filling in a pool – going from backyard swimming pool to level ground in just a few days. What you don’t see in these videos is a few months or years later when the ground settles, leaving the homeowner with sinkholes, uneven ground, and/or drainage issues.
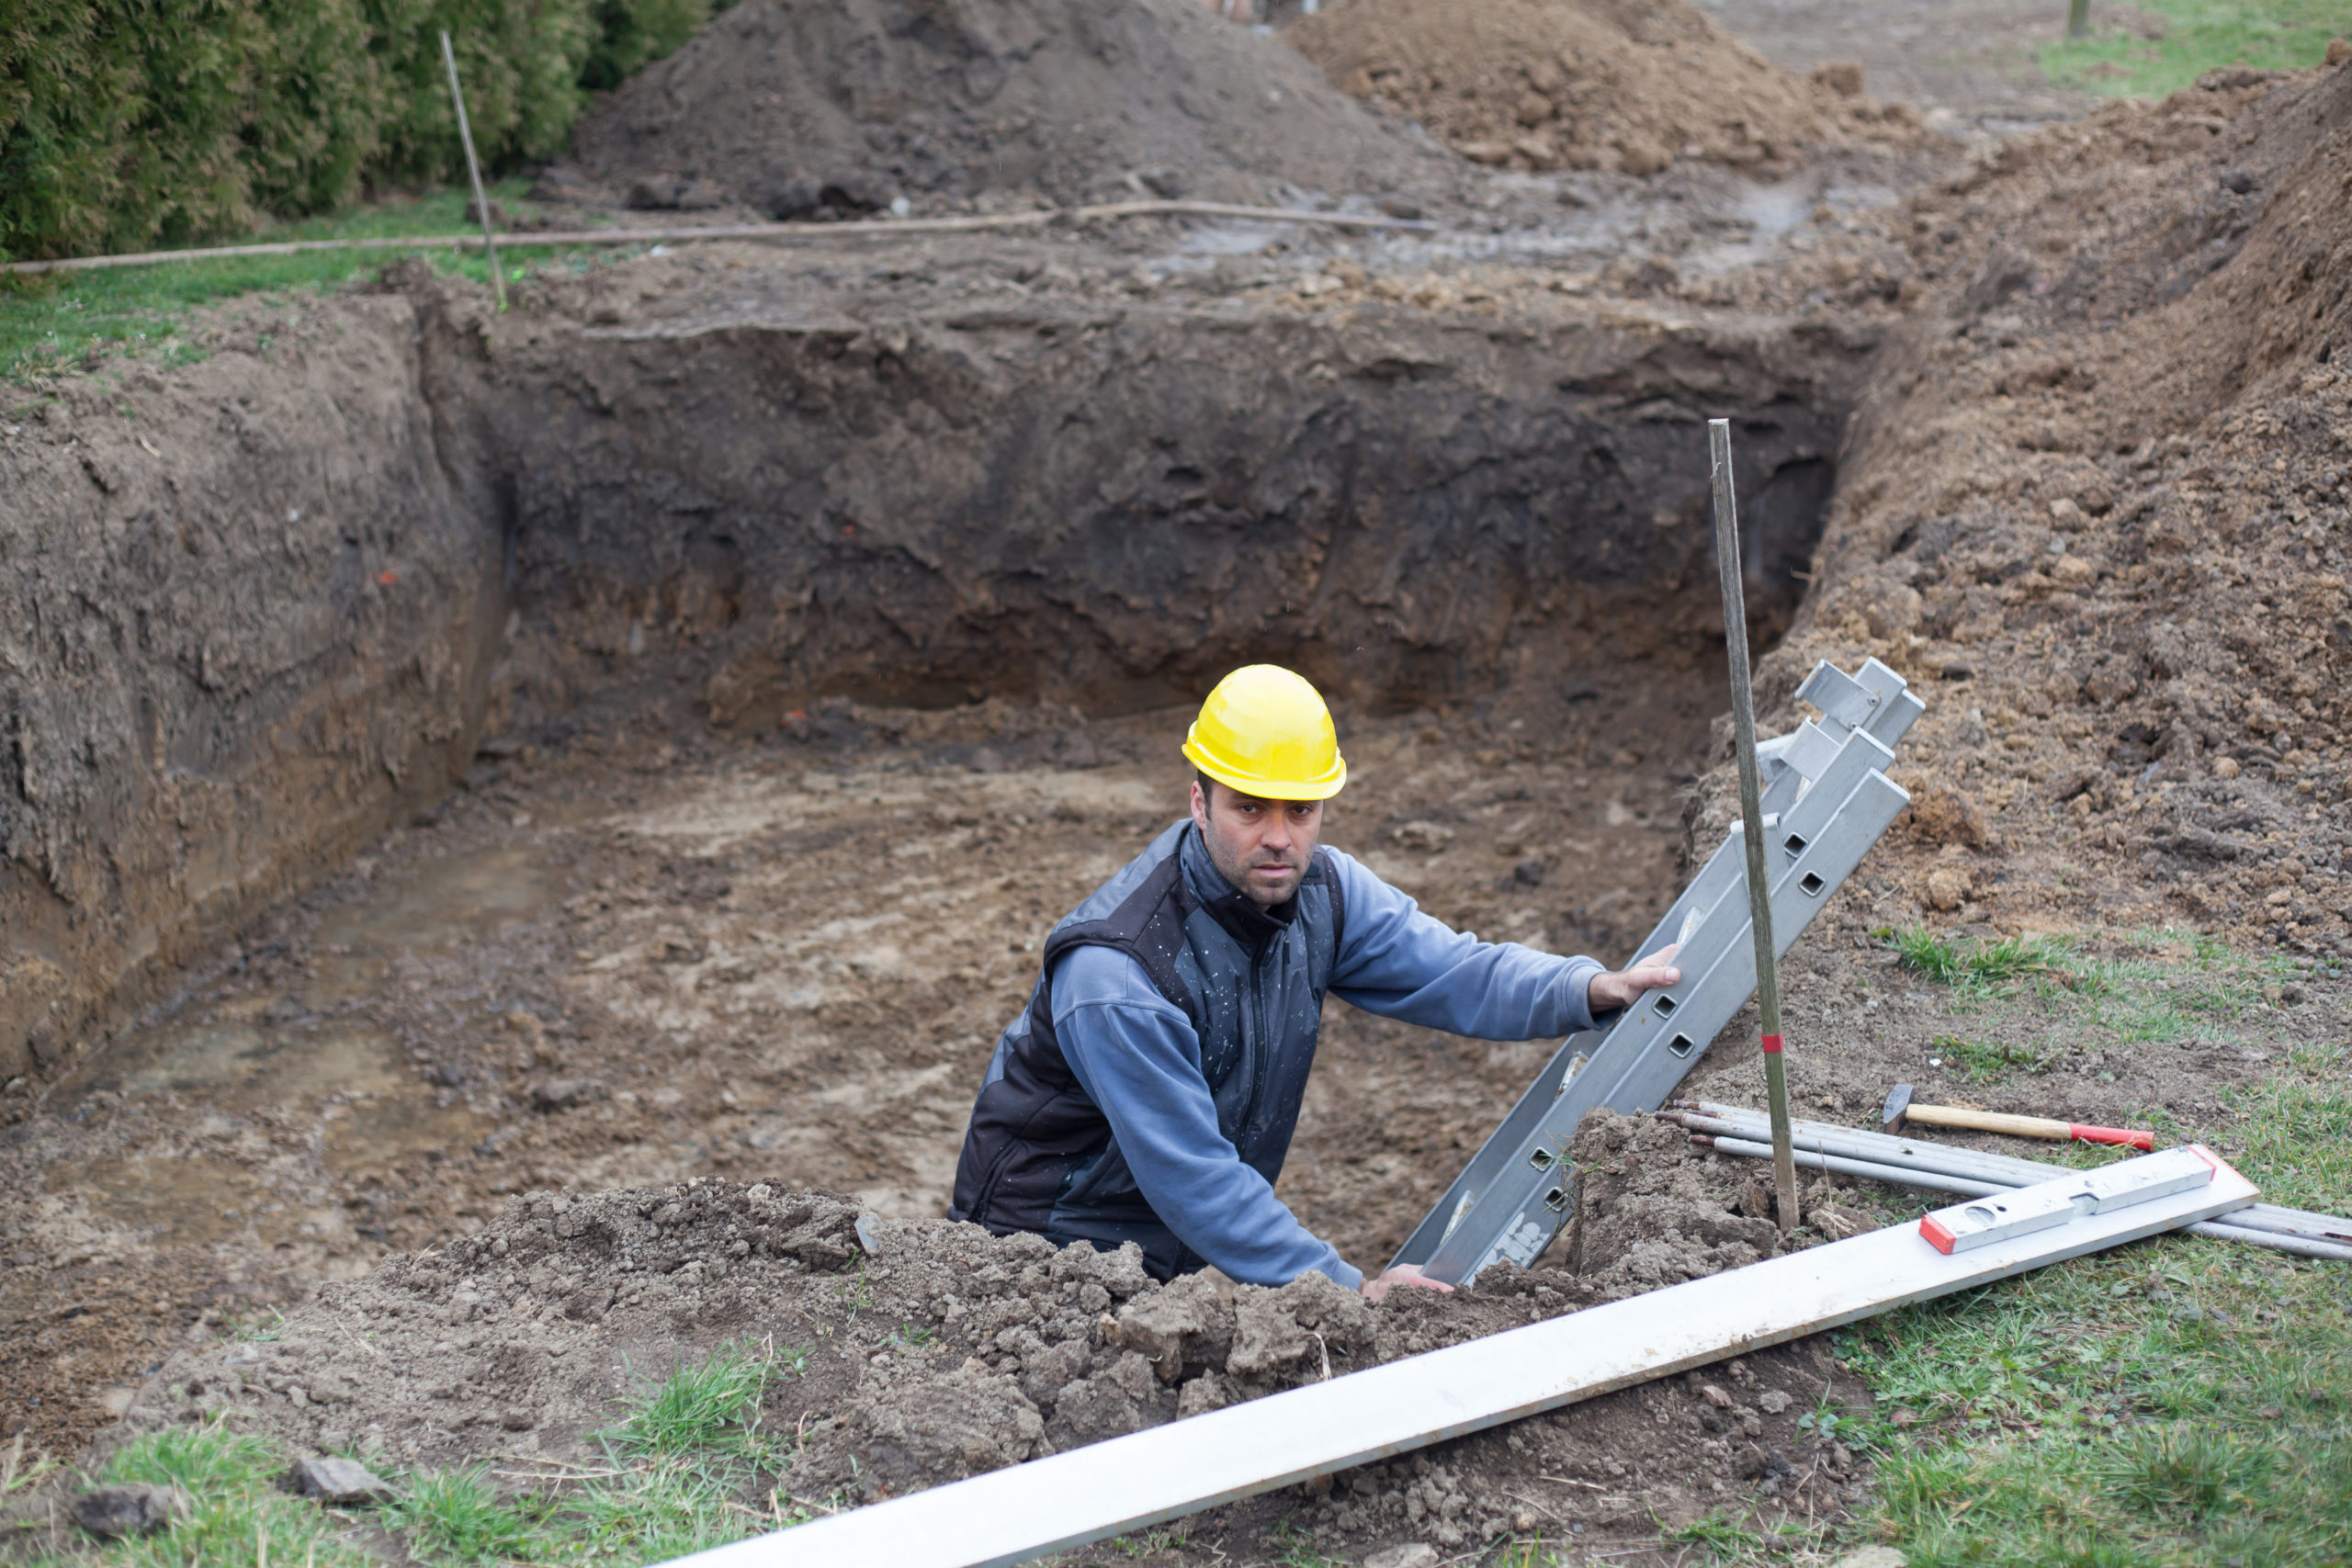
In-ground pool removal can leave your yard a dangerous place if you don’t follow the right pool removal method. Professional, engineered backfills are essential, especially if you or future property owners want to build on the space to expand the home in the future.
You need to make sure the ground is secure, which is why it’s essential to have a professional contractor to assist with proper soil compaction.
Using the Wrong Pool Removal Method
Removing an above-ground pool is much simpler than tearing out an in-ground pool. The removal process doesn’t leave as much of a hole if the pool was sitting above ground. The process for above-ground pools is less complicated, but still not easy. You still need to drain the pool, disassemble the materials, then haul everything away. Finally, the area where the pool was located might need a little bit of fill dirt, such as topsoil for the top layer.
Complete pool removal requires full demolition and hauling away the remaining materials. The best solution for choosing from these two types of pool removal is to talk to a professional contractor about city requirements and necessary permits.
Inexperience Using Heavy Machinery
Yes, you can rent heavy machinery, but you need to be sure that you have the knowledge and skills to use this equipment without causing collateral damage in your yard. Usually, the intention is to save money on the cost to remove a pool. Sometimes DIY pool removal is a more expensive option because of the unintended damage that occurs.
Heavy machinery can break sprinkler lines, crush plumbing and sewer connections, ruin septic tanks, and more. In that case, you’ll be spending a lot of money to bring in a professional plumbing and repair team to fix the damage.
Hiring a professional pool removal company is a simple way to avoid these issues. The team knows the best practices for pool removal, including the right ways to use heavy machinery to avoid damage to the property.
Problems with Gas and Electrical Lines
One detail that DIY homeowners overlook is the proper handling of the gas and electrical lines. Not only are these systems connected to the swimming pool to run the heating, water, and more, but you might accidentally hit the main lines that are running through the property.
You need to know where these main lines are located, as well as expert industry strategies to avoid damaging them. Too often, homeowners don’t do the preparatory work, then discover the lines when the damage has already been done.
Hiring the pros is the ideal solution. An experienced pool removal company knows where to look, how to mark the lines and proper techniques for protecting the utility connections during the excavation.
Using the Wrong Fill Dirt
You need to bring in a lot of fill to cover up the hole left behind in your yard. Most homeowners assume that all dirt is the same, so it doesn’t matter what type of fill dirt they choose. You might be surprised to learn that there are major and important differences between different types of dirt.
You shouldn’t just fill in the swimming pool with the cheapest dirt you can find. Most “free” fill dirt out there contains organic material, clay, and trash, all of which cause problems with drainage and compaction. Additionally, it’s important to use the right amount of fill dirt vs. topsoil. Typically, 80% of the hole needs fill dirt, with about 20% of topsoil on the highest layer.
Underestimating A Pool Removal Project
The truth is that there are a lot of things that can go wrong in a DIY pool removal project. There are a lot of materials to haul away, and this process can be complicated, especially if you don’t have the right tools or equipment.
Homeowners mistakenly think they can get the job done in a weekend. Then, they end up with an ongoing mess in the backyard and a much higher bill than anticipated. Small details can lead to big issues, such as underestimating how much fill material will be required to fill the volume of the pool and still have the ability to compact everything down.
Contact Pool Removal Contractors
Can I remove my own swimming pool? Don’t set yourself up for failure because you removed a pool incorrectly. Instead, invest in the right services so you can avoid issues in the future. At Mikula Contracting, we offer quality services for both above-ground and in-ground pool removal. Contact us anytime to schedule a consultation and request a free estimate.

Why Digging A Foundation is Not a DIY Project
You’ve saved and dreamed, planned, and waited but it’s finally time to build the home you’ve desired and longed for. You can already see yourself making your new home your own with the little touches you’ve dreamed of. As you ponder the DIY projects you’re ready to take on, you could be thinking “maybe we can save some money if…”. Let’s talk about one of those DIY projects that future homeowners think they can take on, but soon find what a big mistake it was to do all on their own. One of those projects might be digging a foundation. After all, using an excavator to dig some holes can’t be that hard right? Let’s “dig in” and find out why you should never make digging a foundation a DIY project.
Process of Digging a Foundation
Are you thinking about building a new home, adding on, or building another structure on your property altogether? The foundation is possibly the most important part of your entire build. If you don’t have your foundation right, the rest of your structure won’t withstand the tests of time.
A foundation provides strength, helps keep out moisture, and provides some protection from the elements. It keeps your home stable during earthquakes, floods, and more.
When the process of digging a foundation begins, it may not seem like not much digging is happening at all. The first step in the excavation process includes clearing your site properly so that you have the room to dig your foundation and build your structure. Any roots from trees or shrubs within a foot of the foundation need to be removed as well.
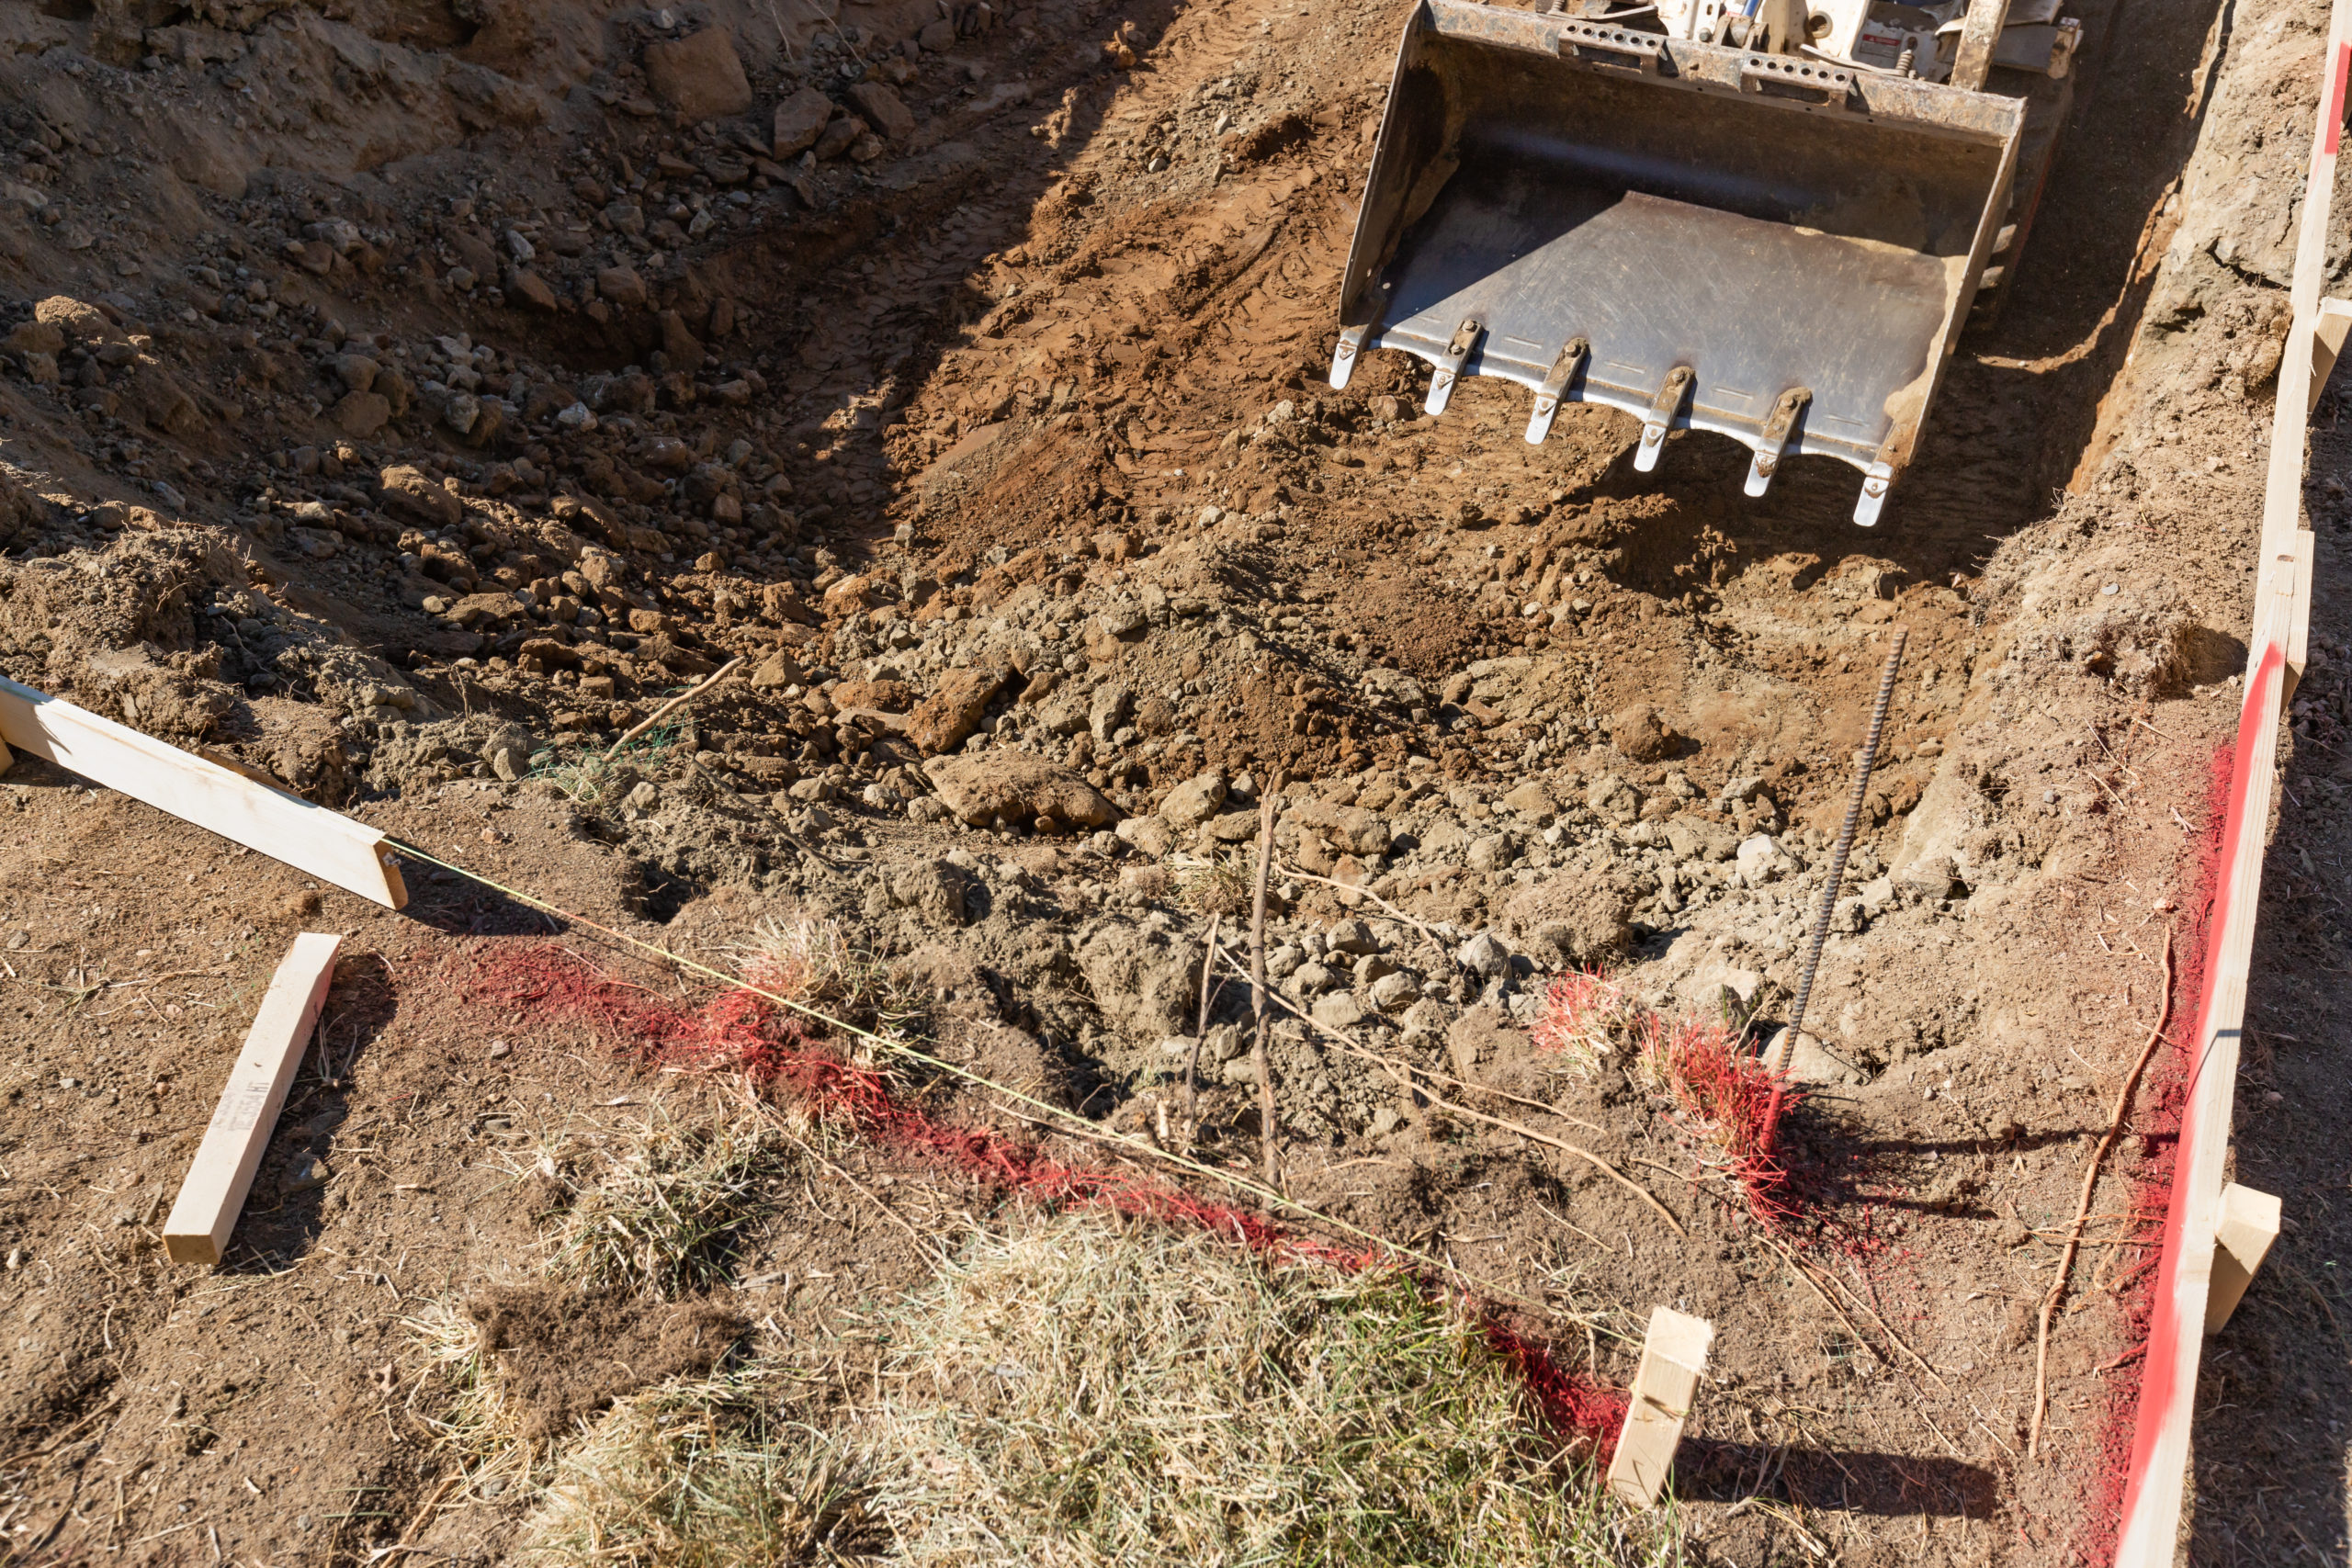
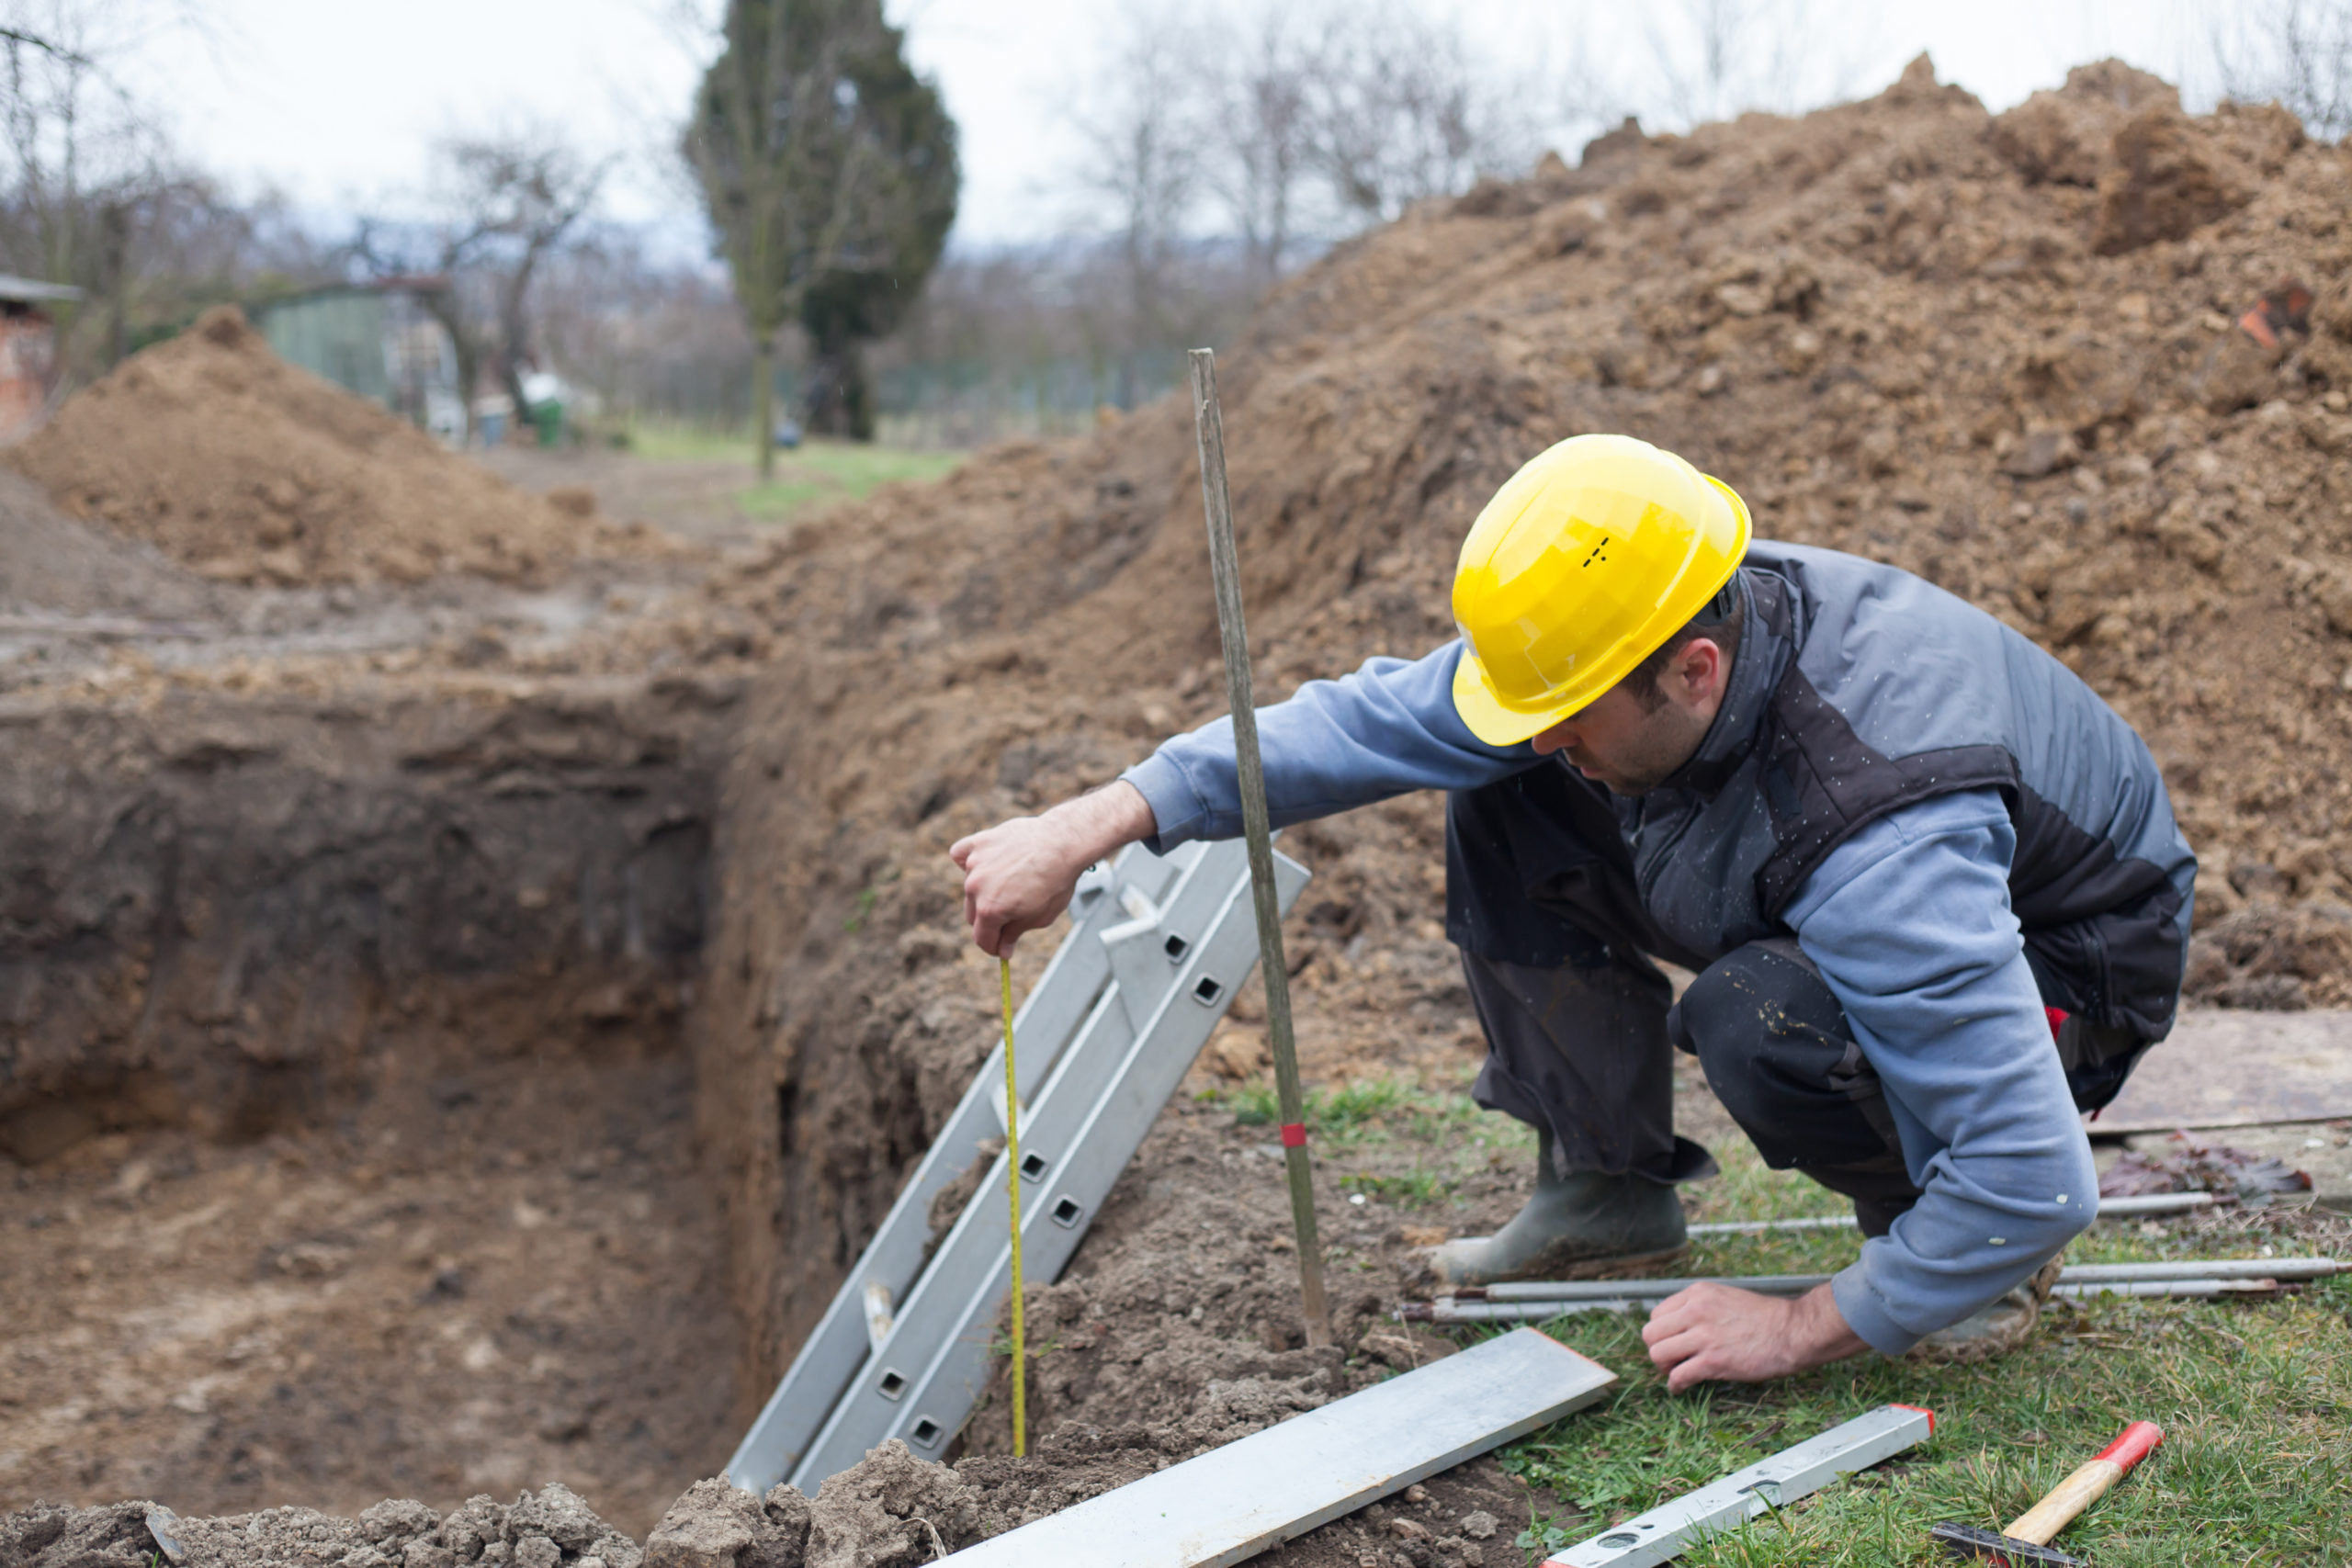
Next, the site is “set out” with the use of wooden stakes and strings to map out where the foundation excavation should be. The excavation contractor will then dig to the depth the general contractor and engineers have determined. This will clear the space necessary for the footings and foundation to be placed. This part of the foundation process is more precise than you might think. If dug too deep, it will need to be filled in since the loose dirt now lacks the stability and support that your foundation needs. It will now need to be compacted or filled with other material. There are all kinds of situations like this throughout the foundation excavation process that require detailed focus to get right.
A soils engineer will determine whether gravel needs to be added because of a high-water table, drainage systems placed, etc. If the dirt is loose, planking will need to be placed to reinforce the sides from falling in so that the foundation work can be completed. When excavation is complete, the footings and foundation can be poured into different sections or troughs to maintain the shape and structure.
Once the foundation has had time to cure, the area can be backfilled and leveled out. Building can now begin! The excavation and foundation digging process may feel like a waste of time, but you’ll be glad you took the time to get it right.
Dangers to Excavating Yourself
Maybe you have received the necessary permits and rented equipment for the job. You have big plans of saving on excavation costs but, this task may be more than you have bargained for. Foundation excavation and pouring can be quite dangerous. Educate yourself on the risks before moving forward and make the wise choice of hiring a professional to complete the job for you. Some of these risks include:
- Hitting power lines below the ground or above your head, results in electrocution.
- Improper excavation can lead to
- Falling into the trenches or holes because the ground is loose from excavating.
- Dirt and debris dust can cause breathing issues if the proper safety gear is not worn.
Common Reasons Why Foundations Fail
Digging a foundation fails for all kinds of reasons. Some take time and others fail immediately. Some of these reasons include:
- Failing to remove tree roots. Removing an above-ground stump does not ensure that roots will stop growing, and could eventually disturb the foundation.
- Backfill soil contains too much water, causing the foundation to fall inward or to absorb the water, creating cracks and leaks.
- A sinking base can cause the foundation to shift and possibly even crack.
- Not allowing the foundation to dry long enough before proceeding to backfill and build on top of it.
- Failing to pour the entire foundation at once. This can allow seams to develop between pours which permits moisture to seep in.
Commonly Made Mistakes
Some mistakes to be aware of during the foundation excavation process include:
- Failing to get the necessary permits before excavating.
- Forgetting to measure the size of the equipment you will be renting. Some lots are small and won’t fit just any excavator or cement truck.
- Failing to plan for excess soil removal before foundation excavation begins. If you fail to remove dirt and are on a small lot, the dirt can fall back into your trenches, and you will need to begin the digging process all over again.
Call Mikula Contracting for Excavation Needs
When it comes down to it, hiring a professional is the safest and often most cost-effective way to complete your foundation excavation. Mikula Contracting has been in the excavation business for more than 70 years. Throughout the years we have encountered all kinds of building sites and situations. This experience makes us the trusted foundation excavation company for residential and commercial builds throughout New Jersey. Let us be your excavation and foundation experts. Call us at 973-772-1684 with any questions you may have or to schedule a time for us to help in your upcoming build.
What Equipment Is Used for Inground Pool Removal?
Are you dreaming of that big, beautiful backyard where you can run and play with your kids? If you have a large pool taking up all that space, your backyard may seem a bit like a prisoner to the pool, keeping you from utilizing it the way you want. Maybe you’re just tired of the time, maintenance, and cost of keeping a pool and are ready for a change. Have you done the research if you’re considering an inground pool removal? Is this a project you can attempt on your own, or will it require qualified pool removal contractors? If you are trying to take on a pool demolition on your own, what equipment is used for swimming pool removal? Let’s “dive deeper” and take a look at this project a little closer.
How Is a Pool Removed?
Your swimming pool removal method will, of course, depend on the type of pool you have. An in-ground pool removal will be much more involved than above-ground pool removal will be. Here’s a general narration of each project’s removal process:
Complete Pool Removal
For a complete pool removal, your pool will need to be drained, and then all materials removed. While that may sound simple, there’s much more involved than you may initially believe. It includes removing the liner, all concrete, fiberglass, rebar, etc. Once the entire pool area is cleared out, it can be filled in with dirt and some gravel. And then, you can compact the soil to avoid the ground sinking later.
The best part of removing a pool completely is you never have to worry about what’s under your grass or garden area just a few inches down. You can build on top of it with no worries too. Your ground will move and sink much less over time, if at all, with a complete pool removal as well.
Above Ground Pool Removal
Above-ground pool removal is by far the easiest kind of pool to remove. Again, draining the pool will be the first step. Next, things will need to be unscrewed and removed. You may be wondering, “what equipment is used for swimming pool removal in this case”? Often, a sledgehammer is enough to destroy the deck and walls of your above-ground pool. If needed, a simple skid steer can also help with certain parts. Once everything is torn up, you can rent a dumpster, hire a junk removal service, or recycle what you can to get everything cleaned up and out of your way.
What Equipment Is Used for Swimming Pool Removal?
While the need for certain heavy equipment will depend on the swimming pools we are removing, for the most part, 6 kinds are typically used. They include:
- Excavator (with and without a jackhammer) – This equipment is used to help break up the hard concrete or gunite portion of the pool. This is a very heavy piece of machinery. Many people try to use smaller pieces of equipment to complete the same job, but it can place the machine operator in great danger.
- Skid steer (or bobcat) – This is a very versatile machine because many different buckets can be easily switched out for different projects. Typically, a skid steer can help move materials that have been demolished to the trucks that will take them away and dispose of them by using a kind of “grabber” attachment.
This bobcat can also be used to help spread dirt and other material (gravel, etc.) to get it ready to be compacted. A bobcat does an incredible job smoothing out ground material and making it look nice. Once the ground is compacted, things can be leveled out once again and left nice for the customer.
- Junk removal trucks, large dumpsters – This equipment is often overlooked when you are thinking about what equipment is used for swimming pool removal, but it is essential and adds to your overall pool removal cost. You must have at least one of these things to get rid of the materials you are ripping up when you remove the pool in your yard.
- Compactor – In order to do the job correctly, you must use a soil compactor. Sometimes these compactors can be referred to as a “sheep foot” roller which is used to get the soil to really compact, even up to 95% density! There are “knobs” on this type of roller, which pushes down and manipulates the soil until it is compacted to the desired amount. Plate compactors can also be used, but they take longer and are a bit harder to use.
- Dump trucks – These big trucks are what bring in your soil or gravel that fills in the hole that is left after your pool has been removed. Dump trucks will save you time by completing the job quickly and efficiently.
- Other small tools – Many other tools are used when completing a pool removal job. These include tools that the typical person does not usually have at their disposal. These tools may include a grinder (to cut rebar), geotextile filer fabric (help avoid soil relocation), silt sifting bags, pressure washers, etc.
What Will Your Project Cost?
The cost for your pool removal will again depend on the type of pool you have, but for an inground pool (the costliest type to be removed), you can expect to pay anywhere from $8,000 to about $20,000. You will be at the pricier end if you have a large, deep pool that you want to be removed completely.
The good news is that much if not all of your pool removal costs will be made up for with the money you save on the care and maintenance of your pool. You’ll soon begin to see those savings come in and appreciate the time you will save worrying about it all.
Call Mikula Contracting for Pool Removal
Mikula Contracting gets your pool removal job done right with the material, equipment, tools, and know-how to leave you feeling good about your project completion.
A pool removal project is not something that can be done easily by just watching a couple of YouTube videos and renting a bobcat at your nearest home improvement store. So when you find yourself wondering “what equipment is used for swimming pool removal” and what to do next, stop and call Mikula Contracting to finish the job the way it should be done.
Better yet, save yourself time and money and let the professionals take care of things from the beginning. Then, you’ll be happy with how quickly and efficiently we work as well as the quality work you will receive. Your pool removal will not be our first, and we will make sure you see and feel the experience we possess in this area of work. So don’t hesitate to give Mikula Contracting a call today.
When Should You Remove Your Pool
When should a pool be removed? If you’ve had a backyard pool for years, then you might be looking for a change and considering the option to remove your pool. However, before jumping into the project, it’s wise to talk to qualified pool removal contractors to learn more about your options.
Not only do you need to ask questions about the proper pool removal method, But it’s also smart to learn about the best timing for the pool removal process.
Top Reasons: When Should a Pool Be Removed?
Here are a few things to discuss if you are asking when a pool should be removed.
Pool Isn’t Being Used
Even though it once felt like a luxury to have a backyard swimming pool, this home feature can eventually start to feel like another maintenance task on your to-do list. One of the most common reasons families consider removing and filling the swimming pool is that they aren’t swimming very often anymore.
If the pool isn’t being used, why continue with the maintenance and upkeep of having this extra feature in the backyard?
Repurposing the Backyard
Do you have new plans for landscaping or backyard features? The swimming pool takes up a large percentage of the yard, which means your options are limited as long as the pool remains. People consider swimming pool removal because they want to use the yard for other activities instead. This decision opens up many options year-round.
Home Additions
Whether you need a few more bedrooms or you want to expand the kitchen and living space, you might be considering a home addition. The problem is that a swimming pool might be getting in the way of adding to your house.
Investing in a complete pool removal gives you the option to build onto the current home structure. Keep in mind that partial pool removal doesn’t allow building on that location. So, don’t cut corners on the ground pool removal if you have big plans for a guest house or home additions in the future.
Save Money on Maintenance Costs
How much money are you spending every year on maintenance costs? When considering the out-of-pocket expense, you might find it motivating to contact a ground pool removal company. The maintenance and utility expenses add up, especially as the equipment gets older and outdated.
Here are some of the ways you might be spending money on pool maintenance costs:
- Water Treatments: It’s necessary to buy chemicals and treatment products to maintain the ideal pH balance and ensure the cleanliness and safety of the water.
- Water Bill: Costs go up when you add a lot of water into the swimming pool. Watch your water bill, and you’ll see that your utilities are higher when your pool must be filled.
- Electrical Bill: Additionally, the electricity bill increases, especially in the transition seasons when you are forced to use the pool heater more frequently. For example, families often turn up the water heater if they are using the swimming pool in the spring or fall months. While the water is comfortable, it can cost hundreds of dollars a year in higher electricity expenses.
- Winterizing: When the weather turns cold, winterizing services are needed to remove the water from the lines and prevent frozen pipes. Unfortunately, these winterizing services just add another annual cost to your bill.
- Accessories: When using the swimming pool, it’s common to put more money into accessories that make the pool experience more enjoyable. Examples include outdoor furniture, shade umbrellas, pool towels, life jackets, inflatable toys, and more.
Climate Change
If you want to do your part to slow climate change, you can begin by making incremental changes at home. For example, consider how much energy you are using when you have a pool in the backyard. The electricity adds to your carbon footprint. Make sure the benefits you are receiving from the swimming pool outweigh the impact your pool has on the environment.
The reality is that your decisions at home won’t have an immediate, measurable effect on climate change. But the small choices that everyone makes over the years add up to more significant results that will save our planet in the future.
Expensive Repair and Remodeling Costs
Remodeling and repair services are other financial factors that might make you wonder: when should a pool be removed? Wear and tear can take a toll over the years, often leading to peeling plaster and broken tiles that need to be fixed. Additionally, broken equipment needs to be fixed, such as the water pump, filtration system, heating units, and more.
If you are still using the swimming pool, then these repairs are a priority to maintain the safety and beauty of the swimming pool. But it is also expensive to bring in a contractor to fix these issues. So if you are tired of paying for remodeling and repair costs, it might make sense to remove an inground pool instead. Pool demolition is more expensive upfront, but it will save you a lot of money on repair costs in the future.
Stop Worrying About Liabilities
How much is the liability risk when you have a backyard swimming pool? If you are constantly fretting about an accident that could result in liability issues, then you are probably asking when you should remove your pool. There is always a safety risk, which means that you need to have safety gear and ongoing supervision – regardless of whether the pool is being used.
In fact, it’s common for unused pools to have higher safety risks because the pool is “out of sight and out of mind.” The cost to remove a swimming pool may be worth the peace of mind that comes from eliminating the risk.
The truth is that insurance costs go up when you have a swimming pool in the backyard. paying for the pool removal cost is offset a bit by the lower insurance premiums you will be paying after the pool is gone.
Overview: How Pool Removal Works
Reach out to a pool removal contractor to learn more about how pool removal works. Not only can you ask, “when should a pool be removed?,” but you can also find specific services that are ideal for the type of swimming pool you are removing from your home.
You can choose from partial or complete swimming pool removal, depending on your budget and the type of pool in your yard.
Pool removal services include full-service solutions, including:
- Draining the Pool: Getting rid of the water so the underlying materials can be demolished and removed from the yard.
- Hauling Away: The materials are hauled away, leaving a clean slate without remnants of concrete, vinyl, steel, etc.
- Filling in a Pool: The remaining hole needs to be filled in using fill dirt, with higher quality soil on the top layer. Cheaper fill dirt is the best way for the lower part of the pool cavity, with the top few feet needing topsoil.
Deciding If You Really Want to Remove Your Pool
We’ve listed a lot of reasons why you might be asking: when should a pool be removed? Before you jump into this decision, make sure you are ready to commit to a significant change in your yard. There are notable benefits to having a backyard pool, such as the option to have fun in the sun with your loved ones – in the privacy of your backyard.
But there are also a lot of drawbacks to having a private swimming pool. So as you measure the pros and cons, you might be like many other families who decide that pool removal is the best solution.
Call Mikula Contracting for Pool Removal Solutions
At Mikula Contracting, we’ll help you decide when a pool should be removed. Then, our team will offer full-service solutions from start to finish to complete this project. Contact us to learn more about the available services for your yard and swimming pool area.
Does Removing a Pool Affect Your Home Value?
Does it feel like a dream come true to have a private swimming pool in your backyard? In the beginning, it feels like a fun feature to have a place for hosting family and friends on a hot summer day during the swimming season. While there are many benefits to residential swimming pool ownership, you might eventually reach the point where you feel that removing a pool is your best option. At this point, you are probably wondering: does removing my pool affect home value?
The swimming pool can affect the price when it’s time to sell your home. Talk to a real estate agent and you will likely find that an inground pool doesn’t add value to your home. In fact, removing the pool can add value, resulting in more equity when it’s time to sell.
Not only do you need to consider the cost, but also look at the longer-term financial benefits that are available when you invest in swimming pool removal.
Type of Pool Removal Affects Home Value
As you are asking “does removing my pool affect home value,” it’s important to understand the differences between available types of pool removal. A full pool removal takes out all remnants of the swimming pool. When the remaining hole is filled in with engineered backfill and professional compaction, there are fewer risks of issues in the future. This method preserves your home value because the ground is more secure, and future owners can build in that area if they desire.
Does Removing My Pool Affect Home Value?
The simple answer to your question is: yes! Pool removal could increase the value of your home. Your property value is more likely to go up when the pool you’re removing has these factors:
- The pool takes up a lot of the backyard
- The swimming pool is older than 30 years
- Major repairs and renovations are needed on the swimming pool
- There is no safety gate around the swimming pool
- You only have a few months of swimming weather
- It is a vinyl lined swimming pool
- You are the only one in the neighborhood with a backyard pool
In comparison, certain types of swimming pools and circumstances could potentially increase the value of your home. These are swimming pool factors that could have a positive effect on home value:
- The pool was installed less than 15 years ago
- Less than 10% of the backyard is taken up by the swimming pool
- Many of the neighbors have swimming pools
- The pool equipment is energy efficient and relatively new
- You live in a luxury home
- A safety gate surrounds the swimming pool
The actual value of the home depends on the area and many other real estate factors. It’s also important to consider supply and demand, and how the current real estate industry trends are impacting the types of homes that people are buying. You’ll want to talk to an industry expert to learn how much pool removal will affect your property.
Swimming Pool Installation and Removal Can be Expensive
Putting in a swimming pool requires a bit of an investment. Often, these upfront costs are added onto the mortgage or a home equity line of credit, resulting in interest accrual over the course of the loan (most people pay their mortgages for 15 years or 30 years).
Because you invested so much money into the swimming pool installation, you are probably feeling the obligation to keep the pool in place. But if this backyard feature is no longer serving the needs of your family, then it might be time to remove the pool. Even though it will cost money for proper pool removal, you can recover some of these costs by saving money on other related expenses.
Other Money-Saving Benefits of Pool Removal
Homeowners underestimate the maintenance costs when adding a pool in the backyard. If you live in a warmer climate, it might seem like a great addition to your home to enjoy many months of swimming weather without a need to go to a public pool.
But the ongoing time and money investment can be cutting into your budget. Calculate the higher water and electric bills, as well as other additional pool costs for:
- Maintenance equipment
- Water treatment chemicals
- Pool toys
- Patio furniture
- Professional maintenance and repair services
- Accessories
- And more
Additionally, the costs of homeowners insurance go up when you have a backyard pool. If you are thinking about pool removal, talk to your insurance company to see how much money you are going to save in the coming years.
More Benefits of Swimming Pool Removal
As you are asking “does removing my pool affect home value,” also learn about the other benefits you might experience after swimming pool removal. Here are some of the reasons why homeowners are motivated to take out their backyard swimming pool:
- More green space and usable yard
- Reduced yard maintenance
- Avoiding liability issues
- Lower utility costs, saving over a thousand dollars a year
- Cheaper insurance costs
The benefits add up. Even if you aren’t planning to move for a while, you might be ready to remove a swimming pool for your own family’s needs.
Call Experienced Pool Removal Contractors
What information do you need about swimming pool removal? If you are asking “does removing my pool affect home value,” then Mikula Contracting is the team to call. Reach out to us to book a free consultation so you can learn about the best course of action. We’ll provide an estimate for the work and help you choose the ideal services for your home.
Best Way to Remove a Vinyl Lined Inground Pool
When a backyard pool is outdated, older than 15 years, or in need of major repairs, you might choose to remove your inground pool instead of sinking more money into upkeep and maintenance. However, there are specific steps that need to be followed when removing a pool with a vinyl liner to ensure quality results and minimize the risk of complications in the future.
At first, the concept of removing a vinyl-lined in-ground pool might seem simple. Is it possible to just fill in the pool with dirt to cover it up? The truth is that there are many essential tasks to remove the materials and bring in the right type of fill dirt to prevent sinking and instability down the road.
Consider hiring a professional pool removal company for assistance instead of risking the problems that often occur with DIY pool removal. Investing in an experienced contractor is the most important thing you can do when tearing out a backyard swimming pool.
2 Options To Remove An Inground Pool
There are two possibilities for inground pool removal. It’s best to do the research and weigh the pros and cons to find out which method will work for your home. Your contractor will explain the differences between a partial pool removal vs. a complete pool removal.
Partial Pool Removal
Partial pool removal might be recommended after the vinyl lining is removed if you have concrete walls behind the vinyl. This method is cheaper and faster compared to full pool removal. But there is one big disadvantage: you won’t have the option to build structures on the land in the future because of stability issues.
With a partial pool removal, a portion of the side of the pool might be left in place. For example, the top of the walls needs to be removed, but the bottom sections can remain in place. Concrete that comes from the pool walls is placed in the bottom of the pool as fill materials. The contractor drills large holes in the bottom of the pool to enable proper draining. Then, the pool is backfilled and compacted, leaving some of the pool materials buried below.
Full Pool Removal
Another option is to break down and haul away all of the remaining materials from the inground pool. Nothing is left behind in the pool cavity with this method, except for fill dirt and topsoil.
While full pool removal is more expensive compared to partial pool removal, it’s often a better option because you aren’t limiting possibilities for future construction on that part of the property. Full pool removal is often a recommendation for vinyl-lined swimming pools. Since these pools often have steel walls and other steel materials, it’s necessary to remove the steel before backfilling the swimming pool.
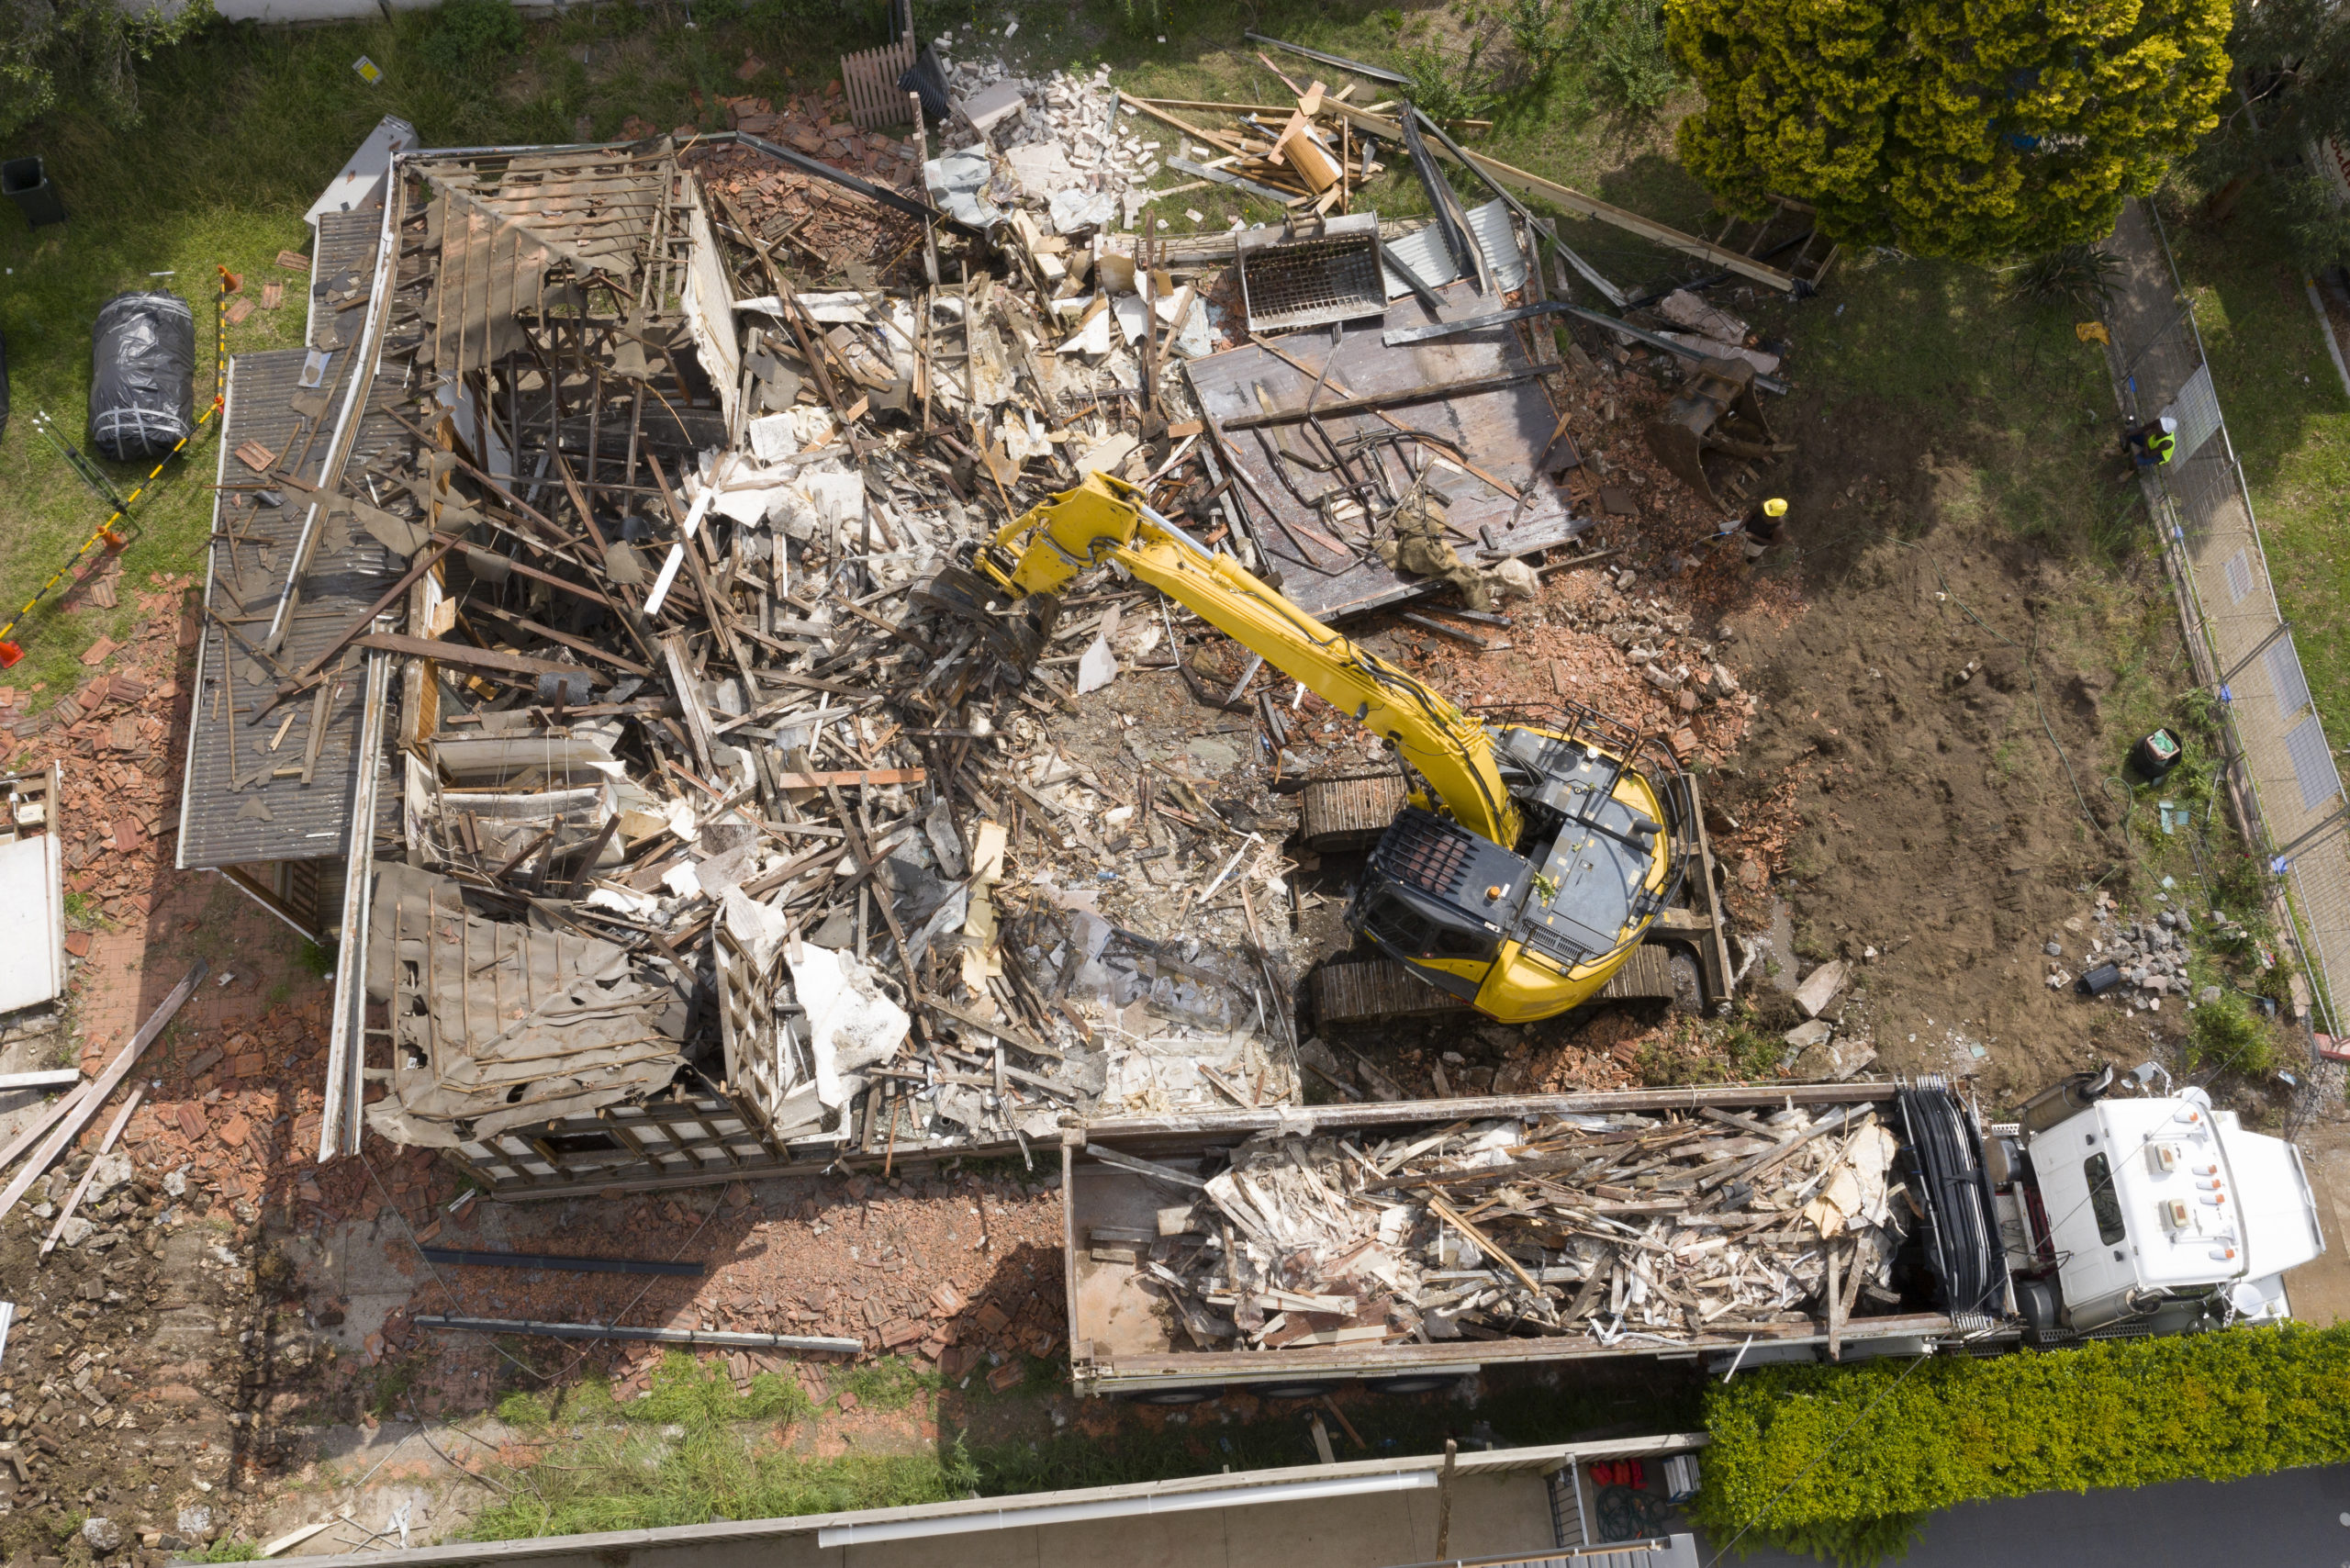
When you choose a complete pool removal, it means that everything goes: vinyl lining, fiberglass, steel, concrete, equipment, and more. We bring in heavy equipment to break up the pool walls and bottom, then haul everything away. Finally, the project is finished with backfilling and compaction to ensure balanced, even land in the future.
Regardless of the type of swimming pool removal that you choose, proper compaction and backfill are the most important details, so you don’t end up with a sinkhole in the future.
Overview: Removing a Vinyl lined Inground Pool
If you are ready to take out a swimming pool, talk to a knowledgeable contractor to learn more about this process. The specific services you need vary depending on the type of pool you have and where it is located.
Here is an overview of what typically happens when removing a vinyl-lined in-ground pool:
- Estimate: Don’t hire a pool removal contractor without having an estimate on paper. This project can be costly, which is why you need full transparency about how much you will be paying for these services. Ask for a consultation and estimate to get personalized recommendations for your project.
- Access: First, the contractor needs access to the worksite. For example, it might be necessary to temporarily remove a section of your backyard fencing to bring in heavy equipment. Sometimes, removing landscaping features like shrubs might be required. Also, clear out any items that could get in the way, such as patio furniture.
- Utilities: Before the digging starts, the pool removal contractor needs to identify where the utility lines are located. Then, these utilities need to be disconnected before the project is underway.
- Water: Now it’s time to pump out the water. The contractor can’t start digging until all the water is removed from the pool.
- Vinyl Liner: When there is access to the vinyl liner, it’s time to cut this liner into chunks for removal. The vinyl liner is hauled away, to be disposed of properly at a nearby location.
- Steel Structure: Once the vinyl liner is out of the way, steel walls often need to be disassembled and removed. Alternatively, you might have composite, wood, or fiberglass under the vinyl liner.
- Concrete Decking: If there is concrete pool decking around the pool's edge, it’s common to break the concrete into pieces for fill. The concrete chunks are placed in the empty pool cavity, or the concrete might need to be hauled away.
- Fill Dirt: The next step is to add fill dirt in the pool cavity. Then, the topsoil is put on the highest layer. Heavy equipment is necessary to compact the soil and grade the area to ensure water drains away from houses and other structures. Talk to your contractor to determine if engineered structural backfilling is necessary for your yard.
Depending on your unique situation, there might be variances with each of these steps. A demolition contractor can offer specific information to ensure your project is completed successfully.
Call Trusted Pool Removal Contractors
If you need information about removing a vinyl-lined in-ground pool, then Mikula Contracting is the team to call. Contact us for more information about pool removal services. We are here to help!

6 Questions to Ask Your Excavating Contractor
6 Questions to Ask When Finding an Excavating Contractor
A commercial construction project is a big undertaking, especially if it’s your first time going through it. Finding an excavating contractor and making all the big decisions can be a lot to navigate. There are a lot of choices, and sometimes there are multiple companies fighting for the chance to be hired to complete your project.
Finding an excavating contractor that makes you feel comfortable and confident is one of the first big decisions you’ll make in your commercial building project. You don’t want to just hire an excavator you found on the internet. You want someone that you know does exceptional excavation work and will do it in a timely manner at a fair cost. What else should you be looking for in an excavating company? Let’s examine six questions you should be sure to ask.
Are You Licensed?
Asking your potential excavation contractors if they are licensed, bonded, and insured is one of the very first questions you want to ask. While this isn’t a requirement in every state, you want to be sure the group you hire has the knowledge and experience to complete your job. You’ll also want to be sure they have insurance protection in case something goes wrong. Don’t just take their word for it either. Ask to see proof of these qualifications and insurance before you hire your excavator or any other contractor for your project.
Ask for an Estimate
If the excavating contractor you’re working with gives you a verbal cost estimate, ask for a written estimate at the very least. Have them write out the extra costs that could be added to the estimate and how much those “extras” will be. Get everything in writing, especially on a large commercial project. If your budget is out of whack, in the beginning, you’ll be trying to make up for it throughout the rest of your build.
When it comes to the excavation timeline, getting an estimate can help keep your excavating crew accountable. Make your expectations known and agree on a timeline that is realistic.
What Similar Projects Have You Completed?
Always ask for examples and even references from past projects. A company that regularly completes these kinds of jobs will have no problem giving you references of people they have worked within the past.
You should also look online and see if any reviews or other mentions are available to you. Choose an excavator who not only has a great reputation but is also someone with whom you feel at ease in sharing your project.
If the excavator you’re thinking of hiring hasn’t done a job like yours, you may want to think twice. Maybe you’re building a large 10 story office building, but they have only ever worked on residential excavations. Even though they do good work, they don’t have the experience you need for your project. Be sure to ask.
Which Training and Certifications Does Your Team Have?
It’s important to know what kind of training the company you’re hiring has put its team through. Do they have any special certifications that make them a stronger choice than others? How familiar are they with the piece of equipment they will be using?
Knowing the skillset of your excavation team will be vital in your decision-making process. Finding an excavation contractor with the training and specialized certifications that make them a step above others will serve you well on your current project and for future projects to come.
How Many Years of Experience Do You Have?
How long have you been in business? How many years have you been doing commercial excavating? These are both great questions for your potential excavator. A commercial excavation project is vastly different from a residential dig. When you’re speaking with each excavation company, be specific and don’t let them brush over your questions. A crew with great experience is anxious to brag about their skillset.
Make sure you hire someone with years of experience, and a team that’s just as skilled. Just because an excavation contractor overseeing the project has plenty of experience doesn’t mean the team is equally skilled.
Is Your Bid an Estimate or a Final Price?
Do you understand exactly how much your commercial excavation project is going to cost? When finding an excavating contractor, ask if the bid is an estimation of what the final cost will be or if it is what you can plan to pay in the end. This is an important one. Extra costs and charges can easily be thrown in after the fact if you don’t agree on a fixed price before your project starts. Don’t waver on this one. It could save more money than you know!
Call a Trusted Excavation Contractor
Mikula Contracting has over 76 years of excavating experience. Our commercial excavation work speaks for itself. We encourage our potential customers to check out our past work and talk with our past customers to see and hear for themselves how amazing our work truly is. The customer service and project management we provide will be unforgettable.
If you have started looking for an excavating contractor for your big project, we encourage you to give us a call and find out how we can help make your project great. We believe your commercial build deserves to have a strong support and foundation from the beginning. Get the job done right with Mikula Contracting.
5 Reasons to Hire a Professional Excavation Contractor
5 Reasons to Hire a Professional Excavation Contractor
You may see all the DIY projects on TV and Instagram and decide that you can take on a number of projects by yourself. But when it comes to excavation work, that is in a category of its own. For example, taking on the excavation of a concrete slab or an in-ground swimming pool can cause irreversible property damage. Instead of risking a disastrous construction project that will likely result in calling on a professional excavation contractor for help anyway, you can start the project right by calling them from the start.
Read on to learn about the reasons to hire a professional excavation contractor.
Top-Notch Equipment
When you hire a professional excavation contractor, you won’t have to worry about how you’re going to level out a piece of rocky soil or dig out a foundation on a construction site for your home. In addition, you won’t need to purchase fancy machinery or tools when professional excavation companies have their own top-of-the-line equipment.
One of the reasons to hire a professional excavation contractor is that they won’t just rely on a pickaxe and a shovel to break up your old fiberglass swimming pool. An excavator, backhoe, front-end loader, and cranes are just a few pieces of machinery that a professional excavator would have on hand. The team is trained to operate this machinery safely.
With the proper equipment, your project will go from a weeks-long endeavor to something that can be done in an afternoon. Hire a professional excavator to get the job done efficiently and correctly.
Insurance
When you invite a skilled excavator onto a building site, there is a possibility that things could go wrong. An excavating company with years of experience will only allow people on the excavating job that are covered by insurance. One of the many reasons to hire a professional excavation contractor is their insurance. Ask professional excavation services about their safety and insurance policies before hiring them. How they answer the question will reveal the quality of the company and how prepared they are. Hiring an excavation crew with proper insurance will reduce the risk of accidents during your excavation project.
Also, insurance will cover any equipment or property damaged during the project. For example, if you dig and hit a water line, insurance will cover those costs to fix the city water source.
Expertise and Training
As you may wonder what reasons to hire a professional excavation contractor, you must first know that excavation services require much more than digging a hole. Excavation services are vital to preparing land for a big construction project or cleaning out an oil spill. If you skip your due diligence in getting the excavation piece of your construction project done right, the whole project may have severe consequences.
Here are some examples of projects that would serve as reasons to hire a professional excavation contractor:
- In-Ground Pool Removal: Use an excavation team to remove the large, heavy pieces of an old decrepitated pool. The team will finish the project from the pool removal to the backfill of the proper dirt, compacting the soil, and leveling the ground once the project is over.
- Removal of an Underground Oil Tank: Let an excavation team handle the sensitive project of removing an underground oil tank. An oil spill is the last thing you want on your property. They can take care of this project safely and professionally.
- Removal of a Concrete Slab: You may have an old concrete slab to remove that was under an old garage or shed on your property. This is a reason to hire a professional excavation contractor to break up the slab and remove the chunks of concrete without hitting underground gas lines or causing damage to your property.
- Digging a New Foundation: If you are building a home that you would like to last for hundreds of years, it’s a good idea to make sure you get the foundation right. Let this be a reason to hire a professional excavation contractor.
- Leveling Rocky Soil for Construction: An excavation team can prepare the land for a construction project by removing trees and leveling out the rocky soil.
- Clearing the Soil after an Oil Spill: Another of many reasons to hire a professional excavation contractor is soil cleanup. For example, an excavation team can remediate the contaminated soil and backfill with fresh, clean material.Let the professionals take on these complex projects for you. You will end up saving money in the long run when you don’t risk the dangers that can come with a DIY construction project.
Safety
Along with having insurance, the reasons to hire a professional excavation contractor include the safety procedures that an excavation team will be prepared to implement. They will have a map of nearby gas and water lines. They would have safety measures in place if they were to accidentally hit a gas source. When you hire a team that wears proper safety protection and knows what to do when something goes wrong, you reduce the risk surrounding your excavation project.
Excavation Mistakes Can Be Costly
If an excavation mistake were to occur during a DIY project, the error could lead to thousands of dollars in repair, not to mention reparation for a person’s injury or life. Imagine some risks that come with excavation work, like a pit collapsing in on machinery and workers, hitting an overhead power line, or hitting an underground gas line. Be sure to consider these risks and how to mitigate them all as a reason to hire a professional excavation contractor
Call Mikula Contracting for Professional Excavators
Our team at Mikula Contracting wants to help you with your excavation project. With years of experience working on various excavation projects, we have the equipment and safety measures that will bring you peace of mind. So don’t delay – contact Mikula Contracting today to schedule your project.
How Much Does A Home Demolition Cost?
How Much Does A Home Demolition Cost?
Is it better to renovate a home or choose a total demolition and rebuild? And how much does a home demolition cost? Let us explore more.
When it comes to searching for the perfect home in the ideal location, you may not be able to find a home that checks all of the boxes. For example, maybe the house is located in a great school district with nearby shopping and restaurants. But the home has not been maintained over the years and is in bad shape.
Why Choose Home Demolition?
Putting the question, how much does a home demolition cost aside, when would a homeowner choose demolition over renovation? There are a variety of reasons to choose house demolitions:
- Foundation/Structural Issues: The costs of repairing a foundation, roof, and windows are so high that it might make sense to build a brand new home with updated features. When you find a home that has so many structural issues, they may be the tip of the iceberg. A house that was not well-maintained can have construction surprises throughout the process that lead to ever-growing renovation costs.
- Mold: If you discover mold throughout a house, the cost to deconstruct the walls and replace all of the drywall, insulation, and rotted wood can be astronomical. You cannot live in a house filled with mold without suffering from health problems. A mold-infested home would warrant a demolition project.
- Energy Efficiency: A new home comes with modern features like updated windows, doors, insulation, and appliances that promote energy efficiency. Over time it won’t matter how much a home demolition costs because you will save a significant amount of money on energy bills.
- Warranties: When you hire a contractor to build a home from the start, your home comes with all kinds of warranties. You can call the team back to repair the roof, siding, flooring, foundation, windows, HVAC systems, and appliances. Unfortunately, if you move into a home with existing warranties, they do not always transfer to the new homeowner.
If the bones aren’t good, it’s time to tear down and start again. You may be surprised at how much a home demolition costs. Let’s take a look.
How Much Does a Home Demolition Cost?
The average home demolition costs $2-17 per square foot. The wide range is attributed to the home's location, whether rural or in a busy city. It also depends on what part of the country you live in and the competitive construction costs. And finally, the project cost is dependent on what kind of equipment is required.
Here are some other factors that contribute to how much does a home demolition cost:
- Foundation removal
- Dumping fees
- Asbestos or hazardous materials
When you are looking into demolition costs, think about the cost to rebuild as well. Meet with a trusted demolition contractor to outline the process, including whether you can reuse the foundation or any materials. Any reuse of materials will reduce the cost of the new construction.
Necessary Safety Precautions
Once you find out a house demolition cost, ask for an accurate estimate from demolition companies that visit your home. Regardless of how much a home demolition costs, do not choose a team that cuts corners when it comes to safety.
Look for these safety procedures in the outline of the demolition plan:
- Demolition Permit: Your contractor should be prepared to secure the proper permit for demolition. Sometimes construction projects can be delayed due to securing the permit, so make sure your contractor is educated on the permit process.
- Check for Asbestos: Before any demolition project, the property should be inspected for asbestos. If asbestos is found, there will be an extra cost for thorough asbestos removal, but it is vital to the community's health. You cannot demolish a building that will spread poisonous materials into the air.
- Check for Mold: Mold is also a toxic substance that should be dealt with carefully. The property should be inspected for mold, and the presence of mold will affect the next steps of demolition.
- Removal of Hazardous Materials: Other hazardous materials like gas, oil, paint, and chemicals should be safely removed and disposed of before demolition begins. You cannot toss these substances into a dumpster like other materials.
- Proper Equipment: Does the company have a demolition plan? Will they use excavators or a wrecking ball? Are they experienced in the demolition of structures similar to the size of your home?
- Protective Gear: Ask about the personal safety of the construction team. Do they wear protective gear? Are they instructed to practice safety measures at all steps in the process? And do they take safety seriously?
- Roping Off Unsafe Areas: Once the structure is ready for demolition, the home should be closed off so that no one can enter the dangerous premises.
- Ample Signage Announcing Demolition Day: Will the team use warning signs or proper signage to announce that demolition will occur and no one should be inside the building? This step is vital to communicate to the general public.
You will always discover if you are hiring the right contractor if they are upfront about their safety procedures. Ask some tough questions and see if they are transparent about what it takes to demolish a home safely.
What to Know Before Demolishing Your Home
One thing to note before you embark on demolition is that it doesn’t have to be all or nothing when it comes to the cost. For example, you may choose to demolish the whole home or choose partial demolition. So what are all of the different options?
Partial Demolition
Many times, partial demolition is used for a pool or garage that is separate from the home. However, when you choose partial demolition on the part of the house that is connected, you have to think about the weight-bearing walls that go into holding up the house as a whole.
Sometimes it can work to choose a section of a house to demolish. For example, maybe a part of the house was added on by the previous owner. If the construction was not up to code or not holding up well, you can choose to demolish that part of the house and start again. That way, you do not pay the cost of tearing down the whole house, just the section that is not suitable for living.
Deconstruction
Another way that pieces of a home can be preserved for historical reasons is through deconstruction. For example, you can choose to keep parts of a house like the eaves or the windows and demolish the rest of the property. Then, when the new structure is built, you can add back the historical pieces.
Another reason why you may choose deconstruction is to save money. Maybe the previous homeowners just replaced the windows, appliances, or cabinets. Keep the materials while the home is demolished and rebuilt, and then add them back in.
Small savings like not having to pay for a new stove don’t sound significant when breaking down how much a home demolition will cost. But if you are calculating the savings of cabinets, appliances, windows, doors, and more, the savings can really add up!
When you know all of these options, you can make an informed decision on the demolition of your home. Meeting with an experienced contractor will help you make the right decisions as well. A contractor can lead you through the steps of a partial demolition vs. a total demolition. Then, when you get a clear picture of whether you can live on the property during the construction period or need to find temporary housing, you can be prepared to start the project.
Contact the Experts
Mikula Contracting loves to serve the residents of Northern New Jersey. Our family-owned business is important to us, and we strive to make lifelong relationships with each homeowner that we serve.
Safety is key when it comes to demolishing a home. If you have questions regarding the total cost or the step-by-step demolition process, let our Mikula Contracting team help. Our company has experience of over 75 years with residential and commercial demolition. We want to help you understand and make the best decisions for your home. So contact your trusted New Jersey demolition contractors today.
How Long Does Soil Remediation Take?
How Long Does Soil Remediation Take?
Soil remediation is the process of removing or replacing the soil to get rid of contamination. Soil contamination occurs when toxins get mixed with the natural compounds of the soil.
Many times, these chemicals come from industrial activity or hazardous waste such as heavy metals and/or pesticides. However, contamination can come from many places including:
- Livestock manure runoff
- Farming chemicals
- Failure of a septic system
- Improper waste disposal
- Failing underground oil tanks
- Nearby industrial activity
If toxins are present in the soil, you must be proactive with soil remediation to eliminate the contaminants and restore the safety of your land.
Some common soil remediation strategies include bioremediation, soil washing, and thermal desorption. The effectiveness of these options depends on the specific type of contamination in your soil as well as how extensive it is.
These soil remediation technologies can be used to separate out the chemicals, but sometimes it may be necessary to remove the contaminated soil and replace it with clean fill.
How Long Does Soil Remediation Take?
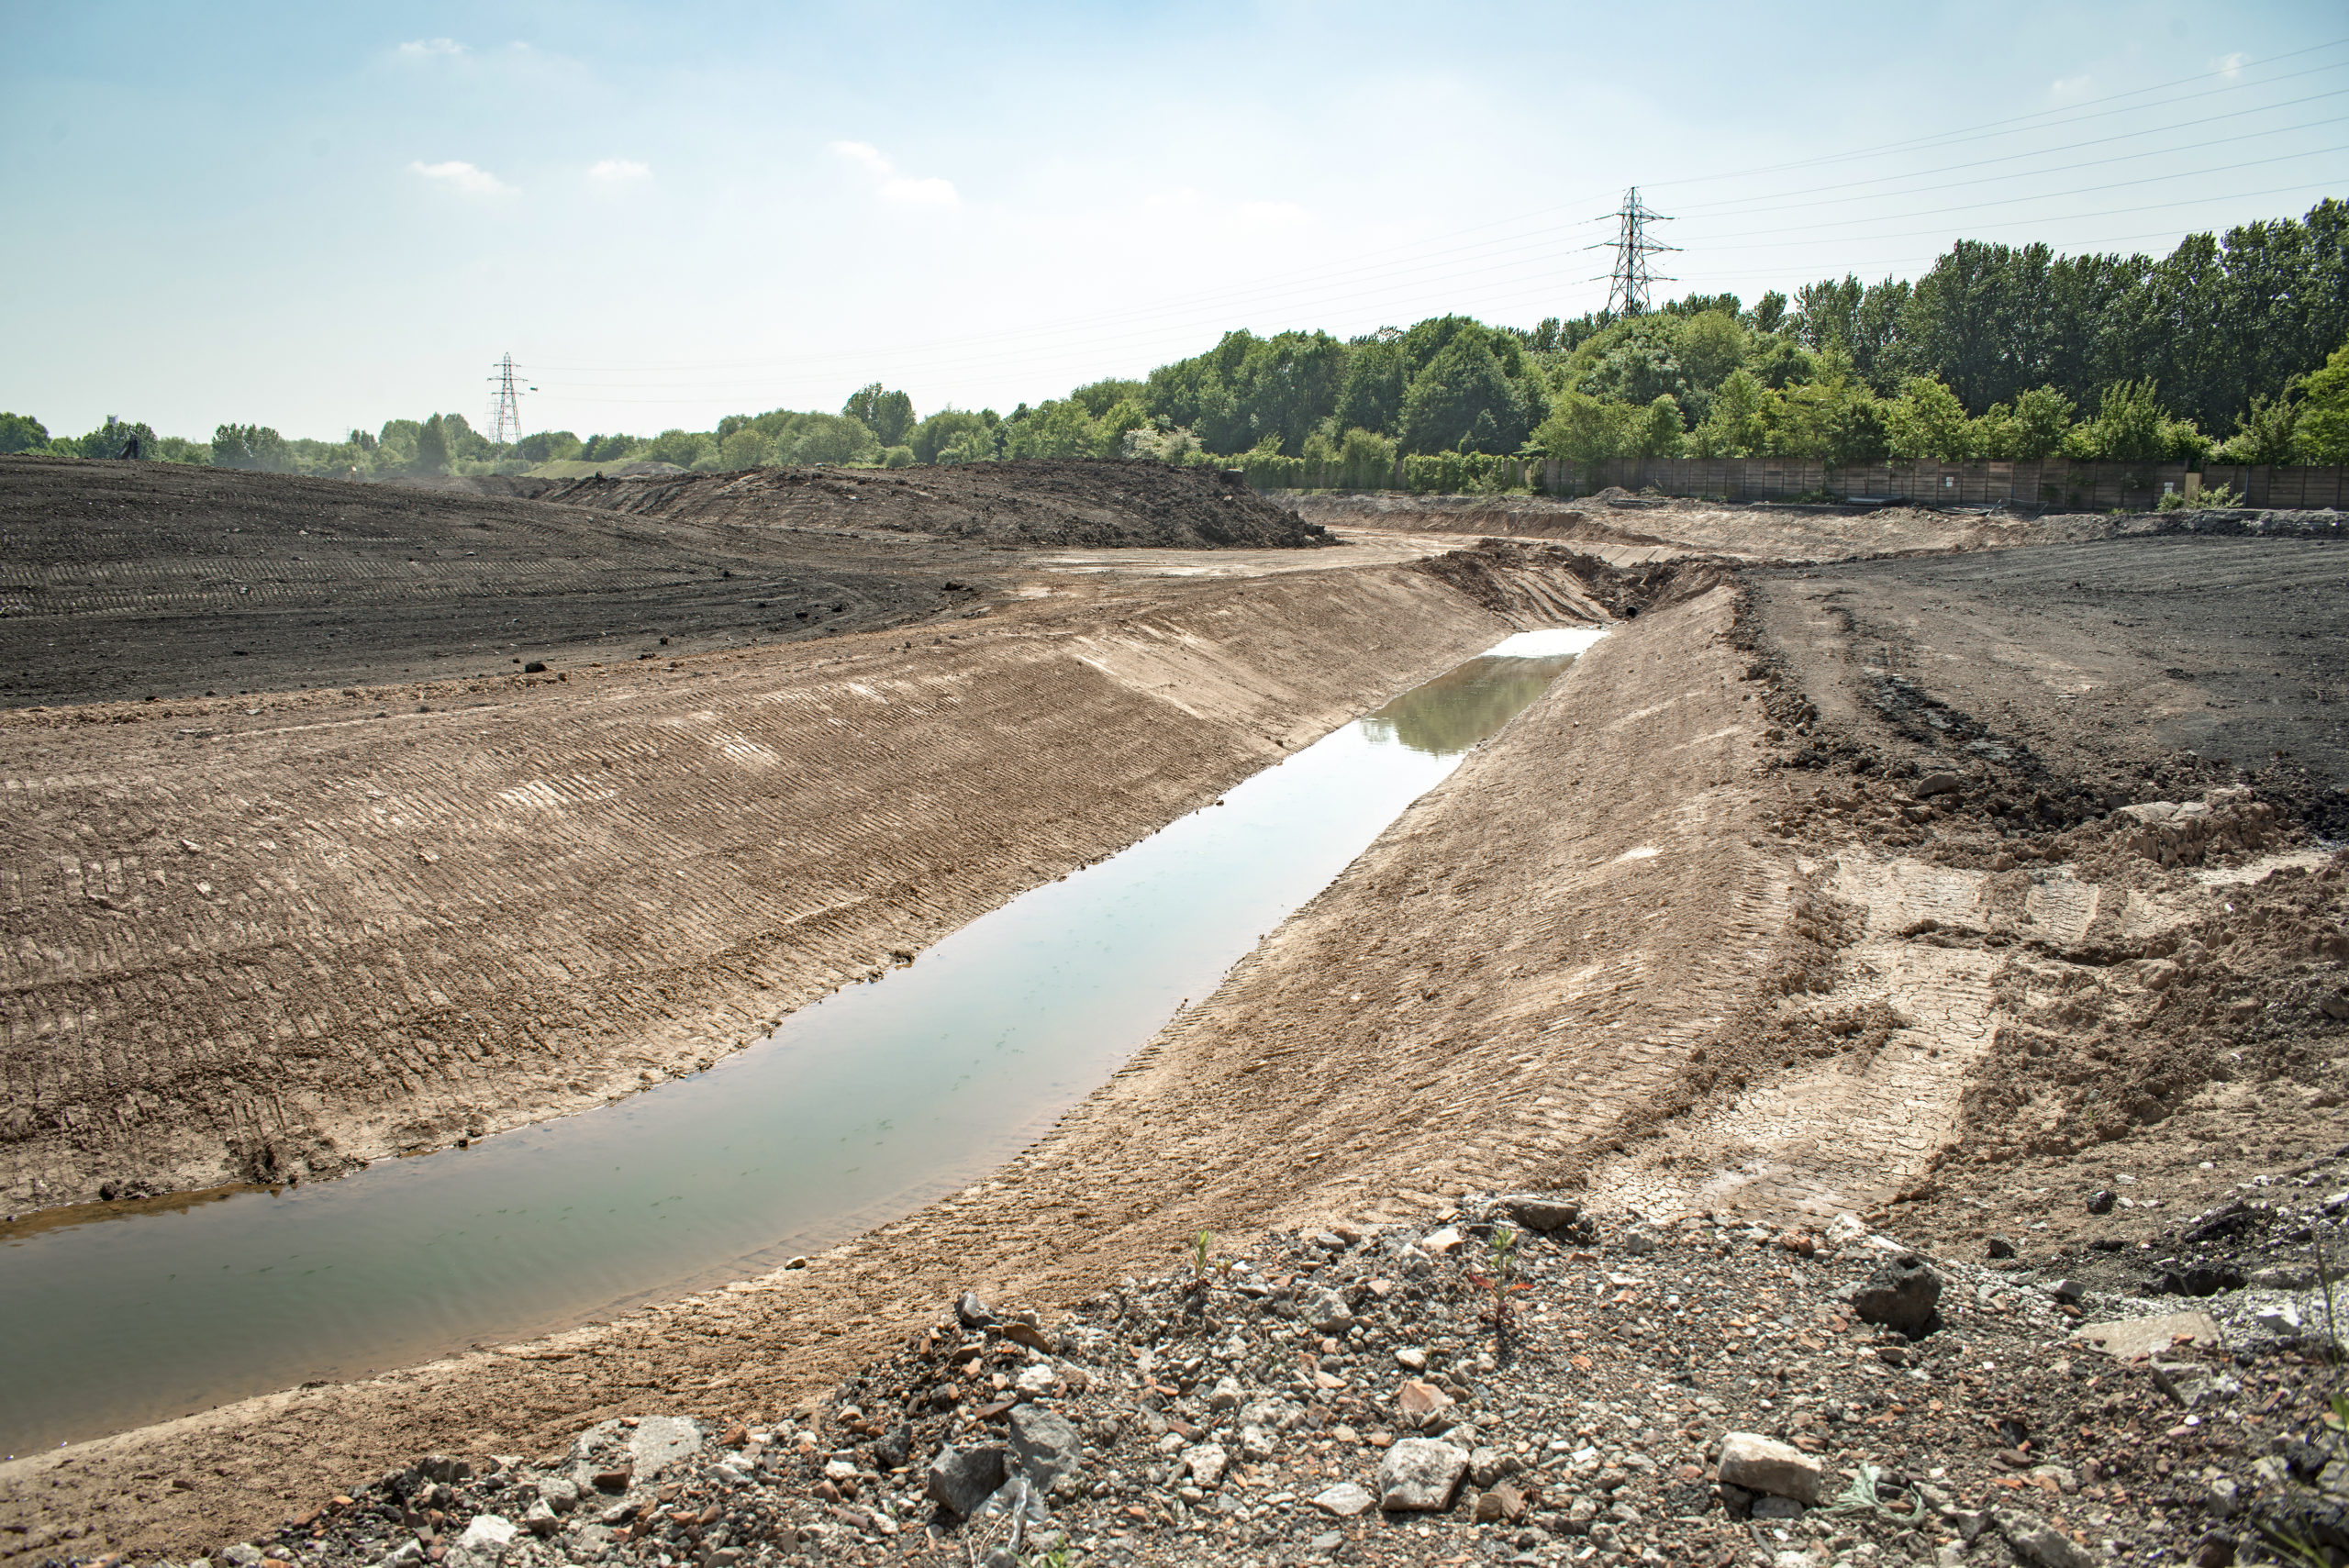
Excavating contaminated soil can take one day or several years. The actual time it takes to excavate the contaminated soil depends on several factors including:
- Large contamination area
- Depth of contamination
- Contamination below the water table
Time by Type of Soil Remediation
Each type of soil remediation strategy takes a different amount of time. However, in all strategies, one of the primary factors is how much soil is contaminated.
Bioremediation
Bioremediation occurs by stimulating the growth of certain microbes to use contaminants, such as oil, as a source of food and energy. As a byproduct, the microbes release water, carbon dioxide, and other non-harmful amino acids. The microbes secrete enzymes similar to the way the human body makes saliva and stomach bile. The enzymes break down the contaminants into smaller pieces. Then, the microbes can consume the broken-down contaminants.
Ideal environmental conditions are necessary to start the bioremediation process including a balance of temperature, surface pH, available moisture, and other factors. In the right environment, with ample food supply, the microbes reproduce. More microbes can then further aid in the removal of additional contaminants. The cycle repeats until the food source is depleted.
Due to the need to maintain environmental conditions, it can take weeks, or even months for microbes to clean up a site. The primary consideration is the number of contaminants present in comparison to the number of microbes present.
Soil Washing
Soil washing is a remediation strategy that removes contaminants by washing the soil with a liquid (often a chemical additive), scrubbing the soil, and then separating the clean soils from contaminated soil and wash water.
The concept of soil washing is based on the idea that contaminants will bind with fine-grained soils like silt and clay. These—in turn—are prone to bind with coarse-grained soils like sand and gravel. The main goal of soil washing is to separate the contaminated fine-grained soils and wash water from the cleaned coarse-grained soils.
The contaminated soils and wash water can be treated or disposed of. The washed soils may be reused as a backfill at the site if all contaminants have been successfully removed. Soil washing can be broken into six steps:
- Pretreatment
- Separation
- Coarse-grained treatment
- Fine-grained treatment
- Process water treatment
- Residuals management
Soil washing is a very fast method. The process can be run at a very high rate of around 100 cubic yards per day. Soil washing is often also used in conjunction with another remediation method because it can concentrate the contaminants down into a smaller volume of soil which can be easily treated by another strategy.
Thermal Desorption
Thermal desorption removes organic contaminants (including volatile organic compounds and some semi-volatile organic compounds) from soil by heating it in a machine called a thermal desorber to evaporate the contaminants. Semi-volatile organic compounds require higher heat than volatile organic compounds. The contaminants are evaporated separated from the solid material.
Thermal desorption may take a few weeks to a few years. Cleanup time will depend on several factors, including:
- The contaminated area is large or deep.
- The desorber is off-site.
- A lot of debris must be crushed or removed.
- The desorber is small.
- Contaminant concentrations are high.
- The soil contains a lot of dust, clay, or organic material.
Most thermal desorbers can clean over 25 tons of contaminated soil per hour.
Benefits of Faster vs. Slower Soil Remediation Methods
Bioremediation is the slowest method while thermal desorption and soil washing are much faster.
One difference in the strategies is how the contaminants are disposed of. With soil washing the contaminated soil and wash water must be processed.
The wash water must be treated in order to be reused in the soil washing process or to be disposed of in sewers. Disposing requirements are stringent, so recycling the water back into the system is the preferred choice as long as it does not interfere with the washing process.
Contaminated fine-grained soils may be disposed of in a landfill. If they are still considered contaminated, they may require further treatment before disposal.
When it comes to thermal desorption, gas collection equipment captures the contaminated vapors. The vapors often require further treatment, like removing dust particles. The remaining organic vapors are usually destroyed using a thermal oxidizer.
The thermal oxidizer heats the vapors to high enough temperatures to convert them to carbon dioxide and water vapor. At sites with high concentrations of organic vapors, the vapors may be cooled and condensed back to a liquid form. The liquid chemicals may be recycled or incinerated. If the concentrations of contaminants are low enough, and dust is not an issue, the vapors can be released without treatment into the atmosphere.
While bioremediation takes much longer, once the process is complete, the microbe population will naturally decline. The microbes also do not create any residual waste that needs to be processed or treated. The carbon dioxide, water, and other amino acids they produce absorb naturally into the environment without any negative impact.
Need Soil Remediation Services? Contact Mikula.
At Mikula Contracting, we offer both residential and commercial soil remediation services in New Jersey. Contact us today for a quote.